If Excel Formula: Mastering IF and Nested IFs in Practice
Master the IF function in Excel, including nesting, AND/OR combinations, and practical examples to validate data, categorize results, and automate decisions.

The IF function is Excel’s core branch logic. It evaluates a logical test and returns a value if TRUE, and another if FALSE. This simple rule forms the backbone of data validation, categorization, and conditional calculations. As you progress, you’ll nest IFs, combine tests with AND/OR, and even substitute with IFS or LOOKUP-based approaches for readability and scalability. If you’re looking to build dependable spreadsheets, this function is where your journey begins, and it sets the stage for more advanced techniques used in real-world dashboards and reports.
What the IF Function Does
The IF function is Excel’s built-in branch logic. It evaluates a logical test and returns one value if the test is TRUE, and another if it is FALSE. This simple construct is the backbone of many data-cleaning, categorization, and decision‑making tasks. In everyday spreadsheets, you’ll use IF to flag exceptions, assign categories, or trigger conditional calculations. The power of IF comes from combining tests, operators, and nested logic to tailor outcomes to your data. If excel formula, you’ll soon appreciate how a small edit to the test reshapes every dependent result.
Beyond basic use, IF serves as the gateway to more advanced tools like IFS, SWITCH, and dynamic array functions. The concept is straightforward, but the real value comes from applying it to real-world data. Start with small datasets to test edge cases, then gradually introduce complexity. In XLS Library’s approach, we emphasize readability and maintainability—so your formulas stay trustworthy as your data grows. This saves time, reduces errors, and makes your spreadsheets more reliable in daily tasks.
Core Syntax and Arguments
The basic syntax is: =IF(logical_test, value_if_true, value_if_false). Each argument can be a value, a cell reference, or a formula. The logical_test uses comparison operators: =, <>, >, >=, <, <=. You can also combine tests with AND and OR inside the logical_test to create more complex rules. Learn how to check for blanks, numeric thresholds, or text matches. For example, =IF(A2>=70, "Pass", "Fail") assigns pass/fail based on a numeric threshold. You can extend this with text tests like =IF(ISNUMBER(B2), B2, "N/A") to guard against unexpected data types.
As you expand beyond simple tests, grouping and clarity become essential. Use named ranges to help readability and reduce errors, and consider wrapping nested IFs inside parentheses to make the structure obvious. If you’re documenting formulas, include comments nearby or use a separate documentation sheet. Finally, remember that Excel evaluates conditions from left to right, stopping at the first TRUE condition in nested tests; plan the order of your tests accordingly.
Using Nested IFs and Alternatives
Nested IFs let you implement a decision tree: IF(condition1, result1, IF(condition2, result2, fallback)). This approach works well for a few levels of decision, but readability degrades quickly as you add more branches. When the logic becomes unwieldy, switch to alternatives such as IFS (Office 365/Excel 2019+), SWITCH, or a lookup-based approach with a threshold table.
For example, to assign a grade based on score: =IFS(A2>=90,"A", A2>=80,"B", A2>=70,"C", TRUE,"D"). If you’re stuck with older Excel, a nested IF pattern can achieve the same: =IF(A2>=90,"A", IF(A2>=80,"B", IF(A2>=70,"C","D"))). The key is to balance clarity with functionality and to avoid excessive nesting in any single formula.
Combining IF with AND, OR, and NOT
Logical operators allow you to sculpt more precise rules. Use AND to require multiple conditions, OR to accept any one of several conditions, and NOT to invert a test. Example: =IF(AND(A2>0, B2<100), "OK", "Review"). This can prevent incorrect outcomes when one variable passes but another fails. When you chain multiple operators, consider parentheses to enforce the intended order of evaluation. This pattern is a natural bridge to more robust data validation rules in Excel.
Practical Examples: Data Validation and Categorization
Data validation often relies on IF to transform raw inputs into meaningful categories. For instance, you might convert numeric scores into performance tiers or flag records that need attention. A simple categorization workflow: =IF(A2>=90, "Excellent", IF(A2>=75, "Good", IF(A2>=60, "Fair", "Poor"))). You can combine this with TEXT functions to format output, or with CONCATENATE to build descriptive messages. In data-cleaning scenarios, IF helps replace placeholders with empty strings or standard codes, improving downstream analysis. When planning these steps, sketch the decision tree on paper or in a separate sheet before translating it to a formula.
Troubleshooting Common IF Formula Issues
Common problems include missing arguments, incorrect logical_test syntax, or mismatched data types. If your result looks like #VALUE! or #NAME?, double-check the function name, commas (or semicolons in some locales), and referencing. Ensure that logical tests compare values of compatible types (numbers to numbers, text to text). Nested IFs often lead to off-by-one errors in thresholds—they can be fixed by stepping through with a small sample dataset or using formula auditing tools. Use Evaluate Formula to see how Excel interprets each step.
Performance and Readability Tips for IF Formulas
Keep formulas readable by limiting nesting depth and using helper columns for intermediate results. Consider alternative approaches, such as IFS, LOOKUP-based tiering, or SWITCH, when there are many branches. Name critical cells, write modular formulas, and document assumptions. Avoid hardcoding magic numbers; place thresholds in a dedicated table and reference them with VLOOKUP or XLOOKUP. For large datasets, vectorized operations or dynamic arrays can reduce recalculation time and help maintain responsiveness in your spreadsheets.
Real-World Workflows: From Data Entry to Reporting
In daily work, IF formulas support data validation at entry points, automate categorizations for reports, and steer conditional formatting. For example, you can flag late tasks, assign priority levels, or route data to different sheets with IF + INDIRECT or FILTER. Building a scalable workflow means separating data, logic, and presentation: keep inputs in a clean table, store rules in a named helper column, and reference results in your dashboards. As your capabilities grow, you’ll combine IF with newer functions to build richer analytics without overloading any single cell.
Common Pitfalls and How to Avoid Them
Over-nesting, ambiguous conditions, and hard-coded thresholds are the main culprits behind fragile IF formulas. Always test with edge cases, and consider documenting your logic. If you find yourself repeating identical tests across many cells, consolidate them with a lookup or a small helper column. Finally, ensure compatibility if you intend to share the workbook with others on older Excel versions; consider fallback logic using IFS or CHOOSE.
Tools & Materials
- Microsoft Excel (desktop or online)(Latest version recommended; ensure you have access to IFS/SWITCH for alternatives.)
- Device with internet access(For using Excel Online or cloud workbooks.)
- Sample data set or workbook(A small dataset to practice the IF workflow.)
- Formula auditing tools(Evaluate Formula, Trace Precedents/Dependents.)
- Documentation sheet(Optional but helps maintainability.)
Steps
Estimated time: 60-90 minutes
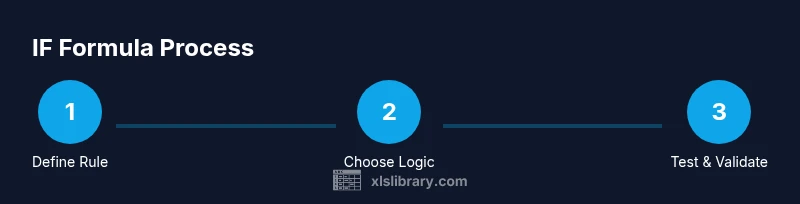
- 1
Identify the decision rule
Clarify the business rule or decision you want the IF formula to express. Write the condition in plain language before translating it into Excel syntax.
Tip: Start with one clear test and confirm it returns the expected TRUE/FALSE outcomes. - 2
Start with the simplest IF
Create a basic IF to capture the core decision, using a single condition and straightforward true/false outcomes.
Tip: Test with representative values to verify the basic behavior. - 3
Add the else result
Provide the value when the condition is FALSE, ensuring it makes sense in your analysis and downstream calculations.
Tip: Keep the false result consistent with your data type (number, text, data). - 4
Nest additional conditions
If more decisions are needed, add another IF inside the false or true branch, forming a nested structure.
Tip: Limit nesting depth to maintain readability; consider alternatives if it grows too large. - 5
Combine with AND/OR
Refine logic by including multiple conditions that must all pass (AND) or any one is sufficient (OR).
Tip: Use parentheses to enforce evaluation order. - 6
Consider alternative logic
For many branches, IFS, SWITCH, or a lookup-based approach may be clearer and easier to maintain.
Tip: Compare readability and future maintenance needs. - 7
Validate with samples
Test the formula against edge cases and typical data to ensure consistent results.
Tip: Create a mini-dataset that stretches all branches. - 8
Document the formula
Add comments or maintain a separate docs sheet describing the rule, inputs, and assumptions.
Tip: Documentation helps you adapt formulas later. - 9
Audit and finalize
Review the entire rule, check references, and ensure compatibility with your audience’s Excel version.
Tip: Use Evaluate Formula to step through the calculation.
People Also Ask
What is the IF function and why is it useful?
The IF function evaluates a condition and returns one value for TRUE and another for FALSE. It’s essential for data validation, categorization, and conditional calculations in Excel. Mastering IF lays the groundwork for more advanced logic and reporting.
The IF function checks a condition and returns different results based on whether that condition is true or false, which makes it a fundamental tool for data validation and categorization in Excel.
How do I nest IF statements without making them unreadable?
Nest IF statements with care, keeping nesting depth limited. Use indentation, add comments, and consider IFS or SWITCH when branches grow. For older versions, break logic into helper columns or use a lookup table to simplify.
Nest only a few levels, use comments, and switch to IFS or SWITCH if your decision tree gets long.
When should I use IFS or LOOKUP instead of IF?
Use IFS or SWITCH when you have multiple clear thresholds to test in order. LOOKUP-based approaches work well for range-based categorization. These options improve readability, reduce nesting, and simplify maintenance.
If you have several thresholds, IFS or SWITCH can be clearer and easier to maintain than a long chain of IFs.
How can I handle errors in IF formulas?
Wrap tests with error-handling functions like IFERROR to gracefully handle unexpected data. Ensure references exist and use ISBLANK or ISNUMBER to guard against invalid inputs.
Use IFERROR or checks like ISNUMBER to prevent error values from propagating in your worksheets.
Can IF be used for data validation and conditional formatting?
Yes. IF can determine categories or statuses that flow into data validation rules or conditional formatting rules, making dashboards more informative and responsive.
IF is versatile for driving both data validation logic and visual formatting in reports.
Watch Video
The Essentials
- Master the basic IF syntax for everyday logic
- Nest sparingly; prefer IFS/SWITCH for many branches
- Combine IF with AND/OR for precise tests
- Test edge cases to catch errors early
- Document formulas to aid future maintenance