Mastering a Purchase Order Form in Excel
Learn how to build a reliable purchase order form in Excel, including key fields, formulas, validation, and templates to improve accuracy and efficiency in procurement workflows.

You will learn to create a reusable purchase order form in Excel that captures vendor data, items, quantities, pricing, and approvals. You will also customize fields, apply data validation, and set up automatic calculations. By following this guide, you can start from a solid template and adapt it to your procurement process, all within Excel.
Why a Purchase Order Form Excel Matters
A well-designed purchase order form in Excel consolidates essential data such as vendor details, item descriptions, quantities, unit prices, taxes, shipping, and totals in a single, reusable document. Using Excel gives you flexibility to tailor the PO to your organization’s workflows while preserving a clear audit trail. The ability to customize fields, enforce data validation, and automate calculations reduces errors and accelerates approval cycles. According to XLS Library, standardized PO templates have a measurable impact on accuracy and cycle times, especially when teams share a single source of truth for purchasing data.
Key Fields and Data Validation
A solid PO form Excel should include metadata at the top and a line items section below. Core fields include PO number, issue date, supplier name, ship-to and bill-to addresses, and department. The line items table should cover item code, description, quantity, unit price, currency, tax rate, line total, and an optional notes column. Use data validation to create dropdowns for suppliers and items, and ensure numeric fields accept only valid values. Establishing named ranges for supplier lists and tax rates helps keep formulas accurate as data grows. This structure supports consistent data entry across teams and locations, while making it easy to export or print.
Build a PO Template in Excel
Start with a clean skeleton that separates header metadata from the line items area. Create bold headers for each column, freeze the header row, and format currency cells for clarity. Reserve extra rows to accommodate new line items without breaking formulas. Populate the supplier and item dropdowns from a centralized list on a separate sheet. Validate PO numbers with a simple pattern and ensure dates use Excel date validation. By designing with reusability in mind, your template can be copied for new requests while preserving a consistent format.
Automating Calculations with Formulas
Totals and taxes should update automatically as line items change. Use a SUM formula to calculate the line totals, then a SUM to derive the subtotal. Apply a tax calculation cell that multiplies the subtotal by the current tax rate, and add shipping and discounts as separate inputs before computing the grand total. You can also fetch supplier-specific terms or currency via lookup functions like XLOOKUP, reducing manual data entry. Built-in Excel features enable error checking and quick auditing of each PO.
Designing for Reuse: Templates and Customization
Aim for a template that can be reused across departments and vendors. Store the file as a template so different teams can create POs from a consistent starting point. Leverage named ranges, protected formula cells, and a separate data sheet for item catalogs and supplier details. Consider building currency and tax rate sections that can be easily updated in one place. Clear documentation within the template helps new users understand field meanings and workflows.
Sharing, Version Control, and Security
Share your PO form Excel via cloud storage to enable collaboration while preserving the original template. Use track changes in approval workflows and set permissions to prevent unintended edits on formula cells. Protect sensitive fields such as supplier banking information by locking those cells or using sheet protection with a password. Establish a versioning approach so updates to the template or lists do not overwrite existing POs.
Common Pitfalls and How to Avoid Them
Avoid missing PO numbers or misaligned item data by enforcing strict validation rules. Ensure consistent currency formatting and price accuracy by tying unit prices to a validated item catalog. Regularly audit the data by comparing totals against a trusted source. Finally, avoid duplicating line items; implement a simple duplicate check on the description or item code to catch errors early.
Tools & Materials
- Excel (Office 365 or newer)(Windows or macOS; ensure access to the data validation and lookup features)
- PO data sheet or supplier/item catalog(Centralized lists used for dropdowns and lookups)
- Template PO workbook(Start from a reusable template to maintain consistency)
- Printer or PDF export option(For hard copy or external sharing)
- Backup storage (OneDrive/SharePoint)(Version control and collaborative access)
- Notes on tax rules and currencies(Helpful reference for accurate totals)
Steps
Estimated time: 60-75 minutes
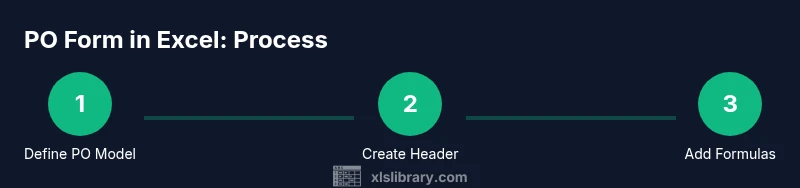
- 1
Create skeleton PO model
Draft a basic layout that separates header metadata from the line items and totals. Define the essential columns for the item table and reserve space for future rows. Decide where validations will live and how totals will be calculated.
Tip: Plan field locations before entering data to minimize rework. - 2
Set up header metadata
Add fields for PO number, date, supplier, ship-to, and department. Apply date validation and ensure PO numbers follow a consistent format. Link supplier details to a named range for reliable lookups.
Tip: Use a single row for metadata to keep the header compact and readable. - 3
Create line items table
Set up columns for item code, description, quantity, unit price, currency, tax rate, and line total. Leave rows expandable and apply data validation to restrict entries to the catalog.
Tip: Lock the header row and the total calculation cells to prevent accidental edits. - 4
Add totals and tax formulas
Enter formulas to compute line totals, subtotal, tax, shipping, discounts, and grand total. Use absolute references for constant values like tax rate to keep formulas stable when you copy rows.
Tip: Test a sample PO to verify all totals adjust correctly. - 5
Enhance data validation and defaults
Create dropdowns for supplier and item selectors, and set default values where appropriate. Use named ranges and helper columns to simplify complex lookups.
Tip: Regularly refresh the catalogs to reflect changes in suppliers or items. - 6
Save as template and test
Save the workbook as a template and run a few test POs to confirm formatting, calculations, and validations. Document any caveats for future users.
Tip: Share the template with a small team for feedback before broad rollout.
People Also Ask
What is a purchase order form in Excel used for?
A purchase order form in Excel is used to capture vendor details, items, quantities, pricing, and approval information in a single file. It serves as a structured record for spending and helps ensure consistency across requests.
A PO form in Excel keeps all purchasing details in one place and helps teams stay aligned on costs and approvals.
Are macros required in a PO form?
Macros are not required for a basic PO form. They can automate repetitive tasks, but a well-designed template with built-in formulas and data validation often suffices.
Macros are optional; many teams succeed with formulas and data validation alone.
How do I protect PO data in Excel?
Protect sensitive cells and sheets using Excel’s protection features. Lock critical formulas, restrict editing on the catalog, and use password protection if needed. Store templates in a controlled location with versioning.
Protect critical cells and keep templates in a secure, versioned location.
Can I share the PO form with teammates?
Yes. Share via cloud storage with appropriate permissions and consider enabling track changes for auditability. Provide a brief user guide to prevent unintended edits.
Share via the cloud with proper permissions and a quick guide.
How do I ensure unique PO numbers?
Implement a PO number scheme and validate it with a simple pattern or lookup. Consider auto-generating PO numbers from a separate system to avoid duplication.
Use a consistent pattern and a lookup to avoid duplicates.
How can I export a PO to PDF?
Excel allows exporting or printing to PDF. Ensure page size and margins are set for clean hard copies and external sharing.
Export or print to PDF for external sharing.
Watch Video
The Essentials
- Use a reusable PO template to standardize data.
- Data validation reduces entry errors and improves accuracy.
- Formulas automate totals and taxes for consistency.
- Templates enable fast, controlled procurement processes.
- The XLS Library team recommends starting from a proven template.