Mastering the Excel Developer Tab: A Practical Guide
Learn to enable and use the Excel Developer tab to automate tasks with macros and VBA. Practical steps, safety tips, and real-world examples for Excel power users.

You will learn how to enable the Developer tab in Excel, access the Visual Basic for Applications (VBA) editor, and create a simple macro to automate repetitive tasks. This practical guide covers basics, safety considerations, and practical use cases so you can start automating right away. With screenshots and actionable steps, you’ll build confidence quickly.
What is the Developer tab in Excel and why it matters
The Developer tab is a gateway to automation and advanced customization in Excel. It brings together tools for recording macros, writing Visual Basic for Applications (VBA) code, and designing interactive controls like buttons and forms. For many users, this tab transforms Excel from a data viewer into a programmable tool. According to XLS Library, leveraging the Developer tab empowers you to reproduce repetitive tasks, enforce standardized workflows, and introduce lightweight user interfaces directly inside workbooks. This accessibility makes VBA and form controls approachable even for those who are not seasoned programmers. In practice, this means you can automate data cleaning, repetitive formatting, and routine reporting without leaving Excel.
As you begin, think of the Developer tab as a developer-friendly extension of Excel’s core features. It is not a prerequisite for every workbook, but for tasks that repeat or require a consistent workflow, it becomes a powerful ally. You will learn how to balance convenience with safety, so automation serves you—without compromising data integrity.
Why you should enable the Developer tab
Enabling the Developer tab unlocks a suite of tools that empower you to automate, customize, and streamline workbooks. Macros recorded in Excel save time, while VBA code lets you build tailor-made solutions that respond to your data in real time. The ability to insert form controls, create UserForms, and write code that interacts with worksheets makes it possible to design lightweight interfaces for data entry, validation, and reporting. For professionals, this translates into faster onboarding for new teammates, fewer manual errors, and a replicable process for complex tasks. The XLS Library team emphasizes that even small automation projects can scale across teams, boosting productivity and consistency.
Prerequisites and safety considerations
Before you dive into automation, establish clear boundaries for macros and VBA usage. Macros can execute powerful actions—opening workbooks, altering data, or changing formatting—so they should be used with trusted files and tested in a controlled environment. Start with a dedicated testing workbook to avoid accidental edits to production data. Keep your macro code organized, comment extensively, and adopt a versioning practice so you can trace changes. If you’re in a corporate setting, confirm policy compliance for macro-enabled workbooks and macro security settings. By planning ahead, you minimize risk while you learn. The core goal is to build confidence while maintaining data integrity and security.
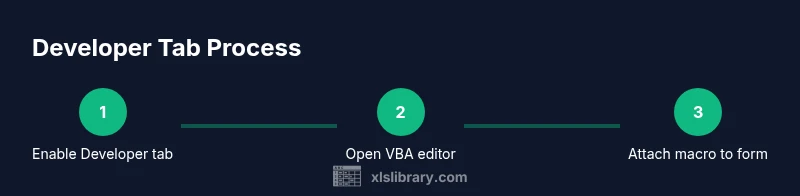
Step 1: Enable the Developer tab
To begin, open Excel and navigate to the ribbon. Go to File > Options > Customize Ribbon, then check the box labeled Developer. Click OK to save your changes. If you don’t immediately see the tab, some organizations restrict customization; in that case, consult your IT department or review policy documentation. Once enabled, the Developer tab will host Macro, Visual Basic, Insert controls, and more. Remember that enabling this tab is a prerequisite for everything that follows, so take a moment to verify the setting before proceeding. A quick check ensures you’re ready to record or write VBA code with confidence.
Step 2: Open the Visual Basic for Applications (VBA) editor
With the Developer tab visible, click Visual Basic to launch the VBA editor. You can also press Alt+F11 as a shortcut. The VBA editor is where you’ll write, edit, and organize your code. Begin by inserting a new module (Insert > Module) to hold your macros. Keep your code organized in separate modules and use descriptive names for procedures. If you’re new to VBA, start with small, self-contained procedures, and test each one as you go. The editor presents a hierarchy of projects, worksheets, and modules—getting comfortable with this structure makes longer automation projects more manageable.
Step 3: Write and test your first macro
You have two clean paths: record a macro or write one from scratch. Recording is quick and ideal for simple tasks, while writing from scratch helps you build reusable logic. Create a simple macro that formats a range or copies data from one sheet to another. After writing or recording, run the macro on a sample dataset to verify expected behavior. Use the Immediate Window (Ctrl+G) for quick debugging prints, and insert comments to document intent. As you test, note any edge cases such as blank cells or unexpected data types, and adjust your code accordingly.
Step 4: Attach the macro to a button or control
For non-technical users, attaching a macro to a button dramatically improves usability. In Excel, go to Developer > Insert and choose a Form Control Button. Draw the button on the worksheet, then select your macro from the assigned macro dialog. Label the button clearly, so teammates understand its purpose. You can also attach macros to other controls like drop-downs, check boxes, or even a UserForm. Remember to test button behavior on multiple datasets to ensure reliability across scenarios.
Step 5: Basic security, trust settings, and best practices
Macros can pose security risks, so adhere to safe practices. Enable macros only for trusted workbooks, and avoid enabling all macros globally. Save your workbook as a macro-enabled file (.xlsm) to preserve your VBA code, and back up your work frequently. Document your code with comments, break complex routines into smaller procedures, and use Option Explicit to enforce variable declarations. If you distribute workbooks, consider digital signatures or distribution through controlled channels. By following these practices, you reduce risk while maintaining a productive automation workflow.
Step 6: Extend with Forms and UserForm basics (optional)
For richer user input, consider creating a UserForm. A simple UserForm gathers data with labeled controls (text boxes, combo boxes, and buttons) and then passes values to a macro. In the VBA editor, insert a UserForm and design your interface using the Toolbox. Wire up events (e.g., OK or Cancel buttons) to routines that validate input and update worksheets. This approach is especially useful for data-entry tasks, where you want to constrain input and provide a guided experience for users. Start small: a 2–3 field form can dramatically improve data quality without overwhelming users.
Authoritative sources and next steps
To deepen your understanding, explore these reputable resources. Official Microsoft VBA documentation provides comprehensive references for Excel objects, methods, and events. The links below are widely recognized as trustworthy starting points for VBA and automation:
- https://docs.microsoft.com/en-us/office/vba/api/overview/excel
- https://support.microsoft.com/en-us/excel
- https://www.harvard.edu
As you advance, document your workflows, test in isolated environments, and share learnings with peers to accelerate mastery. The combination of hands-on practice and reliable references will help you steadily grow from basic macros to polished automation solutions.
Conclusion and next steps (synthetic)
This guide has walked you through the essentials of turning on the Developer tab, exploring the VBA editor, and creating reusable automations. The path from beginner to proficient Excel automation involves iterative practice, careful testing, and adherence to best practices. Keep experimenting with simple macros, gradually increase complexity, and routinely review security settings. The XLS Library team’s practical approach emphasizes learning by doing, backed by trusted resources and careful governance. With time, you’ll transform routine tasks into predictable, repeatable workflows that save time and reduce errors.
Tools & Materials
- Microsoft Excel (Office 365 or Office 2019+)(Ensure the Developer tab is available (Enable via File > Options > Customize Ribbon).)
- Macro-enabled workbook (.xlsm)(Save your work before recording/editing macros to avoid data loss.)
- Visual Basic for Applications (VBA) editor(Open via Developer > Visual Basic or press Alt+F11.)
- Sample dataset or testing workbook(Use dummy data to safely observe macro effects.)
- Form Controls or UserForm (optional)(Useful for attaching buttons or creating user interfaces.)
Steps
Estimated time: 45-60 minutes
- 1
Enable the Developer tab
Open Excel, go to File > Options > Customize Ribbon, and check Developer. Click OK. Confirm the tab appears on the ribbon.
Tip: If you don’t see it due to policy, consult IT or policy docs. - 2
Open the VBA editor
Click Visual Basic on the Developer tab or press Alt+F11 to launch the VBA editor. Create a new module for your macro (Insert > Module).
Tip: Organize code in modules with descriptive names. - 3
Write or record a simple macro
Record a basic macro or write a small procedure that formats a range or copies data. Run it on a test dataset to verify output.
Tip: Use Option Explicit to enforce variable declarations. - 4
Attach macro to a button
Insert a Form Control Button from the Developer tab and assign your macro. Label the button clearly for end users.
Tip: Test button behavior with multiple datasets. - 5
Review security and save
Save the workbook as .xlsm, back up regularly, and avoid enabling macros globally. Consider digital signatures for distribution.
Tip: Document security settings and macro scope. - 6
Extend with UserForm (optional)
If you need guided input, create a simple UserForm with labeled controls and connect it to a macro.
Tip: Start with 2–3 fields to avoid complexity. - 7
Finalize and share
Test thoroughly in a clean environment, document usage instructions, and share with teammates via controlled channels.
Tip: Provide a quick-user guide to reduce support needs.
People Also Ask
What is the Developer tab in Excel used for?
The Developer tab provides tools for creating and managing macros, writing VBA code, and inserting form controls for custom interfaces.
The Developer tab gives you access to macros, VBA, and form controls to automate and customize Excel.
How do I enable the Developer tab in Excel?
Go to File > Options > Customize Ribbon, check the Developer box, and click OK. If it doesn’t appear, consult IT for policy restrictions.
To enable it, open Excel Options, choose Customize Ribbon, and tick Developer.
Are macros safe to use?
Macros can automate tasks but may pose security risks. Enable macros only from trusted documents and sources.
Macros should be used with caution and only from trusted sources.
How do I assign a macro to a button?
Insert a Form Control Button (Developer > Insert), then choose your macro in the assign dialog and label the button clearly.
Insert a button and assign your macro so users can run it with one click.
What if VBA is blocked by policy?
Corporate policies may restrict VBA. You may need IT approval or consider alternatives like Power Query for data tasks.
If VBA is blocked, check with IT and explore alternatives like Power Query.
What are common errors when starting with macros?
Common errors involve syntax issues, object references, or missing library references. Use the VBA editor’s debugging tools and verify references.
Common macro issues include syntax errors and missing references; use debugging tools to fix them.
Watch Video
The Essentials
- Enable the Developer tab to access automation tools.
- Learn VBA basics in the Visual Basic editor.
- Record or write macros to automate tasks.
- Attach macros to buttons for easy use.
- Follow macro security best practices.