Excel Center Across Selection: Center Text Across Cells
Learn to center text across a selection in Excel without merging cells. A practical, step-by-step guide with tips and real-world examples for cleaner spreadsheets.

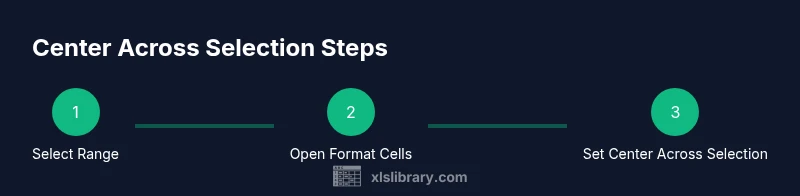
Definition: Center Across Selection centers text over multiple adjacent cells without merging. Steps: 1) Select the range (A1:E1). 2) Open Format Cells (Ctrl+1). 3) On Alignment, set Horizontal to Center Across Selection and click OK. 4) Optional: adjust font and wrap. It works in most modern Excel versions (Windows and Mac). After applying, you can edit content in any individual cell, and the headings or data will appear seamlessly centered across the range.
What Center Across Selection Is and Why It Matters
Center Across Selection is an Excel formatting option that centers content across multiple adjacent cells without actually merging them. The technique preserves each cell as an independent data container, which makes sorting, filtering, and formula application more reliable than traditional merged cells. In everyday reporting, headers and titles often need to span several columns; Center Across Selection gives you a clean, professional look without compromising data integrity. In addition, this approach reduces layout fragility and simplifies downstream data operations while still achieving a visually appealing presentation. The excel center across selection method is supported in most modern Excel versions for Windows and macOS and works reliably with both plain text and wrapped content. According to XLS Library, this approach is particularly valuable when building wide tables for dashboards or printed reports where alignment consistency matters across devices and printers. When you adopt this technique, you’ll enhance readability and maintainability across large spreadsheets.
How to Enable Center Across Selection in Excel
To apply Center Across Selection, you must first select the destination range. The range should include all cells that will show the centered content. Then open the Format Cells dialog. On Windows, press Ctrl+1; on Mac, Command+1. In the Alignment tab, set Horizontal to Center Across Selection and click OK. You’ll see the text centered across the selected columns, while each cell remains an individual cell. If you’re using the Home tab, you can also access the same setting via Home > Alignment > Center Across Selection. For headers or titles, consider increasing font weight or wrapping to maximize readability. This step does not merge cells, so formulas and data sorting stay intact. If the option is unavailable, ensure that you have a non-merged range selected and that you’re using a supported Excel version. Once set, you can reuse this formatting across similar ranges to maintain consistency.
Visual Impact: When to Use Center Across Selection
Center Across Selection shines in headers and titles that should span multiple columns without altering the structure of your table. It’s ideal for wide dashboards where column labels must align with data beneath, but you don’t want the complexity that comes with merged cells. In reports, this approach reduces printing artifacts and keeps alignment consistent in PDFs and slide decks. When you center across a range, the eye-catching effect is a unified header that still preserves cell independence, which is crucial for Excel features like conditional formatting and data validation. If you frequently share workbooks with colleagues who use different Excel configurations, Center Across Selection provides a robust, portable solution that preserves layout across platforms. This technique also benefits accessibility by keeping each cell accessible to screen readers and assistive technologies.
Differences: Center Across Selection vs Merging Cells
Merging cells is a classic technique to create a spanning header, but it comes with downsides: you lose independent cells, sorting across the merged area becomes tricky, and pasting data can break the layout. Center Across Selection avoids those pitfalls by centering text over a range without changing the underlying cell structure. The technique also reduces risk when copying, inserting, or deleting columns. However, it requires careful range selection and may feel unfamiliar to users who expect the merged look. If you need a truly single header cell for advanced operations, merging may still be appropriate, but for most data-centric workflows Center Across Selection strikes a better balance between aesthetics and functionality.
Note: Center Across Selection does not create a single merged cell; it visually centers across the range while keeping each column valid for data operations.
Practical Examples: Readability in Headers and Data Rows
Use Center Across Selection to format a table where the main header spans five columns with a uniform center alignment. In a sales report, create a title above the data rows and apply Center Across Selection across the column headers. For multi-year data, apply the feature to year labels so each year remains aligned with its data underneath. In addition, you can combine Center Across Selection with Wrap Text to ensure long labels remain readable without increasing row height. As you practice, try different font weights or colors to emphasize the header while preserving the data cells for filtering. This technique scales well for tables with dozens of columns, making complex spreadsheets easier to scan. In dashboards, consider tiered headers across groups of columns for quick visual cues.
Keyboard Shortcuts and Quick Access
Shortcuts speed up the workflow: use Ctrl+1 (Windows) or Command+1 (Mac) to open the Format Cells dialog. Once there, Tab to the Alignment tab and select Center Across Selection for the Horizontal alignment. If you frequently format similar ranges, record a macro or add the command to your Quick Access Toolbar for one-click access. On large workbooks, consider applying the setting in batches—select contiguous ranges of columns with similar headers to maintain visual consistency across the sheet. When editing, remember that the actual data stays in each cell; only the display spans across them. Using keyboard shortcuts helps you format large workbooks faster and with fewer mistakes.
Pitfalls and Common Mistakes to Avoid
A major pitfall is applying Center Across Selection to numeric data that must be sorted or filtered. While the text may look centered, sorting by the header requires caution because Excel will treat the range as individual columns. Another mistake is neglecting to test in print layouts; Center Across Selection can appear differently in print previews if font sizes or page breaks differ. Also, avoid using this technique on very narrow ranges; the centered content can appear cramped. Lastly, avoid mixing Center Across Selection with merged cells in adjacent ranges, as inconsistent alignment can confuse readers. Always verify that your workbook’s headers render correctly across devices and in print.
Best Practices for Consistent Formatting Across Large Ranges
Plan your table structure before applying formatting; decide which headers span across which columns, and document the decisions for teammates. Use Center Across Selection for top headers and multi-column titles; reserve merged cells for special cases only. Maintain consistent font size, weight, and color to reinforce hierarchy. Combine with Wrap Text for long labels and consider conditional formatting rules to highlight data beneath. When you copy or insert columns, recheck formatting to ensure alignment remains intact. Finally, test the workbook in different display environments (HD monitors, projectors) to ensure the centered headers render well on all devices. Consistency here speeds up reviews and reduces layout disputes.
Troubleshooting: When Center Across Selection Doesn't Work
If you don’t see Center Across Selection as an option, ensure you’re not working with a merged range. If the option is grayed out, unmerge cells, reselect the target area, and try again. If the text still doesn’t center, verify you are applying Horizontal alignment and not a vertical alignment setting. In some cases, regional settings or language packs may affect dropdown labeling; switch to English labels briefly to confirm the action. Finally, remember that Center Across Selection affects display only; it does not modify data underneath, and it may not carry through to certain export formats without adjusting the underlying range. Use the Print Preview to double-check alignment before sharing.
Real-World Scenarios: Reports, Dashboards, and Presentations
In finance dashboards, center across selection helps label sections across several columns while preserving sortability. In operations reports, apply it to section headers across multiple data columns so that the viewer’s eye naturally travels across the page. In client presentations, use it to create clean tables in slides where you’re limited by space; the non-merged cells ensure you can still copy and reuse data across charts. For large teams, standardize the approach by documenting the header spanning rules and providing a quick template workbook. The result is more maintainable spreadsheets that look professional in PDFs and printed reports. According to XLS Library, consistent formatting choices like Center Across Selection contribute to faster review cycles and fewer formatting headaches during collaboration.
Tools & Materials
- Microsoft Excel (Windows or macOS)(Any recent version with Center Across Selection feature.)
- Computer or device with keyboard and mouse(Standard setup sufficient for practice.)
- Sample workbook with headers(Optional for hands-on practice.)
Steps
Estimated time: 15-25 minutes
- 1
Open workbook and select range
Open the workbook you’ll work on and select the range across which you want to center text. Ensure the range is contiguous and represents the header or title area. This step defines the scope for the formatting change.
Tip: Use Shift+Arrow keys to quickly extend the selection. - 2
Open Format Cells dialog
With the range selected, open the Format Cells dialog. On Windows you can press Ctrl+1; on Mac use Command+1. The dialog provides access to all alignment options in one place.
Tip: Alternatively, access via Home > Alignment > Center Across Selection. - 3
Navigate to Alignment
In the Format Cells dialog, switch to the Alignment tab to access the Horizontal alignment options. This tab also controls text wrapping, indentation, and text orientation.
Tip: If you don’t see the Horizontal option, scroll or resize the dialog for clarity. - 4
Set Horizontal to Center Across Selection
From the Horizontal dropdown, choose Center Across Selection. This setting centers text across the selected columns without merging cells. Preview should reflect the spanning effect.
Tip: If your target range includes merged cells, unmerge first and reselect. - 5
Apply and close
Click OK to apply the formatting and close the dialog. The text should visibly center across the entire selected range while each cell remains separate.
Tip: Double-check in both Normal view and Page Layout/Print Preview. - 6
Verify in worksheet
Type into the first cell to confirm that the content appears centered across the range. Check that adjacent cells show the centered effect without displacement.
Tip: If text spills, enable Wrap Text or adjust column widths. - 7
Test on larger range
Apply the same steps to a larger set of columns to ensure consistency across the sheet. The alignment should hold across the entire span.
Tip: Use Format Painter to copy the same alignment to other sections quickly. - 8
Save and share
Save the workbook and share with colleagues to verify cross-device consistency. Re-check in Print Preview on different devices if possible.
Tip: Create a small template with examples to train teammates.
People Also Ask
What is Center Across Selection in Excel?
Center Across Selection centers text over multiple adjacent cells without merging them, preserving individual cell data. It’s ideal for headers that span several columns while keeping data operations intact.
Center Across Selection centers text across adjacent cells without merging.
Does Center Across Selection merge cells?
No. It centers the display across cells while leaving each cell independent and sortable. This avoids many issues caused by merged cells.
No, it doesn’t merge cells.
Can I apply Center Across Selection to entire rows?
Center Across Selection applies across columns. You can center header text across a row by choosing a range across that row, but it’s not a row-wide merge.
It centers text across columns, not rows.
Will Center Across Selection affect printing?
Print rendering follows the on-screen alignment. Check Print Preview to ensure the centered headers appear as intended in the printed output.
Yes—printing follows on-screen alignment; verify with Print Preview.
Is Center Across Selection available in all Excel versions?
Most recent Windows and Mac versions include Center Across Selection. If you’re on an older edition, update Excel to access this feature.
Most recent versions support it; update if needed.
Watch Video
The Essentials
- Center text over a range without merging.
- Apply via Format Cells > Alignment > Center Across Selection.
- Use for headers to improve readability without compromising data operations.
- Test in print and on multiple devices for consistency.
- Keep documentation to guide teammates.