How to Make an Excel File Read-Only
Learn practical, step-by-step methods to make Excel workbooks read-only using password protection, sheet protection, and storage-level controls. This XLS Library guide helps teams protect data without locking out legitimate viewers.

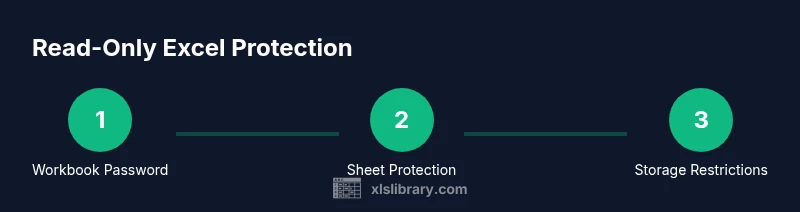
Goal: Make an Excel file read-only. You can do this by (1) applying password protection to the workbook or to individual worksheets, (2) enabling sheet protection with restricted editing, and (3) restricting file access through your storage service (OneDrive/SharePoint) or by saving as a read-only copy. The method you choose depends on whether others need to view or edit certain parts.
Why making an Excel file read-only matters
According to XLS Library, protecting an Excel workbook from unintended changes is a sound first step when sharing data with teammates. Read-only files help preserve formulas, formatting, and data integrity, especially in controlled environments where multiple people access the same document. This approach reduces the risk of accidental edits, unwanted deletions, and layout drift that can undermine reporting. If you are asking how do i make an excel file read only, know that there are several layers you can apply, from password-protected workbooks to locked worksheets and file-system restrictions. The right combination depends on who needs access, what parts should stay editable, and how the file will be distributed. In practice, most teams use a mix of protection methods: a password to prevent opening or editing, sheet protection to guard specific ranges, and storage controls that enforce read-only access at the document or folder level. Keep in mind that no single method is foolproof; layered protections give you the best balance between usability and safety.
wordCountBlock": null,
Tools & Materials
- Excel installed on a computer(Excel 2016 or later on Windows or macOS; for best results use the latest updates.)
- Password to protect workbook or sheets(Choose a strong, unique password and store it securely.)
- Access to storage service(OneDrive, SharePoint, or a network share with appropriate permissions.)
- Backup copy of the file(Keep a separate backup before applying protections.)
- Optional: administrator or IT guidance(Helps align protections with organizational policies.)
Steps
Estimated time: 25-40 minutes
- 1
Open the workbook you want to protect
Launch Excel and load the target workbook. Save a backup copy before applying protections so you can recover if needed.
Tip: Always start with a backup in case you forget passwords or lock yourself out. - 2
Choose the protection method
Decide whether you will password-protect the entire workbook, protect specific worksheets, or apply a storage-level read-only setting. Each approach offers different guardrails for edits.
Tip: Workbook protection blocks opening or editing; sheet protection limits edits on specific cells. - 3
Apply workbook password protection
Go to Review > Protect Workbook, then select a password option. Save the password in a secure password manager and confirm the protection is active.
Tip: Password protection helps prevent opening for unauthorized users unless they know the password. - 4
Apply sheet protection with restricted editing
If only certain areas should be editable, protect the relevant sheets via Review > Protect Sheet. Specify allowed actions (formatting, inserting rows, etc.).
Tip: Limit editing to essential cells; avoid blanket permissions.” - 5
Set file-level read-only (OS/Storage)
On your OS or in OneDrive/SharePoint, set the file attribute or link to read-only when sharing. This helps deter edits even if protection is bypassed.
Tip: Combined with password protection, this reduces chances of accidental edits. - 6
Distribute with clear usage rules
Share the read-only file with explicit guidance on what is protected and how edits should be requested. Consider using a shared read-only link.
Tip: Provide a process for legitimate edits, such as submitting change requests. - 7
Test the protections
Close and reopen the file, then attempt edits to verify protections work as intended. If something doesn’t behave, revert to backup and reapply settings.
Tip: Testing saves you from post-distribution surprises. - 8
Document password recovery options
If you must forget a password, have a documented recovery path or an admin who can restore access. Avoid distributing passwords broadly.
Tip: Never store passwords in the same place as the protected file.
People Also Ask
What does it mean to make an Excel file read-only?
Read-only means users can view the content but cannot modify it unless they have the proper permissions. In Excel, you can enforce this by protecting the workbook, protecting sheets, or controlling access via storage services. These measures help preserve formulas and formatting.
Read-only means viewing is allowed, edits are blocked unless permissions are granted.
What is the difference between workbook protection and sheet protection?
Workbook protection controls actions at the file level (opening or structural changes), while sheet protection guards individual worksheets, limiting edits to specific cells or features. Use both when you need broad protection with some editable zones.
Workbook protection stops changes to the file; sheet protection locks specific parts of a sheet.
Can I edit the file on my computer if I password-protect it?
If you know the password, you can edit or open the protected workbook. Without the password, editing is blocked. Always store passwords securely and avoid sharing them widely.
You need the password to unlock and edit protected content.
Will read-only settings carry over if I share the file via OneDrive or SharePoint?
Share links and permissions can enforce read-only access, but protections inside Excel remain important. Use a read-only link or restrict editing in the storage service to complement workbook or sheet protections.
Shared storage settings can reinforce Excel protections, not replace them.
Is Excel protection foolproof against determined users?
No protection is foolproof. Skilled users may bypass protections with non-authorized methods. Treat Excel protections as a strong barrier for everyday workflows, complemented by governance and access controls.
No security is perfect; use it as a solid barrier plus organizational controls.
How do I recover a forgotten password for protected workbook?
There is no built-in password recovery in Excel. If you forget a password you may need to restore from a backup or consult your IT admin for recovery options or password reset procedures.
If you forget the password, you may need to restore from backup or contact IT.
Watch Video
The Essentials
- Protect with layered methods (workbook + sheets).
- Use strong passwords and store securely.
- Test protections before sharing widely.
- Document recovery options and keep backups.
- Storage-level restrictions reinforce, not replace, Excel protections.