How to Get Excel on Mac: A Practical Setup Guide
Learn practical steps to install, activate, and optimize Excel on macOS. Compare options, avoid common pitfalls, and start crunching data today with a clear, step-by-step approach.

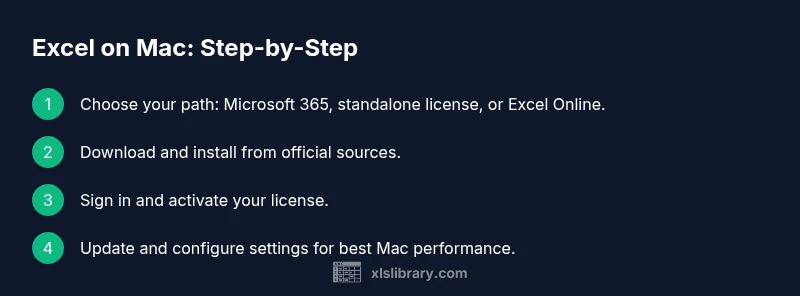
By the end, you will have Excel running on your Mac using a Mac-compatible path. Choose between Microsoft 365, a standalone Excel for Mac license, or Excel Online, and follow the installer or web steps. You’ll need a Mac with current macOS, an active Microsoft account, and reliable internet access to complete the setup successfully.
Understanding your options to get Excel on Mac
If you're wondering how to get excel in mac, this guide covers practical paths that fit different work styles. Excel for Mac is available through several routes, including a Microsoft 365 subscription that keeps features up to date, a standalone Office license for a one-time purchase, or the free-to-use Excel Online in your browser. Each option has trade-offs for offline use, collaboration, and cost. For many users, Microsoft 365 provides the most seamless experience across devices, including Mac, Windows, and mobile. If you're primarily working offline or want a one-time purchase, a standalone Office license may be preferable. Excel Online is ideal for quick edits when you have only web access. In addition to licensing, you’ll want to verify your Mac’s
Licensing, pricing, and choosing the right path
Licensing for Excel on Mac comes in a few flavors: ongoing subscriptions that include all Office apps and updates, a one-time license for a fixed set of apps, or free browser-based access via Excel Online. A subscription tends to offer the best long-term value if you work across multiple devices or teams, while a one-time license can be attractive for standalone use. Excel Online provides basic editing and sharing without installing software on your Mac. In all cases, check compatibility with your
How to install Excel via Microsoft 365 on Mac
If you opt for Microsoft 365, start by visiting the official Microsoft site, sign in with your Microsoft account, and begin the download. Run the installer, agree to the license terms, and follow the prompts to install Excel along with the other Office apps if you chose the full suite. After installation, launch Excel, sign in to activate, and allow any required updates to complete. It’s a good idea to configure auto-save and cloud storage so your work remains synced across devices.
How to install Excel with a one-time license on Mac
For a one-time license, download the Office installer from the official source and run it on your Mac. The process is similar to the subscription path, but activation relies on your license key rather than a continuous subscription. After installation, open Excel and sign in if prompted to link your license to your Microsoft account for future updates. Keep the installer and your license key in a secure place for future re-installations.
Using Excel Online on Mac
If you prefer not to install anything, Excel Online offers solid editing capabilities directly in your browser. Sign in with a Microsoft account, and you can create, edit, and share spreadsheets with others in real time. While some advanced features require the desktop app, many day-to-day tasks—like formulas, charts, and data analysis—work well in the web version. Keep in mind that offline access is limited, and performance depends on your internet connection.
Activation and sign-in considerations
Activation for any Excel path requires a valid Microsoft account and internet access. After installation, you may be asked to sign in and verify your license. If you use a corporate license, your IT department might provide instructions or a company portal to activate. If you encounter activation errors, ensure your account details are correct and that your Mac is connected to the internet. In some cases, a sign-out and sign-in cycle resolves sync issues.
Mac-specific tips & shortcuts for Excel
Mac users benefit from keyboard shortcuts that leverage the Command key, such as Command-C for copy and Command-V for paste. Use Command-S to save, Command-Z to undo, and Command-Shift-Arrow to select ranges quickly. The Option key can help with advanced selection and navigation, while the Function keys can control screen brightness and volume without interrupting your workflow. Customizing the Quick Access Toolbar can save time on repetitive tasks.
Troubleshooting common issues on Mac
If Excel won’t start, check for
Real-world examples of Excel on Mac in action
On a Mac, you can build dashboards, analyze data with pivot tables, and create charts with familiar tools. Import data from external sources, clean it with built-in features, and use formulas to automate tasks. The Mac experience emphasizes smooth typography, retina display clarity, and efficient keyboard navigation—features that help you stay productive when working with large datasets.
Tools & Materials
- Mac computer with supported macOS(Ensure it meets minimum system requirements for Office apps.)
- Active Microsoft account(Needed to activate licenses and sign in to Office.)
- Internet connection(Required for download, activation, and updates.)
- Official Microsoft installer or Mac App Store access(Only download from official sources to avoid malware.)
- Web browser (Safari, Chrome, etc.)(Used to run setup wizards and access web-based options.)
- External drive for backups (optional)(Useful for keeping installers or license keys safe.)
Steps
Estimated time: 30-60 minutes
- 1
Decide your Excel path for Mac
Choose between Microsoft 365, a standalone license, or Excel Online based on how you work, whether you need offline access, and your budget.
Tip: Assess whether you’ll need offline access and cross-device syncing before choosing a path. - 2
Prepare your Mac for installation
Update macOS to the latest compatible version, free up disk space, and back up important files to avoid interruptions during installation.
Tip: Close unnecessary apps to speed up the installer and avoid conflicts. - 3
Create or sign in to a Microsoft account
If you don’t already have one, create a Microsoft account. Sign in during installation to activate your license or subscription.
Tip: Use a strong password and enable two-factor authentication for security. - 4
Download the installer from official sources
Go to the official Microsoft site or Mac App Store and download the Excel installer appropriate for your chosen path.
Tip: Verify the source URL before downloading to avoid counterfeit software. - 5
Run the installer and accept terms
Open the downloaded file, follow prompts, and accept license terms. The installer will place Excel and the Office apps on your Mac.
Tip: Read the terms briefly to understand update policies and privacy settings. - 6
Sign in to activate and update
Launch Excel, sign in with your Microsoft account if prompted, and allow updates to finish before starting work.
Tip: Enable automatic updates to keep features secure and current. - 7
Configure preferences and save locations
Set default save locations, enable AutoSave, and choose preferred file formats and keyboard shortcuts.
Tip: Turn on AutoSave when saving to OneDrive or SharePoint for seamless syncing. - 8
Verify installation and start a test workbook
Open Excel, create a new workbook, and test a simple formula to confirm everything works as expected.
Tip: Test a basic chart or pivot table to ensure performance.
People Also Ask
Can I get Excel on Mac for free?
Excel Online provides free browser-based editing with limited features. Desktop Excel requires a Microsoft account with a subscription or license. If you need full offline features, plan for a paid path.
Excel Online is free but has limited features; full offline Excel requires a subscription or license.
Do I need internet to use Excel on Mac?
Activation and online features require internet, but you can work offline once Excel is installed and activated. Some features may still require online access.
You need internet to activate, but you can work offline after activation.
Is Excel for Mac the same as Windows?
Most core features overlap, but some Windows-specific features or shortcuts differ. Mac users may rely more on keyboard shortcuts and macOS-specific behaviors.
Core features overlap, but differences exist between Mac and Windows.
What keyboard shortcuts are unique to Mac Excel?
Mac Excel uses Command-based shortcuts (e.g., Command-C, Command-V) and macOS navigation patterns. Many Windows shortcuts translate with Command instead of Ctrl.
Mac Excel uses Command-based shortcuts; most Windows shortcuts map with Command.
Can I move files between Mac and Windows easily?
Yes. Files saved in common formats (like .xlsx) are compatible across platforms. Ensure you use compatible features to avoid loss of functionality.
You can share .xlsx files between Mac and Windows with care for feature differences.
How do I migrate existing spreadsheets from Windows to Mac?
Open Windows-created files in Excel for Mac after ensuring compatibility. Some macros or features may require adjusting due to platform differences.
Open Windows files in Excel for Mac and adjust macros as needed.
Watch Video
The Essentials
- Choose the right Excel path for Mac based on needs.
- Complete the step-by-step install and activation to start working.
- Leverage Mac shortcuts to work faster in Excel.