How to Insert a File in Excel: A Step-by-Step Guide
Learn how to insert a file in Excel using embedding, linking, or importing. Get practical steps, tips, and best practices for clean, portable workbooks.

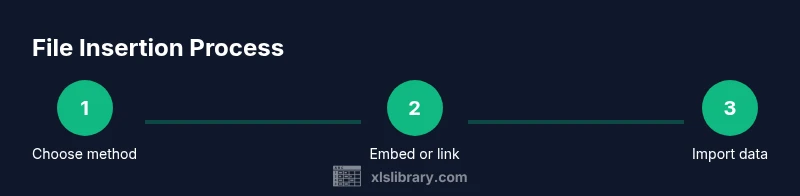
In Excel, you can insert a file by embedding the file on a worksheet, linking to it, or importing its data. Start with Insert > Object to embed, or check Link to file to maintain a live connection. For data imports, use Data > Get Data to import content. Choose the method that fits your workflow and sharing needs. Consider file type, size, and whether others should edit or view the source.
Why inserting files in Excel matters
For teams that manage reference documents alongside data, inserting files into Excel can save time and reduce fragmented workflows. By attaching source PDFs, Word documents, or CSV files directly to a workbook, you keep related information in one place. According to XLS Library, using structured file insertion reduces time spent searching for original sources and helps keep collaborators aligned. Whether you embed, link, or import content, a deliberate approach improves traceability and reduces data silos. This capability supports practitioners across accounting, project management, and data analysis by keeping context attached to the numbers. When you attach files properly, you also simplify audits, reviews, and collaborative sharing. The goal is to make access predictable, avoid broken references, and preserve the integrity of your workbook as a single source of truth.
Understanding when to embed, link, or import
Excel supports three complementary approaches for handling external files: embedding, linking, and importing. Embedding copies the file into the workbook so it travels with the file, but it increases the workbook size. Linking preserves a reference to the original file, keeping the workbook lighter but requiring the external file to remain in its location. Importing brings file content into Excel as structured data, enabling analysis inside a table or query results. Your choice depends on factors such as file size, collaboration model, and how often the source file changes. For example, attach a project brief as an embedded PDF for offline viewing, link a policy document that updates regularly, or import a CSV for ongoing data analysis. Understanding these behaviors helps you design more reliable workbooks and smoother workflows.
Embedding a file as an object in Excel
Embedding a file creates a self-contained object inside your workbook. To do this, navigate to the Insert tab, select Object, and choose Create from File. Browse to select your file, and optionally enable Display as icon. This method is ideal when you want a single source of truth that travels with the workbook. Remember: embedded files are part of the workbook’s data footprint, so plan for growth. After embedding, you can resize or reposition the icon or thumbnail to fit your sheet layout. The embedded file remains accessible offline and does not depend on the external source.
Display options: showing content vs. icon
Excel gives you display options for embedded objects. If you don’t display the file content directly, you can show an icon to save space and reduce clutter. If you prefer quick previews, keep the content visible, especially for text files or images. The choice affects readability and workbook size, so pick a mode that aligns with how your team consumes the workbook. For training or client deliverables, a clearly labeled icon with a short description can be a clean compromise. In all cases, ensure the object is clearly identifiable (rename the display name) to prevent confusion later.
Linking to a file: advantages and caveats
Linking creates a dynamic connection to the source file. In the Object dialog, you can select Link to file so that the workbook points to the original location rather than embedding the file. This keeps the workbook lighter and ensures you’re always referencing the latest version if the source is updated. However, broken links are a common pitfall when file paths change, or when sharing the workbook without the linked files. To mitigate this, maintain a consistent folder structure and use relative paths when possible. If you move a linked file, you’ll typically need to update the link in Excel.
Importing data from a file into Excel via Get Data
Get Data (Power Query) lets you import content from various file formats (CSV, TXT, Excel, JSON, and more) directly into Excel as a table or query. Start with Data > Get Data, choose the appropriate file type, and navigate to your file. Power Query offers transformation steps to shape the data before loading it into a worksheet. This is ideal for frequent data refreshes or when you need to apply consistent cleaning rules. After loading, you can refresh to pull the latest content without reopening the source file. This method separates raw source files from your analysis workbook, increasing reproducibility.
Working with common file types: what to choose
Different file types suit different tasks. Embedding a PDF or image provides a static reference for readers who don’t need to edit the source. Linking works well for policies or specifications that evolve, provided you can rely on a stable folder structure. Importing is best for data-centric files (CSV, TXT, Excel) where you want to perform filtering, sorting, and calculations. When choosing a method, consider how updates are managed, how many people access the workbook, and whether the source files are stored in shared drives or cloud locations. Each approach has trade-offs between portability, accuracy, and ease of maintenance.
Practical example: a project workbook scenario
Imagine you’re managing a multi-team project with a single Excel workbook tracking tasks, milestones, and budgets. You attach a PDF project brief on the first tab as an embedded object so stakeholders can read it without leaving Excel. You link a living policy document stored in a shared drive to ensure updates are reflected when the workbook is opened. Finally, you import a CSV export of monthly expenses via Get Data to analyze spend trends without copying large data tables into memory. This blended approach keeps context, ensures data integrity, and supports collaboration.
Best practices for maintainable file insertions
Create a consistent naming convention for all inserted items (e.g., [Type][Source][Date]). Store linked files in a dedicated, well-organized folder structure and avoid linking to personal directories. Document the chosen method for each file (embed, link, or import) in a separate sheet or a README within the workbook. Regularly audit your workbook for broken links or outdated imported data and set up a routine to refresh data sources. Finally, consider creating a short training note for teammates to standardize how files are added and updated in shared workbooks.
Tools & Materials
- Excel-compatible file(PDF, Word, CSV, TXT, or other formats you plan to attach or import)
- Microsoft Excel (Windows or Mac)(Office 365 / Excel 2021+ or equivalent)
- Target workbook(A current workbook where you will insert or import the file)
- Backup copy(Optional safety copy of the workbook before making changes)
- Stable file path(Essential if you plan to link to an external file; maintain folder structure)
Steps
Estimated time: 15-25 minutes
- 1
Open the workbook
Launch Excel and open the target workbook where you want to insert or import a file. Ensure you have save permissions and enough storage for embedded objects if you plan to embed large files.
Tip: Save a backup before inserting large attachments to prevent data loss. - 2
Decide insertion method
Determine whether you will embed, link, or import content based on file size, collaboration needs, and whether the source file should stay dynamic. Embedding keeps a copy in the workbook; linking keeps a live reference; importing pulls data into a table.
Tip: Document the chosen method next to the file name for future users. - 3
Embed the file as an object
Go to Insert > Object > Create from File. Browse to select your file and choose whether to display as an icon. Click OK to finish. The file now exists inside the workbook as an object.
Tip: If you display as an icon, rename the icon to something descriptive. - 4
Configure display options
Decide if you want to show the file’s content directly or only an icon. Displaying content is helpful for quick viewing; an icon can keep the sheet tidy while still providing access.
Tip: Use meaningful icons and captions to avoid confusion later. - 5
Link to a file
To link, repeat the steps for embedding but check Link to file in the Object dialog. The workbook will point to the source file’s location rather than storing a copy.
Tip: Prefer relative paths when possible to avoid broken links after a move. - 6
Import data via Get Data
Navigate to Data > Get Data, choose the appropriate file type (CSV, TXT, Excel, etc.), and import into a worksheet. Use Power Query to transform data before loading if needed.
Tip: Apply consistent data types during import to prevent errors later. - 7
Refresh and manage sources
For imported data, set up automatic or on-demand refresh to keep content up to date. Manage source steps in Power Query to ensure repeatable results.
Tip: Document the refresh schedule and data origin. - 8
Save and test
Save the workbook and test access from another user or device to ensure embedded or linked content opens correctly and imported data loads as expected.
Tip: Check both embedded content and external links on a different machine.
People Also Ask
Can I insert multiple files into one Excel workbook?
Yes. You can insert multiple embedded objects or links, and you can import data from several files using Get Data. Manage each item individually and keep a clear inventory of what is embedded, linked, or imported.
You can insert several files by embedding or linking multiple objects, or importing data from multiple sources. Keep track of each item to avoid confusion.
What is the difference between embedding and linking in Excel?
Embedding copies the file into the workbook, ensuring offline access but increasing file size. Linking keeps only a reference to the external file, reducing size but requiring the original file to stay in place.
Embedding copies the file into the workbook, while linking keeps a path to the original. Embedding is offline-friendly; linking keeps the workbook lighter but depends on the source file.
Will embedded files increase workbook size?
Yes, embedding increases the workbook size because the file data is stored inside the workbook. Plan for growth if you routinely embed large documents.
Embedding makes the workbook bigger because the file is stored inside it. It’s something to consider for large attachments.
Can I update the embedded file content automatically?
Embedded content does not automatically update from the original file. If you need automatic updates, use a linked file or set up a data import that refreshes on a schedule.
Embedded files don’t auto-update. Use links or data imports if you want automatic synchronization.
Is it possible to insert files in Excel for Mac?
The basic methods (embed, link, and import) are available on Mac versions of Excel, but the exact menu paths may vary slightly. Check the Mac-specific steps if you’re using Excel on macOS.
Yes, you can insert files on Excel for Mac; the steps are similar but may differ slightly in the menus.
Watch Video
The Essentials
- Choose the insertion method based on stability and size
- Embed for portability; link for live updates; import for data analysis
- Plan a consistent file structure to avoid broken references
- Test access on another device to verify reliability
- Document decisions to improve team adoption