How to Move Lines in Excel: A Practical Guide
Learn to move rows in Excel with drag-and-drop, cut-paste, and keyboard shortcuts. This comprehensive guide covers single- and multi-row moves, formulas, and common pitfalls to keep data organized. Brought to you by XLS Library.

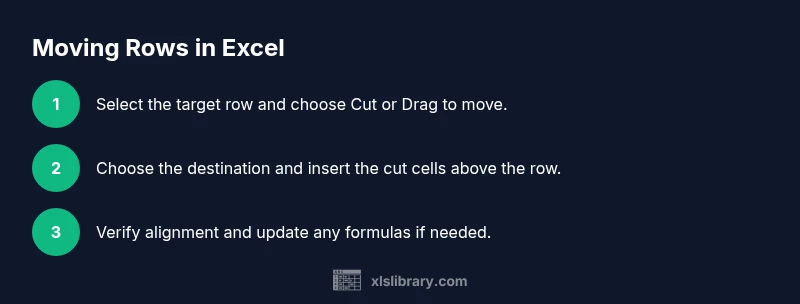
To move lines (rows) in Excel, select the full row(s), cut or drag them to the new position, and then insert or shift surrounding cells to accommodate the move. You can move multiple contiguous rows at once with the mouse or using keyboard shortcuts. According to XLS Library, this basic skill improves data organization while preserving formulas and data integrity in large spreadsheets.
Understanding What It Means to Move Lines in Excel
Moving lines (rows) is a fundamental operation to reorder data in a worksheet. When you move a row, you relocate the entire horizontal record, including cells across all columns, while preserving the content of each cell. This operation is common when aligning quarterly data, reorganizing lists, or grouping related records. According to XLS Library, mastering row movement is a cornerstone skill for clean, efficient spreadsheets and reduces the need for manual copying and pasting across large datasets. In this section, we’ll cover the core concepts and best practices before you start moving lines.
Methods to Move Rows: Drag-and-Drop, Cut-Paste, and Inserting
There are several reliable ways to move rows in Excel, depending on the situation and data layout:
- Drag-and-drop: Select the row header, then drag the entire row to the desired position. Release to insert.
- Cut-paste: Right-click the row header, choose Cut (or press Ctrl+X), select the destination row header, and choose Insert Cut Cells from the context menu.
- Inserting after moving: If you need to create space first, insert a blank row, then move the data into the new row.
Each method preserves the row data but behaves slightly differently with formulas and table structures. Practice with a copy of your data to see how references adjust in your workbook.
Step-by-Step Scenarios: Moving a Single Row, Moving Multiple Rows, Moving Rows in a Filtered View
Moving a single row:
- Save a backup of your workbook.
- Click the row header to select the entire row.
- Cut (Ctrl+X) or drag-and-drop to the new position between two rows.
- If using cut-paste, select the destination row header and insert cut cells.
- Verify that surrounding data shifted correctly and formulas updated.
Moving multiple contiguous rows:
- Click the first row header, hold Shift, and click the last row header to select a block.
- Use Cut or drag-and-drop to the target location.
- Confirm that the block moved together and no data was overwritten.
Moving rows in a filtered view:
- Apply your filter to reveal the rows you want to move.
- Move only visible rows using the same cut-paste or drag-and-drop method.
- After moving, clear the filter and verify all data aligns.
Handling Data Integrity: Formulas and References
Row movement can affect formulas that rely on relative references. Excel adjusts relative references automatically when you move a row, but you should still verify critical formulas after the move. If your workbook uses structured tables (ListObjects), moving rows within a table can alter table structure; consider temporarily converting the table to a normal range for complex moves.
Common Pitfalls and How to Avoid Them
- Merging cells or complex array formulas: Moving rows can disrupt layouts. Avoid moves across merged areas or plan to reformat afterward.
- Hidden rows or filtered data: Ensure you’re moving the intended rows by removing filters or using visible-row selection.
- Tables vs. ranges: Moving within a table may behave differently; understand how ListObjects respond to row shifts.
- Overwriting data: Always move with a backup and verify the destination area is empty or ready to accept the moved data.
Keyboard Shortcuts and Quick Tips
Quickly move lines with these tips:
- Use Ctrl+X to cut, then Ctrl+V to paste (insert) at the destination when not using drag.
- Right-click the destination row and select Insert Cut Cells for precise insertion.
- For bulk moves, select multiple rows by clicking the first row header, holding Shift, and clicking the last, then move.
- Disable automatic calculation temporarily if you’re moving large data sets to reduce recalculation overhead (access via Options).
Best Practices for Large Datasets
When dealing with large worksheets, plan the move in phases:
- Start with a small subset to confirm behavior before moving thousands of rows.
- Use a temporary worksheet to test your move strategy and formulas.
- After moving, run a quick data integrity check: totals, counts, and key references should still align.
- Document the change: note the rows moved, the reason, and the date for future audits.
Checking Your Work: Verification Steps After Moving Rows
After you move lines, verify data alignment across columns and verify key calculations.
- Recalculate totals and subtotals to confirm accuracy.
- Use Trace Precedents and Dependents to inspect formula influence.
- Compare a pre-move snapshot with the post-move workbook to spot discrepancies quickly.
- If something looks off, revert to the backup and try a different method.
Troubleshooting Moving Lines in Excel
If rows refuse to move as expected:
- Check for merged cells or hidden rows that could block movement.
- Ensure there are no protected sheets preventing edits in the target area.
- Confirm you’re not moving into a protected area of a table.
- Restart Excel or try the move in a fresh workbook to rule out application glitches.
Real-World Example: Reordering a Sales Dataset
Imagine a quarterly sales dataset where rows are ordered by product. You want to reorder to align with marketing campaigns. Start with a backup, then move the product lines in blocks so the quarterly totals stay accurate. After moving, verify each product’s totals and adjust any formulas that reference row positions. This practical exercise shows how a simple row rearrangement can improve clarity for reporting and stakeholder communication.
Tools & Materials
- Computer with Excel installed(Office 365 or Excel 2019+ recommended)
- Mouse/trackpad(Precise dragging and selecting rows)
- Backup copy of workbook(Create before large rearrangements)
- Visible gridlines enabled(Helps verify alignment across columns)
- Optional: non-critical test workbook(Practice moves before applying to real data)
Steps
Estimated time: 15-25 minutes
- 1
Prepare your workbook and backups
Before moving any rows, save a backup of the workbook and ensure you have a plan for what to move and where to place it. This reduces risk if something goes wrong during rearrangement.
Tip: Enable AutoSave or save a manual copy in a separate filename. - 2
Identify the target rows
Scan the worksheet to locate the exact rows you need to move. Mark boundaries clearly so you don’t shift unintended data.
Tip: Use the row numbers (headers) to verify you’re selecting the full rows. - 3
Choose a moving method
Decide between cut-paste (Insert Cut Cells) or drag-and-drop based on your comfort level and the data’s complexity.
Tip: Cut-paste works reliably with tables; drag-and-drop is faster for simple moves. - 4
Move a single row with cut-paste
Select the row header, cut (Ctrl+X), select the destination’s row header, and choose Insert Cut Cells to place it above. Check for correct alignment.
Tip: After moving, review adjacent rows for any misalignment. - 5
Move multiple contiguous rows
Select the first row header, hold Shift, click the last row header to define a block, then cut or drag to the new location.
Tip: Ensure the entire block moves together to preserve data relationships. - 6
Move rows within a table or structured range
If data is in a table, moving rows may affect the table’s structure. Move within the table boundaries or temporarily convert to a normal range.
Tip: Tables can auto-adjust, but verify you haven’t broken table references. - 7
Move rows in a filtered view
Apply the filter, move only visible rows, then clear the filter to confirm integrity across all rows.
Tip: Moving hidden rows can cause unexpected gaps if not careful. - 8
Verify formulas after moving
Check that relative references adjust correctly and that any dependent calculations reflect the new row positions.
Tip: Use Trace Dependents to confirm formula paths. - 9
Finalize and document the change
Record what moved, why, and when. Save the final version and compare with the original to ensure accuracy.
Tip: Documentation helps future audits and teammates understand the change.
People Also Ask
Can I move non-adjacent rows in one operation?
Excel does not support moving non-adjacent rows in a single operation. You must move each block separately or use a helper column to rearrange.
Non-adjacent rows can’t be moved in one go; move them one block at a time.
What happens to formulas when I move rows?
Excel automatically adjusts relative references when rows are moved. Absolute references stay the same. Always re-check dependent calculations after large moves.
Formulas adjust with the move, but it’s good to verify critical ones afterward.
Is there a keyboard shortcut to move rows quickly?
There isn’t a universal single-step shortcut to move rows. Use Ctrl+X to cut, then paste with Insert Cut Cells from the context menu or the Home tab to insert at the new location.
You can speed things up with cut-paste and the Insert Cut Cells option.
How do I move rows inside an Excel table (ListObject)?
Moving rows inside a table is supported but can affect the table’s structure. Consider converting to a normal range for complex moves, then convert back if needed.
Tables can support moves but may change the table structure, so proceed with caution.
What should I do if the workbook is protected or shared?
If protection or sharing is enabled, you may need to unprotect the sheet or coordinate with others to perform row moves. Save a backup first.
Unprotect the sheet or coordinate with teammates before moving rows.
Can I move an entire block of rows in a single action?
Yes. Select the row headers for the block, then cut or drag to the new position. Verify that all rows in the block moved together and that data alignment remains intact.
You can move a whole block; just make sure everything shifts together.
Watch Video
The Essentials
- Plan moves before acting
- Move one block at a time to minimize errors
- Check formulas and references after moving
- Use Insert Cut Cells for safer insertion