How to Protect an Excel Sheet with Password
Learn how to password-protect an Excel sheet safely. This practical guide covers sheet protection, encryption options, best practices, and recovery tips to safeguard your data in Excel.

This guide shows you how to protect an Excel sheet with a password using sheet protection and optional workbook encryption. You’ll learn when to apply sheet protection, how to set a password, and how to verify that the protection is active. Strong password practices and testing steps help prevent accidental edits or exposure. We also cover common pitfalls and recovery options if you forget a password.
Understanding protection in Excel: sheet vs workbook vs encryption
According to XLS Library, protecting an Excel sheet begins with understanding the distinctions between sheet protection, workbook protection, and encryption for opening. Sheet protection restricts edits on cells and certain actions while leaving data visible; workbook protection can restrict changes to structure and windows; encryption with a password protects the entire file from opening. In practice, most users should apply sheet protection to limit edits on sensitive sections, and add encryption if the file contains highly sensitive information. When you enable protection, Excel prompts you to create a password. The password is essential for removing protection later, so choose something robust and unique. A strong password usually includes at least 12 characters, a mix of uppercase and lowercase letters, numbers, and symbols. Do not reuse passwords across applications, and consider storing it in a reputable password manager. Remember that protection is not a substitute for secure storage or access control; it primarily prevents accidental edits and casual changes by unauthorized users.
When to use sheet protection vs workbook encryption
There are scenarios where sheet protection alone is enough: you want to prevent accidental edits to formulas, structural changes, or changes to specific cells while keeping the data readable. If your goal is to restrict access to the data itself, you should encrypt the workbook (Encrypt with Password) so that opening the file requires a password. Be aware that Excel encryption strength depends on the version; older Excel versions are weaker. In teams, coordinate with IT to ensure password policies align with organizational standards. Keep in mind that sheet protection offers a balance between security and collaboration; users with the password can still edit protected cells, while others cannot. Test across devices, especially if you work with Excel Online or on different operating systems.
Step-by-step: protect a worksheet with a password
Protecting a worksheet with a password involves selecting the sheet, enabling protection, and setting a password. You can tailor which actions to allow by checking or unchecking options such as formatting cells, inserting rows, or sorting. In most cases you will want to disable edits while permitting basic navigation. After you set the password, make sure to confirm it correctly. Remember that the password is the key to removing protection, so store it securely in a password manager or a secure vault. Finally, save the workbook and test the protection by attempting to edit a protected area to verify that the restrictions are active.
Best practices and common mistakes
Experts at XLS Library emphasize that sheet protection is not a complete security solution. Always pair sheet protection with strong, unique passwords and consider encrypting the entire workbook when sensitive data resides in the file. Avoid simplistic passwords like common words or dates; use a passphrase or a combination of characters. Do not share the workbook password over insecure channels; use a password manager for storage. A common mistake is protecting the wrong sheet or forgetting to save after making changes. Regularly review permissions, especially when collaborating with others, and document where protections have been applied for audits.
Troubleshooting and recovery options
If the protection seems not to work as expected, verify you are protecting the correct sheet and that you are using the desktop version of Excel where the feature is fully supported. Some features differ in Excel Online; always test on the platform you intend to use. If you forget the password, there is no supported method to recover it; rely on backups or unprotected copies to restore access. This is why maintaining backups and documenting the protection setup is essential. For ongoing safety, implement a secondary layer such as encrypting the workbook or using file-level protections in addition to sheet protection.
Tools & Materials
- Microsoft Excel (preferably 2016+ or Office 365)(Desktop version recommended for full protection features)
- Strong, unique password(At least 12 characters with a mix of upper/lowercase, numbers, and symbols)
- Password manager(Store and retrieve passwords securely)
- Backups(Keep an unprotected copy as a recovery option)
- Documentation(Record which sheets are protected and with what settings)
Steps
Estimated time: 15-25 minutes
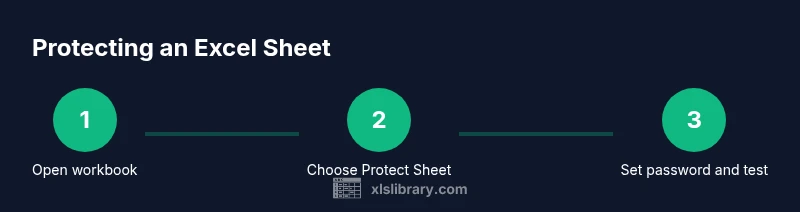
- 1
Open workbook and select the target sheet
Launch Excel, open your workbook, and click the tab of the sheet you want to protect. Ensure the data you want guarded is in view and identify any formulas or important ranges that should remain editable. This ensures you apply protection to the correct area.
Tip: Double-check the active sheet before applying protection to avoid locking the wrong data. - 2
Apply sheet protection
Navigate to the Review tab and select Protect Sheet. In some versions you may find Protect Sheet under the Home or Review tab. Choosing this option opens a password dialog where you will define the protection scope.
Tip: If you cannot see Protect Sheet, check that you are using the desktop app and not Excel Online. - 3
Set a password and permissions
Enter a strong password in the Protect Sheet dialog and choose which actions to allow (for example, select locked cells or format columns). Remember that the password is required to remove protection later.
Tip: Do not reuse passwords from other services; tailor the protection to your specific sheet needs. - 4
Confirm password and save
Click OK, then re-enter the password to confirm. Save the workbook to apply the protections. It is a best practice to test the protection by trying to edit a locked cell.
Tip: Use a test user account if you collaborate to verify that the protections function as intended. - 5
Optional: encrypt the workbook for open protection
If you also want to prevent opening the file, go to File > Info > Protect Workbook > Encrypt with Password and set a separate password. This provides an additional layer of security beyond sheet protection.
Tip: Keep the open-password separate from any sheet-level password and store both securely. - 6
Test, back up, and document
Test the process on a copy of the workbook, back it up, and document which sheets are protected and with which settings. This helps with audits and future maintenance.
Tip: Regularly review protections after workbook updates or role changes.
People Also Ask
Can I password protect a specific worksheet in Excel?
Yes. You can protect a specific worksheet by applying sheet protection to that tab. This prevents others from editing cells unless they know the password or you allow specific actions.
Yes, you can password protect a worksheet to prevent edits; use the Protect Sheet option.
Is sheet protection enough to prevent data exposure?
Sheet protection blocks editing but does not hide data. To prevent viewing the data, use workbook encryption to require a password to open.
Sheet protection only stops edits; it doesn't hide the data. For viewing protection, encrypt the workbook.
What is the difference between Protect Sheet and Encrypt with Password?
Protect Sheet locks editing on a sheet; Encrypt with Password protects opening the file. They serve different use cases; use both when you need to restrict both edits and access.
Protect Sheet locks edits; Encrypt with Password locks opening.
What if I forget the password I set on a sheet?
If you forget the password, there is no supported method to recover. You may need to rebuild from unprotected backups or copies and ensure password storage.
If you forget, there’s no official recovery—backups are your best bet.
Does password protect apply to Excel Online?
Excel Online supports sheet protection, but some features may differ from the desktop. Ensure you test on the platform you’ll use.
Yes, but check differences between desktop and online.
Can I protect multiple sheets with the same password?
Yes. You can apply protection to multiple sheets and reuse the same password, but manage confidentiality when sharing.
Yes, you can use the same password for multiple sheets.
Watch Video
The Essentials
- Protect specific sheets to limit edits, not necessarily hidden data.
- Use strong, unique passwords and store them securely.
- Test protections to verify restrictions are active.
- Back up unprotected copies for recovery.