In Excel Drop Down List: A Practical Guide
Learn to build an in excel drop down list using data validation. This step-by-step guide covers simple and dynamic sources, dependent dropdowns, and best practices for clean, error-free data entry in Excel.

You will learn how to create a reliable in excel drop down list using data validation, manage source lists, and build dependent options for accuracy. This guide covers simple and dynamic lists, common pitfalls, and tips for maintaining data integrity across worksheets. Whether you're building forms, dashboards, or data-entry sheets, mastering this feature will reduce errors and speed up workflows.
Understanding the basics of in excel drop down list
A drop-down list in Excel is a compact data-entry control that restricts input to a predefined set of values. When you select a cell with a valid list, Excel displays an in-cell drop-down arrow, inviting users to choose from the list rather than typing freely. This is powered by Data Validation, a versatile feature that enforces rules on one or more cells. By selecting the List option in Data Validation, you define which values are allowed and what happens if a user attempts to enter a value outside the permitted set. This mechanism is essential for maintaining data consistency, reducing typos, and ensuring downstream calculations or filters behave predictably. In practical terms, a drop-down list is a simple, scalable way to standardize inputs across large worksheets or entire workbooks.
- Primary benefits include error reduction, faster data entry, and easier data cleaning later on.
- It works across single cells, a row, or an entire column, making it adaptable for forms, dashboards, or inventory sheets.
- You can reference a static list, a named range, or a dynamic source that grows as your data changes.
For the aspiring Excel user, understanding this feature lays the groundwork for more advanced techniques like cascading lists and dynamic data validation, which we’ll cover next.
According to XLS Library, in excel drop down list design helps standardize input and reduce data-entry errors across workbooks.
Creating a simple drop-down list
A basic drop-down list is straightforward to implement and ideal for small, static datasets. The core steps are: select the cell or range where you want the list, open the Data tab, click Data Validation, choose List, and enter your source values either directly separated by commas or by selecting a range. When you click OK, the cell shows a down-arrow allowing users to pick from your predefined options. This approach is perfect for menus like “Status” (Open, In Progress, Completed) or “Priority” (Low, Medium, High).
- Use a small, fixed list for longevity and ease of auditing.
- If you plan to share the workbook, consider putting the source list on a separate sheet to keep your main sheet clean and readable.
- You can add an input message and an error alert to guide users and prevent invalid entries.
In practice, a simple drop-down list helps teams enforce consistent data entry across projects. As you grow more comfortable, you can explore dynamic sources that update automatically as your data grows, which is a common next step for efficiency.
Based on XLS Library research, dynamic lists reduce maintenance time and ensure new items appear in the drop-down without manual edits.
Using named ranges for dynamic drop-down lists
Named ranges provide a robust way to manage source data that may expand. Instead of pointing Data Validation to a static list, you define a named range (e.g., StatusList) that refers to a dynamic range using OFFSET or a dynamic formula. This means newly added items automatically appear in the drop-down without changing the validation settings. To implement, create your list on a sheet, define a named range that expands as you add items, and then set Data Validation to reference =StatusList. This approach is especially valuable for datasets that grow over time, such as customer statuses, product categories, or regional codes.
- Dynamic named ranges minimize disruption when data changes.
- Use OFFSET to accommodate new entries or adjustments.
- Always test after updating the source list to confirm visibility in the drop-down.
In real-world use, dynamic drop-downs save time and prevent missed options during daily data entry. The XLS Library team notes that teams that adopt dynamic sources report fewer edits later, especially in collaborative environments.
Creating cascading (dependent) drop-down lists
Dependent drop-downs create a second list whose options depend on the selection in the first list. This is common for categories and subcategories, or country and state selections. The typical setup uses a named range for the first list and, for the second, a formula like INDIRECT to reference a named range that matches the first choice. For example, if the first drop-down selects a department (Sales, Marketing), the second drop-down might show only the roles relevant to that department. Implementing this requires careful planning of your named ranges and a clean data layout to avoid broken references.
- Build a labeled data map that links each first-level option to a corresponding second-level list.
- Use data validation for both drop-downs and ensure the second list updates based on the first selection.
- Test multiple combinations to catch any missing references.
For teams using Excel 365, you can also leverage dynamic array functions like FILTER to build cascading lists more robustly, though this may require newer functions and slightly different setup. XLS Library’s analysis shows cascade lists dramatically improve form accuracy in complex data-entry sheets.
Managing lists with dynamic updates and preventing errors
As datasets evolve, your drop-down lists should adapt without breaking existing workflows. Beyond dynamic named ranges, you can implement table-based sources (Excel Tables) that automatically expand with new entries. Create a table for your source data, then set the Data Validation source to the table column (e.g., =StatusTable[Status]). Tables automatically resize, so your validation source stays current. You can also add data validation rules to handle blanks, duplicates, or unexpected values by using custom formulas or error alerts. For teams that require auditing, enabling the “In-cell dropdown” and “Show input message on cell selection” features helps guide users and maintain consistency.
- Prefer table-based sources for auto-expanding lists.
- Use error alerts to enforce valid values and guide users.
- Periodically audit the source list to remove duplicates or outdated items.
Dynamic lists reduce maintenance overhead and keep your workbooks tidy over time, a point highlighted in XLS Library’s recommendations for scalable Excel solutions.
Common mistakes and troubleshooting tips
Even experienced users encounter hurdles when implementing in excel drop down list. Common issues include referencing the wrong range, failing to save changes after editing the source, and forgetting to lock cells when sharing workbooks. If a drop-down suddenly shows only a partial list or produces errors, first check the Data Validation settings, then verify that the source range is correct and accessible. If you use named ranges, ensure the name points to the right range and that the workbook’s calculation mode is set to automatic. For cascading lists, confirm all dependent ranges exist and that the first drop-down selections match the expected names. Finally, consider using a simple test workbook to validate each component of your setup before deploying it widely.
- Double-check ranges and names after edits.
- Use a separate sheet to host all validation sources to keep inputs organized.
- Create a test scenario to verify every possible path through cascading lists.
The XLS Library perspective emphasizes a controlled, incremental approach: start with a basic list, validate it, then introduce dynamic or cascade features once the core mechanism is solid.
Tips for deployment, sharing, and auditing
When you’re ready to deploy in excel drop down list across a team, document the data validation rules, source data location, and any dependencies. Protect the workbook or specific sheets to prevent accidental changes to validation sources. If you need to share, consider creating a template with ready-made lists and named ranges, so new users can reuse the same structure without modifying the core data. Regular audits can catch stale items or broken references, which is especially important in multi-user environments where contributors add or remove values. Finally, use descriptive names for named ranges and consider adding comments or a legend in a hidden sheet to guide future editors.
- Document validation sources and rules in a dedicated sheet or README tab.
- Protect critical sources and validation rules to prevent accidental edits.
- Keep a change log for major updates to lists.
The practical, repeatable approach outlined here aligns with industry best practices and XLS Library’s guidance for scalable, maintainable Excel workbooks.
Tools & Materials
- Excel software (Office 365 or 2019+)(Any modern Excel version with Data Validation features)
- Source data list on a worksheet(Sheet should be organized as a single column or a named range)
- Named ranges for dynamic lists(Optional but highly recommended for dynamic sources)
- Secondary sheet for source data (optional)(Helpful for complex datasets and easy auditing)
- Shortcut reference sheet for steps(A quick guide tab with keyboard shortcuts (Alt + D + L, etc.))
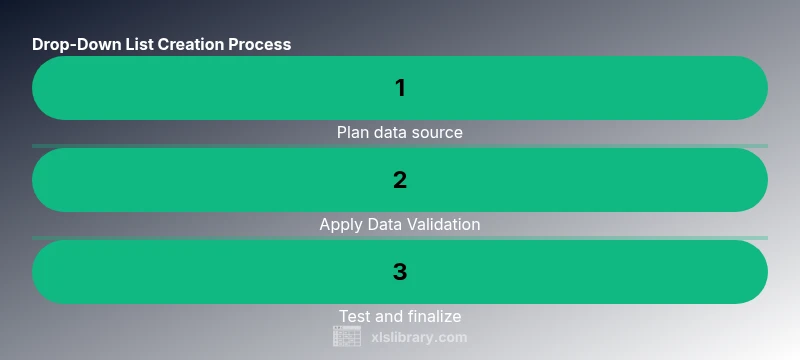
Steps
Estimated time: 20-40 minutes
- 1
Select the target cell(s)
Choose the cells where you want the drop-down list. If applying to a column, select the entire column or a portion of it. This establishes the scope for your validation rule.
Tip: Keep the target range consistent to avoid missing entries later. - 2
Open Data Validation settings
Go to the Data tab, click Data Validation, and pick the List option. This dialog is where you define what values are allowed in the selected cells.
Tip: If Data Validation is disabled, enable it from Excel Options first. - 3
Set the source for the list
Enter your source range or name in the Source field. You can type a static list like Apple, Banana, Cherry or reference a named range such as =StatusList.
Tip: Prefer named ranges for easier maintenance across sheets. - 4
Enable error handling
Configure an error alert to guide users when invalid data is entered. You can customize the message to explain the allowed values.
Tip: A helpful message reduces user frustration and data errors. - 5
Test the drop-down
Click the drop-down arrow in the target cell and verify all expected options appear. Try an invalid entry to confirm the alert works.
Tip: Test with several values to ensure there are no hidden constraints. - 6
Optional: create dependent lists
If you’re using cascading drop-downs, define the second list’s source to depend on the first selection (often via INDIRECT or dynamic arrays).
Tip: Plan your data map before creating formulas or named ranges. - 7
Copy across cells or sheets
Use Fill Handle or Paste Special to apply the same validation to other cells. If you’re applying to multiple sheets, repeat the setup for consistency.
Tip: Pasting validation keeps the behavior uniform across the workbook. - 8
Document and protect
Record the rules in a legend, and protect the source ranges to prevent accidental edits.
Tip: Consider a template with predefined lists for teams.
People Also Ask
What is a drop-down list in Excel?
A drop-down list restricts input to predefined values, enhancing consistency and reducing input errors. It is created via Data Validation -> List and can reference a static list, a named range, or a dynamic source.
A drop-down list in Excel limits what users can type to predefined options, making data entry faster and more reliable.
How do I create a basic drop-down list in Excel?
Select the cells, open Data Validation, choose List, and enter your source values or range. This creates the in-cell dropdown arrow for users to pick from.
To create a basic dropdown, use Data Validation, choose List, and point to your source data.
How can I make a dynamic drop-down list?
Use a named range tied to a dynamic range (for example with OFFSET or a table) so that new items automatically appear in the list without editing the validation each time.
Make the source a dynamic named range or a table so the list grows automatically as you add items.
What are cascading drop-down lists and how do I set them up?
Cascading lists use the selection in one drop-down to filter the options in a second. This often uses INDIRECT to pull from a second named range that matches the first choice.
Cascading lists adjust the second dropdown based on the first selection for guided data entry.
Can I copy a drop-down list to many cells or sheets?
Yes. Use the Fill Handle or Paste Special to apply the same validation rules to adjacent cells or other sheets, ensuring consistency.
You can duplicate a drop-down by copying the cell and pasting validations across destinations.
How do I remove a drop-down list?
Select the cells, open Data Validation, and choose Clear All or set Allow to Any Value to remove restrictions.
To remove it, clear the Data Validation settings for the cells.
Watch Video
The Essentials
- Define a drop-down with Data Validation to enforce valid inputs
- Use named ranges for dynamic and maintainable sources
- Consider cascading lists to refine data entry
- Protect and document validation for team-wide reliability