Lock Cell Excel: A Practical Guide to Protecting Sheets
Learn how to lock cells in Excel to prevent edits. This practical guide covers unlocking cells, protecting sheets, and creating editable ranges with clear steps and safety tips.

This guide shows you how to lock cells in Excel to prevent edits. You'll prepare by unlocking all cells, designate which ones stay editable, and then protect the sheet (with an optional password). You can also create editable ranges for trusted users. The steps apply to Excel for Windows and Mac alike.
Why Lock Cells in Excel Matters
In collaborative spreadsheets, accidental edits can derail calculations, corrupt formulas, or reveal sensitive data. Locking cells is a foundational discipline of spreadsheet hygiene. According to XLS Library, sheet protection is one of the most effective controls teams use to preserve integrity while still allowing necessary input in designated areas. By design, Excel's cell locking is inert until you enable sheet protection; the locked attribute alone does not block edits. This means you have to combine the two features to achieve real protection. In practice, you lock cells you want to guard and unlock those you expect others to modify. The result is a predictable, auditable editing surface that reduces errors, accelerates collaboration, and reinforces data-entry standards.
Understand the Difference: Sheet Protection vs. Workbook Protection
Sheet protection prevents edits to cell contents and many formatting actions, while workbook protection guards structure (such as adding, deleting, or renaming sheets) and certain features. In most daily workbooks, protecting the sheet is sufficient to stop casual changes, while workbook protection adds a higher level of guardrails for organizational integrity. Based on XLS Library research (2026), many teams rely on sheet protection as the primary defense, reserving workbook protection for structural controls in multi-user environments.
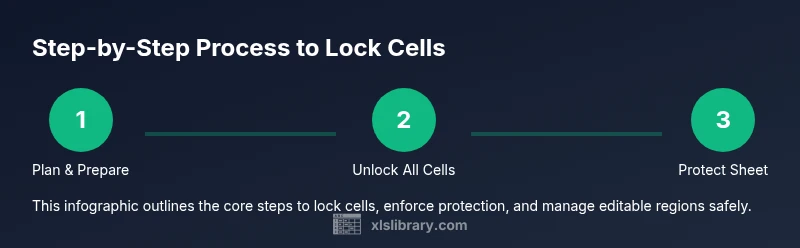
Tools & Materials
- Computer with Excel installed (Windows or Mac)(Ensure you have access to Review tab for protection features.)
- Unlocked workbook (backup copy created)(Start with a clean state; all cells unlocked before locking.)
- Password (optional)(Use a strong password; store securely.)
- Practice worksheet or sample data(Use for testing edits and protection settings.)
- Password manager or secure notes(Keep passwords safe and retrievable.)
Steps
Estimated time: 15-25 minutes
- 1
Open workbook and select entire sheet
Open your Excel workbook and press Ctrl+A (Cmd+A on Mac) to select the entire sheet. This ensures you can reset the locking state for all cells before determining which ones stay editable.
Tip: Starting with a full selection prevents missing cells you intended to lock. - 2
Unlock all cells to prepare for granular locking
With the full sheet selected, open Format Cells > Protection and uncheck the Locked option. This temporarily makes every cell editable so you can designate specific locked areas.
Tip: If you skip this, many cells will remain locked by default and complicate the next steps. - 3
Lock only the intended cells
Select the ranges you want to protect, then re-check Locked in Format Cells > Protection. This creates a precise set of protected cells while leaving others editable.
Tip: Be explicit with ranges to avoid accidental edits in adjacent cells. - 4
Apply sheet protection
Go to Review > Protect Sheet. Optionally enter a password and choose allowed actions (formatting, rows/columns, etc.). This enforces the Locked state and blocks edits.
Tip: Choose a password you can remember or store securely. - 5
Optional: Allow edits to specific ranges
If you have trusted users who must edit certain areas, select Review > Allow Users to Edit Ranges, add a range, and assign a password. This lets specific users modify designated cells without removing protection.
Tip: Use descriptive titles for each range to simplify management. - 6
Save and test
Save the workbook and test by attempting edits in both locked and unlocked regions. Confirm that protected cells reject changes while allowed areas update.
Tip: Test on a copy before applying to a live file. - 7
Optional: protect workbook structure
If you want to prevent adding/deleting sheets or changing sheet order, enable Protect Workbook > Structure. This is separate from sheet protection and adds another layer of protection.
Tip: Only enable this if structure changes must be controlled.
People Also Ask
Can I lock only certain cells in a worksheet?
Yes. First unlock all cells, then select the cells you want to lock and enable protection. This confines the lock to your chosen ranges.
Yes. Unlock all cells first, then lock the ones you want protected.
Will locking cells prevent me from entering data on protected sheets?
Only in ranges that you have explicitly unlocked or configured as editable. Otherwise, protected cells will reject edits.
Only the protected cells block edits; editable ranges stay usable.
How do I unlock cells again if I forget the password?
If you forget the password, the built-in Excel protection cannot be easily bypassed. You should rely on a backup or use password recovery methods provided by your organization.
Without the password, unlocking protected areas can be very difficult; use a backup.
Is workbook protection the same as worksheet protection?
No. Worksheet protection locks cell edits, while workbook protection guards the workbook structure, like adding or deleting sheets.
They're different protections: sheets protect cells, workbook protects structure.
Does Protect Sheet password protect formulas?
Protections can mask or restrict editing of cells containing formulas, but advanced users may still view formulas via Excel's built-in tools. Consider hiding formulas if needed.
Formulas can be protected from edits, but viewing them can require extra steps.
What about Excel versions? Do I have to use Windows?
Most protection features exist in Excel for Windows and Mac. Steps are similar, though menu names may vary slightly by platform.
The protections work on Windows and Mac, with minor UI differences.
Watch Video
The Essentials
- Unlock cells first to plan precise locks.
- Protect the sheet to enforce Lock state.
- Use editable ranges for controlled collaboration.
- The XLS Library team recommends documenting and backing up protection setups.