Protect Excel Cells: A Practical Guide
Learn how to protect Excel cells, sheets, and workbooks to prevent accidental edits. Step-by-step instructions, best practices, and tips for reliable data security in 2026.

Protecting Excel cells means locking specific cells and enabling worksheet protection so edits are restricted to authorized users. This quick answer summarizes how to lock cells, unlock others, and set passwords to safeguard formulas, data, and layout while preserving collaboration. By following these steps, you reduce accidental edits and protect critical data from unintended changes.
What protecting Excel cells means
Protecting Excel cells is a foundational practice for maintaining data integrity in shared workbooks. When you lock cells and apply worksheet protection, only those edits that you explicitly allow will be possible. This is especially important for financial models, calendars, lists with formulas, and forms used by multiple collaborators. According to XLS Library, protecting cells helps prevent accidental overwriting of critical data while still enabling teams to input information where appropriate. The goal is to create a predictable editing environment: sensitive data stays intact, while flexible areas remain usable for entry and validation. In this section we’ll explore the core concepts, the limits of protection, and how to plan a protection strategy that fits your workflow. You’ll learn how to balance security with usability so teammates can contribute without risking the model’s integrity.
Protecting cells in Excel is not about hiding data; it is about controlling who can change what. By default, all cells are locked when protection is applied, but locking alone has no effect until you enable sheet protection. This means you can stage a protection plan by identifying which cells must stay constant and which can accept updates. A well-designed plan minimizes disruption while preserving essential safeguards. As you proceed, treat protection as a workflow, not a one‑off action. The XLS Library team emphasizes documenting decisions and testing thoroughly to avoid surprises later in the project.
In practice, protection should align with real work patterns. For example, a budgeting workbook may lock all formulas while leaving inputs in dedicated cells open for entry. A data entry sheet might lock structure cells while allowing date fields to be edited. The key is to balance control with collaboration, ensuring that your protection strategy supports, rather than hinders, daily tasks. Remember that protection is most effective when paired with clear governance: who can edit what, under which circumstances, and using which password. With this mindset, protecting cells becomes a predictable part of workbook maintenance rather than a source of friction.
Tools & Materials
- Excel software (Windows or Mac)(Any version that supports sheet protection (2010+ recommended))
- Strong password(Optional but recommended for workbook or sheet protection)
- Backup copy of workbook(Before applying protection)
- Documentation checklist(Track protected cells and protected ranges)
Steps
Estimated time: 15-25 minutes
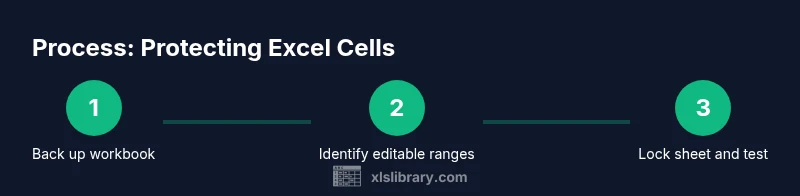
- 1
Back up the workbook
Back up the workbook to create a safe restore point before applying protection. Save a copy in a secure location, preferably with versioning. This ensures you can recover formulas and data if you forget passwords or lock critical cells by mistake.
Tip: Use a descriptive filename and enable version history if available. - 2
Identify editable ranges
Identify which cells must remain editable for day‑to‑day work. Decide which input fields will stay unlocked and which formulas should remain protected. This planning step reduces later frustration when users need to enter data.
Tip: Document the intended editable areas before changing protection settings. - 3
Unlock the editable cells
Select the ranges you want to keep editable, then open Format Cells, go to the Protection tab, and uncheck Locked. This makes those cells editable once the sheet is protected.
Tip: Double-check that all intended cells are unlocked to avoid surprises. - 4
Lock the worksheet
Go to Review > Protect Sheet, set a password, and choose the actions you want to allow (e.g., select locked/unlocked cells, format cells). Protecting the sheet activates the locking on all cells marked as Locked.
Tip: Avoid using a password you cannot remember; consider using password manager notes. - 5
Test the protection
Attempt to edit a locked cell to confirm protection is active. Verify that allowed actions (like selecting cells or sorting) behave as intended based on your choices.
Tip: Test on a copy of the workbook first to prevent accidental data loss. - 6
Consider Allow Users to Edit Ranges
If you need specific users to edit certain cells, configure Allow Users to Edit Ranges with individual passwords or a shared admin password.
Tip: Define who can edit which ranges before enabling this feature. - 7
Save and distribute documentation
Save the protected workbook and share a short guide with collaborators about what is protected and where edits are allowed. Include password handling instructions.
Tip: Keep passwords out of plain text in shared documents; use secure channels for sharing. - 8
Review protections periodically
Regularly review protection settings as team roles change. Revisit editable ranges, passwords, and whether the protection aligns with current workflows.
Tip: Schedule a quarterly reminder to audit protection rules.
People Also Ask
What does protecting Excel cells actually do?
Protecting cells locks selected cells and enables sheet protection so edits are restricted to authorized users. It helps preserve formulas and layout while allowing controlled collaboration. Always plan which cells stay editable and test thoroughly.
Protecting cells locks certain parts of your sheet and keeps others editable, so key formulas don’t get changed by mistake.
How do I protect only certain parts of a sheet?
Unlock the cells that should be editable, then protect the sheet so only locked cells are restricted. You can specify which actions are allowed during protection, such as selecting locked or unlocked cells or formatting. This lets you maintain controlled entry in key areas.
Unlock the areas you want edited, then protect the sheet and choose what users can still do.
What is the difference between protecting a worksheet and a workbook?
Protecting a worksheet restricts edits to cells within that sheet, while protecting a workbook can prevent structural changes like adding or deleting sheets. Use worksheet protection for data integrity and workbook protection for structural stability.
Worksheet protection locks cell edits; workbook protection stops users from adding or removing sheets.
What happens if I forget the protection password?
If you forget the password, access to protected features is restricted. Recovery options depend on Excel features and environment. Always maintain a secure password record or use a password manager.
If you forget the password, it can be hard to regain access, so keep it stored safely.
Can I protect cells without passwords?
You can enable protection without a password, but this option offers weaker security because anyone can unprotect the sheet. For collaborative work, a password adds a necessary layer of control.
Yes, you can, but it’s less secure without a password.
Watch Video
The Essentials
- Lock critical cells first to safeguard formulas.
- Document editable ranges and protection rules.
- Test protection after applying it to catch gaps.
- Store passwords securely and back up files.
- Review protections with collaborators periodically.