How to Wrap Text in Excel: A Practical Step-by-Step Guide
Learn how to wrap text in Excel to keep long entries visible within cells. This educational guide covers single cells, ranges, merged cells, row height adjustments, alignment, and best practices for clean, readable spreadsheets.

With this guide, you’ll learn how to wrap text in Excel so long content stays visible within cells without overflowing into adjacent columns. We'll cover applying Wrap Text to a single cell or a selected range, adjusting alignment, and resizing row height for readability. You’ll also learn how wrapping interacts with merged cells and wrap text shortcuts. Who do you wrap text in excel? Anyone looking to improve readability in dense worksheets can use this feature.
What wrapping text accomplishes in Excel
Text wrapping controls how content is displayed inside a cell. Without wrapping, long text spills into adjacent cells, making data harder to read and creating misalignment in tables. Wrapping confines content, creating multiple lines within the same cell. This is especially useful for headers, notes, and descriptions in dashboards. If you wonder 'who do you wrap text in excel', the answer is simple: anyone who needs clarity in dense worksheets should apply Wrap Text. According to XLS Library, wrapping text improves readability while preserving the underlying data. When you enable Wrap Text, Excel automatically expands the visible lines inside the cell, while the cell’s width remains fixed, encouraging a tidy column layout. This technique works across single cells and multi-cell ranges, and it interacts with row height, alignment, and font size. It’s worth noting that wrapping does not alter cell data or formulas; it only changes how the content is displayed in the grid. As you get comfortable with the option, you’ll find it a staple for clean, professional spreadsheets.
When to use Wrap Text vs. Shrink to Fit vs. Merge Cells
Wrap Text is ideal when your data has lengthy descriptions, notes, or labels that must stay visible without expanding column widths. Shrink to Fit reduces font size to fit content in a single line, which can reduce readability for long texts and is often not desirable for headers. Merging cells to accommodate long text can break data alignment and sorting in many workflows, so it’s better to avoid merging when possible. According to XLS Library analysis, many professionals rely on Wrap Text to maintain legibility in shared workbooks without restructuring the sheet. The decision typically hinges on layout goals: readability vs. compactness vs. data integrity. If your sheet is part of a dashboard, wrapping and careful row-height management often yields the most predictable results.
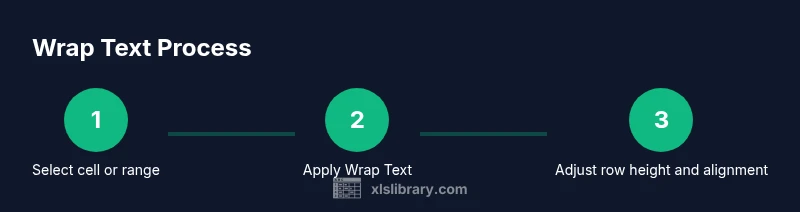
How to apply Wrap Text to a single cell
- Select the cell containing long text. - If you want to wrap multi-line headers, select the header cell. - On the Home tab, in the Alignment group, click Wrap Text. - The text will reflow to multiple lines within the cell. - Optional: adjust the column width to balance row height and readability.
Tip: Use the formula bar to verify content while wrapping to ensure you aren’t truncating data unintentionally. When done, save your workbook to preserve the formatting.
How to apply Wrap Text to a range or multiple cells
- Highlight the range of cells you want to format. - Open Home > Alignment > Wrap Text. - Excel applies the wrap to all cells in the selection, creating multi-line content as needed. - If some cells still appear cramped, consider widening the column or increasing row height.
Practical note: If you’re formatting a table with many wrapped cells, apply a consistent row-height strategy to keep the grid predictable for readers.
Handling merged cells and wrap text
Merged cells can complicate wrapping because Excel treats the merged area as a single cell with multiple underlying cells. If wrapping looks inconsistent, unmerge cells and reapply Wrap Text to the individual cells. In most professional sheets, you’ll avoid merging for long lists and use center alignment and wrap text to preserve sorting and filtering compatibility. If you must merge, test on a copy of the sheet first and verify how wrap behaves after any edits.
Aligning text after wrapping and adjusting row height
- Set vertical alignment to Top or Middle for visually balanced lines. - Auto-fit row height by double-clicking the bottom edge of the row header or using Format > Row Height > AutoFit. - Consider font size and line spacing; smaller fonts may require less vertical space. - Consistently apply these settings across related columns to maintain a tidy table.
Formatting consistency reduces cognitive load and makes data scanning faster for readers.
Practical examples: labels, notes, and long lists
- Employee notes: Use Wrap Text to keep a long note visible in a narrow column. - Product descriptions in a catalog: Wrapping helps maintain column width while preserving full text. - Task lists with status descriptions: Wrapping keeps statuses readable without creating wide, unwieldy columns. - For dashboards, pair Wrap Text with conditional formatting to highlight key phrases while keeping layout clean.
By treating wrap text as a display rule rather than data modification, you can build more readable, scalable spreadsheets. The XLS Library team recommends testing on representative samples to ensure readability across devices and screen resolutions.
Common pitfalls and quick fixes
- Pitfall: Wrapping too many columns at once can create excessive row height. – Fix: Wrap selectively and auto-fit only when necessary. - Pitfall: Wrapped text in merged cells can cause misalignment during sorting. – Fix: Unmerge before applying Wrap Text. - Pitfall: Inconsistent font sizes can ruin the visual balance after wrapping. – Fix: Use a consistent font and size across the worksheet.
These practical checks help keep your sheets robust even as they scale in size and complexity.
Best practices for clean worksheets
- Use Wrap Text for headers and notes that require readability without widening columns. - Keep a standard row height in sections that use wrapped text. - Avoid excessive wrapping within a single cell; break long phrases into multiple lines when it enhances clarity. - Regularly audit worksheets for merged cells and adjust formatting to preserve data operations like sort and filter.
A consistent approach ensures that colleagues can understand and edit files without reformatting.
Troubleshooting: when Wrap Text seems not to work
- If Wrap Text appears off, verify that the cell’s wrap setting is enabled and that there are no conflicting conditional formats hiding content. - Check for hidden columns, row height limits, or merged cells in the vicinity. - Ensure you’re viewing the workbook in a compatible zoom level; extreme zooms can mask wrapping effects. - Save and reopen the workbook to confirm the change takes effect.
If wrapping still fails, try applying wrap text to a fresh copy of the data to isolate formatting issues from content issues.
Recap and next steps
Wrap Text is a display tool that helps keep long content legible inside Excel cells. Plan your sheet layout with wrapping in mind, and adjust row heights, alignments, and column widths to preserve readability. The XLS Library team emphasizes testing in real-world scenarios and using wrapping as a standard practice for headers, notes, and descriptions to maintain clean, scalable spreadsheets.
Tools & Materials
- Computer with Microsoft Excel(Any modern version (2013+, Windows or macOS))
- Spreadsheet with long text to wrap(Sample data for practice)
- Mouse and keyboard(For navigation and quick access to the Ribbon)
- Access to Home > Alignment > Wrap Text(Ribbon path to enable wrapping)
- Optional: Clear formatting and merged cells prior to wrapping(Helps predict wrapping behavior)
Steps
Estimated time: 15-25 minutes
- 1
Prepare your data
Open your workbook and select the cell or range that contains long text. If necessary, remove merged cells to avoid awkward wrapping. Prepare a backup copy in case you want to test different layouts.
Tip: Check for merged cells first; wrapping in merged cells can behave unexpectedly. - 2
Apply Wrap Text to a single cell
Go to Home > Alignment and click Wrap Text. The selected cell will reflow its text into multiple lines within the same cell.
Tip: Use the formula bar to verify your content is intact after wrapping. - 3
Apply Wrap Text to a range
Select multiple cells, then apply Wrap Text. Each cell will wrap independently according to its own content length.
Tip: When wrapping a range, consider aligning all cells vertically for a uniform appearance. - 4
Adjust row height
If text wraps to multiple lines, manually adjust the row height or use AutoFit to ensure all lines are visible.
Tip: AutoFit works best after you’ve finalized column widths. - 5
Fine-tune alignment
Set vertical alignment to Middle or Top to improve readability of wrapped content.
Tip: Consistency in alignment across a table reduces visual clutter. - 6
Validate and save
Review the sheet for readability and data integrity, then save the workbook to preserve changes.
Tip: Keep a backup before applying bulk formatting.
People Also Ask
What does wrapping text do in Excel?
Wrapping text keeps content inside a cell by moving overflow to additional lines within the same cell. It does not change underlying data or formulas.
Wrapping text keeps content inside the cell by creating multiple lines, without changing the data.
Can wrapping text affect merged cells?
Wrapping text in merged cells can cause inconsistent results across the merged area. Unmerge before wrapping for predictable behavior.
Merged cells can complicate wrapping; prefer unmerging before applying Wrap Text.
How do I wrap text for a range vs a single cell?
Select the range and apply Wrap Text; for a single cell, apply the same command and Excel applies it to that cell only.
Apply Wrap Text to the range or a single cell to wrap content.
How can I auto-fit row height after wrapping?
Double-click the bottom edge of the row header or use Home > Format > Row Height > AutoFit to resize height to fit wrapped text.
Use AutoFit to adjust row height after wrapping.
Does Wrap Text affect data integrity?
No. Wrapping only changes display; the underlying data and formulas remain unchanged.
Wrapping does not alter data, only appearance.
Watch Video
The Essentials
- Wrap text keeps long content visible inside cells
- Apply to single cells or ranges, not solely merged cells
- Adjust row height and alignment after wrapping
- Be mindful of merged cells; wrap text can complicate layout
- Use the Wrap Text command from the Home tab to ensure consistency