How to Wrap Text in an Excel Cell: A Practical Guide
Learn how to wrap text in an Excel cell to improve readability. This guide covers auto-wrapping, manual line breaks, alignment, and best practices for clear, professional spreadsheets.

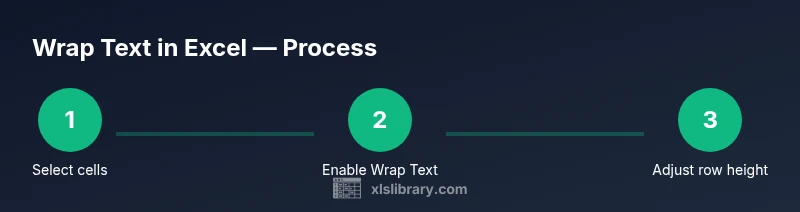
Wrapping text in an Excel cell keeps long values visible without widening every column. In practice, enable Wrap Text from the Home tab, then adjust vertical alignment and row height to fit all lines. You can also use Alt+Enter to insert manual line breaks for precise control, and explore wrap options in older Excel versions.
Understanding Wrap Text in Excel
Wrapping text in Excel is a formatting feature that allows a cell's content to display on multiple lines within the same cell, instead of overflowing or truncating. This feature is essential when working with long descriptions, notes, or multi-part data in dashboards and reports. When enabled, Excel automatically breaks lines to fit the column width and wraps the remaining content to subsequent lines. According to XLS Library, using wrap text effectively can dramatically improve readability in complex spreadsheets and make data far easier to scan during reviews. In practice, you should reserve wrap text for cells where the content would otherwise run off-screen, ensuring that your visual layout remains clean and consistent across rows and columns.
Key takeaway: wrap text is a formatting decision, not a data change; it affects presentation, not the underlying values.
Methods to Wrap Text in a Cell
There are several reliable ways to wrap text in Excel, depending on your version and preference. The simplest method is to use the Wrap Text button on the Home tab. Select the target cells, click Wrap Text, and Excel will display all content within the available width by creating line breaks automatically. For precise control, you can insert manual line breaks with Alt+Enter (Windows) or Option+Enter (Mac). This lets you control where lines break, which is especially useful for titles or headers within a larger data table. If you’re preparing a report, you may also adjust the column width to balance readability with space usage.
Pro tip: for Windows users, you can toggle wrap text with a single keyboard shortcut by selecting the cells and pressing Alt+H, W, and then entering. Mac users can access the same option from the Format Cells dialog under Alignment.
When to Use Auto-Wrapping vs Manual Line Breaks
Auto-wrapping is great for text-heavy cells where you want Excel to handle line breaks automatically as the column width changes. Manual line breaks provide precise control for short phrases that require specific breaks, such as headers or notes that align with other elements in your sheet. In practice, dashboards often benefit from auto-wrapping to maintain consistent line lengths, while title cells or labeled fields may require manual breaks for a neat, predictable appearance. Based on XLS Library analysis, teams frequently combine both approaches to keep dashboards readable while preserving the exact structure of key labels.
Tip: test both methods on a sample sheet to see which produces the most legible result for your audience.
Formatting for Readability: Alignment, Row Height, and Merged Cells
Beyond wrapping, alignment and row height influence readability. Vertical alignment (top, middle, bottom) ensures content sits where readers expect it, while horizontal alignment controls alignment within the cell’s width. After wrapping, you should use AutoFit Row Height to ensure every line is visible, or manually adjust row heights for dense data. Merged cells can complicate wrapping; if you must wrap across merged cells, consider unmerging and redesigning the layout to avoid inconsistent wrapping and misaligned text. Consistent font size and padding help maintain a clean, professional look.
Best practice: apply wrap text only to cells that need it, not to entire columns by default, to avoid unnecessary layout changes in large spreadsheets.
Troubleshooting Common Wrapping Issues
If wrapping doesn’t appear to work, first verify that the cell is not part of a merged group that disrupts line breaks. Check that the row height is sufficient; otherwise, wrapped content may appear truncated. Another common issue is wrapping being applied to a cell with a formula that returns a long string; ensure the result is not hidden by column width or conditional formatting. If text still won’t wrap, reselect the cells, reset the alignment, and reapply Wrap Text. Finally, confirm you’re using a modern Excel version that supports wrap text functionality, as some legacy versions handle wrapping differently.
Note: always save a copy before making large formatting changes in a complex workbook.
Advanced Tips and Shortcuts
For power users, combining wrap text with conditional formatting can highlight key notes without sacrificing readability. Use Alt+Enter for controlled breaks in headers, and consider creating a reusable style that includes Wrap Text, vertical alignment, and a fixed row height for consistent reports. If you frequently work with long text in many cells, you can create a custom style or a macro to apply Wrap Text to a selected range automatically. Remember to document formatting choices in your workbook so teammates understand the layout decisions.
Caution: avoid excessive wrapping in cells that feed into charts or pivot tables, as visual alignment may drift when refreshing data.
Applying Wrap Text Across a Range: Best Practices
When wrapping text across a large range, start with a pilot area to refine row heights and alignment before applying to the entire sheet. Use a clear and consistent column width strategy so that wrapped lines do not create irregular row heights. For multi-column headers that require wrapping, group related columns and ensure that each header remains legible through controlled line breaks. Finally, test the worksheet on different screen sizes or print layouts to confirm that the wrapped content remains readable in various contexts.
Bottom line: thoughtful wrapping, aligned with a consistent format, improves readability without compromising data density.
Tools & Materials
- Computer with Excel installed (Windows or macOS)(Excel 2016+ recommended; Excel 365 works best for live dashboards)
- Sample workbook containing long text fields(Include descriptions or notes to test wrapping)
- External monitor or adjustable workspace(Helpful for reviewing layout on large displays)
- Keyboard shortcuts reference (Alt+Enter, etc.)(Keep handy for quick line breaks)
Steps
Estimated time: Estimated total time: 15-25 minutes
- 1
Open workbook & select target cells
Open the workbook that contains the data you want to wrap. Use the mouse or keyboard to select a single cell or a range where wrapping is needed. This ensures the Wrap Text setting applies to the intended area.
Tip: Use Ctrl+Shift+Arrow keys to quickly select a block of cells. - 2
Enable Wrap Text on the selected cells
Go to the Home tab and click Wrap Text. Excel will automatically wrap content within the selected cells to fit the column width.
Tip: If Wrap Text is disabled by a theme, reapply the style after wrapping. - 3
Adjust row height to fit content
After wrapping, the content may require more vertical space. Use AutoFit Row Height or manually drag the row boundary to fit all lines.
Tip: Double-click the row boundary to auto-fit height for the selected rows. - 4
Insert manual line breaks for precise control
Place the cursor inside a cell and press Alt+Enter to insert a line break at your preferred point. This is useful for headers or titles that need specific breaks.
Tip: Combine with a small font size to keep lines compact. - 5
Fine-tune alignment & borders
Set vertical alignment to top or middle and adjust horizontal alignment as appropriate. Consider light borders or gridlines to improve readability without clutter.
Tip: Use a consistent font and padding to preserve legibility. - 6
Review & save
Review the wrapped content in different views (screen and print). Save the workbook and note any cells that require future adjustments.
Tip: Document your formatting decisions for teammates.
People Also Ask
What is wrap text in Excel and why should I use it?
Wrap text formats a cell so content appears on multiple lines within the same cell. It improves readability for long descriptions and helps dashboards stay neat without expanding column widths.
Wrap text in Excel formats a cell to show content on multiple lines, making long entries easier to read without making columns wider.
Does wrap text affect the underlying data?
No. Wrapping only changes display formatting. The actual cell value remains the same; formulas, filters, and sorts operate on the original data.
Wrapping is a formatting change; it doesn’t alter the data itself, only how it’s shown.
Can I wrap text in merged cells?
Wrapping in merged cells can be unpredictable. If possible, wrap text in individual cells and avoid merges for stable formatting.
Wrapping merged cells can behave oddly; consider avoiding merges for consistent wrapping.
Why isn’t wrap text working after I updated Excel?
Check if the selection is still active, ensure Wrap Text is enabled, and verify row height. Sometimes a workbook theme overrides formatting; reapply the style if needed.
If wrapping stops working, recheck the selection, reapply Wrap Text, and adjust row height as needed.
Is wrap text available in all Excel versions?
Wrap Text is available in modern Excel versions across Windows and macOS. If you’re using an older or limited version, consult Help for the specific edition’s formatting options.
Most recent Excel versions support Wrap Text; check Help if you’re using an older edition.
Should I always auto-fit row height after wrapping?
Auto-fit is convenient for pages and dashboards but may create uneven rows in some layouts. Review the result and adjust manually if needed.
Auto-fit is helpful, but review the final look to ensure lines align nicely.
Watch Video
The Essentials
- Wrap text enhances readability without widening columns.
- Choose auto-wrap for dashboards and manual breaks for headers.
- Adjust row height after wrapping for complete visibility.
- Test across views and document formatting decisions.