How to excel if: Master the IF Function in Excel
Learn how to excel if you want to apply conditional logic in Excel using the IF function. This practical guide covers syntax, nesting, AND/OR combinations, and real-world scenarios to boost data mastery with XLS Library.

Master the IF function in Excel with this step-by-step guide. You’ll learn basic syntax, nested logic, and how to combine IF with AND/OR for complex conditions. By the end, you’ll be able to confidently apply IF to real-world data tasks and improve spreadsheet automation. This quick answer prepares you for deeper sections, ensures proper syntax, and highlights common pitfalls.
Understanding the IF Function in Excel
According to XLS Library, the IF function is the cornerstone of conditional logic in Excel. If you're asking how to excel if you want to automate decisions in your data, the IF function tests a condition and returns a value when true and another when false. The syntax is simple: IF(logical_test, value_if_true, value_if_false). The real value comes from using IF in combination with other functions and operators to model real-world decisions. In practice, you’ll start with a single threshold and then expand with nested tests as your data grows. This section lays the foundation: what the function does, how Excel evaluates conditions, and how to translate real-world questions into a formula. You’ll learn terminology, common patterns, and the way IF interacts with types (numbers, text, and logicals). The XLS Library team found that grounding your understanding in everyday tasks helps you remember rules and apply them consistently.
Building Your First IF Formula
To build your first IF formula, identify the test, the result if true, and the result if false. For example: =IF(A2>60, "Pass", "Fail"). This simple pattern checks whether a score in A2 exceeds 60 and returns Pass or Fail accordingly. If you want to extend this beyond a single test, you can nest another IF inside the false branch: =IF(A2>60, "Pass", IF(A2>50, "Retake", "Fail")). Practice with a few rows to see how dragging the fill handle updates the references. This hands-on approach builds confidence in applying IF to grading, budgeting, eligibility, and more.
Handling Text and Numbers in IF
IF must handle both numeric and text data, and you can tailor tests to fit your data type. For numbers, you test with operators like >, <, >=, <=. For text, you compare strings or use functions like ISTEXT, ISNUMBER, or EXACT. Example: =IF(A3="Yes","Approved","Denied") or =IF(ISTEXT(B3), "Text present", "Not text"). Be mindful of locale-specific separators and how Excel interprets blanks. Understanding these nuances helps you avoid common mistakes when you copy formulas across dozens of rows.
Nested IFs vs IFS: Choosing the Right Approach
Nested IFs are powerful but can quickly become hard to read. IFS, available in newer Excel versions, offers a cleaner alternative by evaluating multiple conditions in order without deep nesting. Example: =IFS(A2>90, "A", A2>80, "B", A2>70, "C", TRUE, "D"). If you need to support older workbooks, stick with nested IFs but keep readability by indenting lines and adding comments. Your goal is a maintainable formula that future you can understand without rereading the logic.
IF with AND/OR: Complex Conditions
Combine IF with AND or OR to test multiple criteria in a single row. For instance, =IF(AND(B2>0, C2>1000), "Eligible", "Not eligible") checks two conditions together. OR allows any one of several conditions to pass: =IF(OR(D2="Pass", E2>75), "Ok", "Review"). The key is to anchor tests in clearly defined thresholds and to document the logic so teammates can interpret it quickly.
Real-World Scenarios: Grades, Status, Thresholds
IF shines when you need to categorize data. Examples: assigning letter grades from numeric scores, labeling project status, or flagging values that exceed a limit. For grades, you might nest multiple tests to assign A–F. For status, IF can translate numeric milestones into textual labels ("On Track", "Behind"). Threshold logic helps automate dashboards, reducing manual errors and speeding up reporting. The more you practice with realistic datasets, the faster you’ll spot patterns and reuse formulas.
Troubleshooting Common IF Errors
Common errors include missing closing parentheses, wrong argument separators for your locale, and referencing empty cells. If Excel returns #VALUE!, check data types and ensure tests are logical. If you see #NAME?, verify that you typed IF correctly and that your workbook is set to a locale that uses the correct separator (comma or semicolon). When in doubt, break the formula into steps in separate cells to isolate where the logic goes wrong.
Extending with Related Functions: CHOOSE, SWITCH, IFERROR
As your datasets grow, extend IF logic with related functions. CHOOSE selects from a list based on a numeric index. SWITCH (Excel 2016+) evaluates expressions against a list of cases and returns the corresponding result, reducing nesting. IFERROR helps catch and gracefully handle errors from nested tests. Combining these tools lets you build robust decision rules while keeping formulas readable and maintainable.
Documentation and Reproducibility: Keeping Formulas Explainable
Document every decision rule behind an IF formula by adding comments or a separate documentation sheet. Use named ranges for logic components and avoid hard-coded constants scattered across cells. This practice improves reproducibility and makes it easier for teammates to audit and update rules as data requirements change. The goal is a transparent, auditable decision trail that others can follow.
Tools & Materials
- Excel (Windows or macOS, 2019+ or Office 365)(IF function is available in all current versions; use latest for best compatibility)
- Dataset or sample workbook(Include a column of numbers and one of text to test logical tests)
- Blank workbook or new worksheet(Keep originals intact while practicing formulas)
- Internet access (optional)(Great for looking up official documentation and examples)
- Notes on regional separators(Some locales use semicolons ; as argument separators)
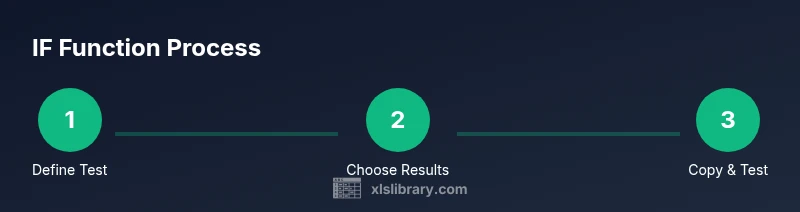
Steps
Estimated time: 15-25 minutes
- 1
Open your workbook and identify the test
Open the dataset where you want to apply the IF logic. Decide which column contains the value to test and what the true/false outcomes should be.
Tip: Document the test in plain language before writing the formula. - 2
Enter your first IF formula
In a new column, type =IF(A2>60, "Pass", "Fail"). Adjust the cell references to fit your data.
Tip: Use quotes around text results to ensure Excel treats them as strings. - 3
Copy the formula down the column
Drag the fill handle to apply the formula to adjacent rows. Verify that references adjust correctly (A2 → A3, etc.).
Tip: If you see #REF! or #VALUE!, re-check relative references and data types. - 4
Test with blanks and edge cases
Leave some cells blank or insert boundary values (60, 61) to observe reactions and ensure consistency.
Tip: Use IF with ISBLANK or a custom test to handle blanks gracefully. - 5
Add a second condition with nesting
Implement a nested IF to extend logic: =IF(A2>60, "Pass", IF(A2>50, "Retry", "Fail")).
Tip: Keep the nested structure readable and comment where possible. - 6
Switch to IFS for multiple tests (optional)
If using a modern Excel version, replace nested IFs with IFS for readability: =IFS(A2>90, "A", A2>80, "B", TRUE, "C").
Tip: Confirm workbook compatibility before saving with IFS. - 7
Combine with AND/OR for complex logic
Use logical operators to require multiple criteria: =IF(AND(B2>0, C2>1000), "Eligible", "Not eligible").
Tip: Test each condition separately first to avoid logic traps. - 8
Test edge cases and document results
Check various data states and ensure the outcomes align with expectations; annotate formulas or keep a separate log.
Tip: Create a small test list with expected results to validate quickly. - 9
Review and optimize for maintenance
Look for opportunities to simplify, rename ranges, and remove hard-coded constants where possible.
Tip: Aim for readability; introduce named ranges to clarify intent.
People Also Ask
What is the IF function in Excel?
The IF function tests a condition and returns one value if true and another if false. It’s the foundation for conditional logic in Excel formulas.
The IF function tests a condition and returns a value based on whether the condition is true or false.
How do I nest IF statements in Excel?
Nest IF statements by placing a complete IF formula inside the value_if_true or value_if_false part of another IF. This allows multiple sequential tests.
Nest IF statements by putting one IF inside another to test multiple conditions.
What’s the difference between IF, IFS, and CHOOSE?
IF tests one condition at a time; IFS handles multiple conditions in order without nesting; CHOOSE selects a value from a list based on an index.
IF handles a single condition first; IFS checks many; CHOOSE picks from a list by index.
Can IF handle text comparisons?
Yes. You can compare text directly or with functions like EXACT for case-sensitive checks. Ensure data is consistent in formatting.
Yes, you can compare text, and consider using EXACT for case-sensitive checks.
How do I use IF with AND/OR?
Combine IF with AND or OR to test multiple conditions in a single formula, aiding complex decision rules.
Pair IF with AND or OR to test multiple conditions at once.
What are common IF errors and how to fix them?
Common errors include missing parentheses, wrong separators, and mismatched quotes. Break the formula into parts to identify the issue.
Common errors are missing parentheses, separators, or quotes; test step by step to locate the problem.
Watch Video
The Essentials
- Learn the IF syntax: IF(logical_test, value_if_true, value_if_false)
- Copy formulas with relative references to fill down quickly
- Nested IFs reduce readability; consider IFS for clarity
- Use AND/OR to handle multiple conditions in one test
- Document logic and test with edge cases for reliability