Excel Mailing Labels: Create, Format, and Print
Learn how to create, format, and print mailing labels from Excel with a practical, step-by-step approach. This guide covers data preparation, template selection, mail merge setup, printing tips, and best practices to ensure clean, professional results.

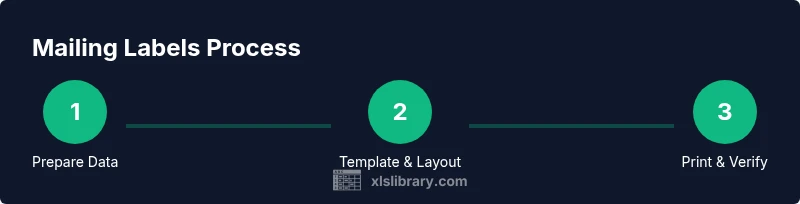
By the end of this guide you'll be able to create, format, and print Excel mailing labels from a data sheet. Key prerequisites are a clean Excel list with columns for name and address, a standard label sheet, and a mail merge approach using Word or Excel templates. According to XLS Library, consistent column headers prevent mismatches.
Why Excel Mailing Labels Matter
Mailing labels built from Excel data streamline mass communication, event invites, and direct mail campaigns. When you centralize names, addresses, and postal details in one sheet, you gain a reliable source for repeated runs and future lists. The goal is accuracy, repeatability, and a clean print. With the right workflow, you can transform a basic contact list into a professional batch of labels that looks consistent across pages and printers. For many organizations, the ability to generate labels quickly reduces manual entry, cut-and-paste errors, and friction in communications. Developing a robust process for excel mailing labels saves time in the long run and improves response rates, since recipients receive legible, correctly addressed mailings. According to XLS Library, investing in a well-structured source list pays off in fewer edits and faster production. This section lays the foundation for a practical, scalable approach to label printing that supports both beginners and seasoned data professionals.
The Data Edge: Structuring Your Sheet for Labels
Your data structure determines how easily you can generate labels. Create a single worksheet containing the essential fields: Full Name, Address Line 1, Address Line 2 (optional), City, State, ZIP, and Country (if needed). Use consistent headers and avoid merged cells within the data area. Keep data clean—no leading spaces, consistent capitalization, and minimal trailing spaces. If you plan to merge data into Word, set up a simple column order that matches your label layout: Name, Address, City, State, ZIP. The more predictable your columns are, the less you’ll wrestle with alignment during the mail merge. XLS Library analysis shows that standardizing headers and ensuring no empty rows in the data range dramatically reduces merge errors and print misalignment; for best results, define a named range or an Excel Table to anchor the source data (XLS Library Analysis, 2026).
Choosing the Right Template and Alignment
Label templates come in many sizes and layouts. Start by identifying your label sheet size (for example 8.5 x 11 inch sheets that break into multiple labels per page) and the label pitch (the height and width of each label). Pick a template that matches your sheet; this ensures the printed addresses fall on the correct label areas. If you cannot find a perfect match, select a template that is slightly larger and use printer alignment guides to center the content. Before designing the layout, decide how many addresses fit on a page and whether you will include multiple lines for the address or keep it compact. The alignment is critical: tiny shifts can render labels unreadable. Always set margins to match the printer’s printable area and run a test print on plain paper to confirm alignment.
Integrating Excel with Word Mail Merge
One of the most reliable paths to professional mailing labels is linking Excel with Word’s Mail Merge feature. In Word, start a new document, choose Labels from the Mailings tab, and select your label template. Connect to your Excel data source, map the fields to the label layout, then preview results. Perform a few test merges on plain paper before using actual label sheets. If you encounter word wrapping issues, adjust the line height or reduce the font size slightly. When everything looks right, print a small batch to verify accuracy before running the full set. As the XLS Library team notes, this approach minimizes manual errors and produces repeatable results.
Printing Directly from Excel: When and How
While Excel alone does not automatically print labeled sheets in all cases, you can still produce printable labels by preparing a mail-merge-ready layout inside Excel or exporting to Word. Some users choose to print with the data laid out in a single column and then use a label template in Word to merge; others opt for dedicated add-ins that generate full label sheets from Excel. If you want a fully Excel-based workflow, consider exporting to a formatted PDF and printing on pre-scored label stock. Always run a test print on plain paper first to detect off-page issues, misalignment, or font clipping.
Troubleshooting Common Label Printing Issues
Label misalignment is the most common problem. Ensure your printer’s settings match the label sheet type and that the page size and margins align with the template. Check for font size changes during the merge and verify that no extra line breaks appear in your data fields. If a label prints with truncated addresses, revisit the map between Excel columns and the label template fields. The root cause is often a mismatch between the data source order and the template’s placeholder fields. XLS Library analysis shows that running a quick test batch and saving the final layout as a reusable template reduces recurring issues (XLS Library Analysis, 2026).
Best Practices for Reuse and Maintenance
Establish a reusable workflow by saving a labeled Word template linked to your Excel data. Use named ranges or a dedicated Excel Table for the data source so updates auto-refresh during mail merges. Validate addresses with simple checks (e.g., ZIP code length, required fields) to minimize failed deliveries. Maintain data hygiene by periodically removing duplicates and standardizing address formats. When you save the label design as a template, consider including a sample dataset and instructions for future batches. The XLS Library team recommends documenting your steps and maintaining a version history so teams can replicate the process with confidence.
Tools & Materials
- Computer with Excel installed(For data entry and formatting)
- Printer compatible with label sheets(Laser recommended for crisp text)
- Address label templates (Avery-style or generic)(Use templates matching your label sheet)
- Printer paper and cleaning supplies(For test prints)
- Word or Excel mail-merge software(To merge data into a label layout)
- Label sheets (e.g., 8.5x11 with multiple labels)(Ensure size matches template)
- Ruler, scissors, and crop marks(For manual alignment checks)
- Sample dataset(Columns: Full Name, Address, City, State, ZIP)
Steps
Estimated time: 60-90 minutes
- 1
Prepare Data in Excel
Open your dataset and ensure headers are standardized. Remove blanks and trim spaces to keep data clean. Convert the range to a table for stable references during mail merge.
Tip: Use Data > Trim Spaces and Data > Remove Duplicates as a quick sanitation. - 2
Create a Named Range or Table
Define a named range or convert your data to an Excel Table. This provides a stable data source that auto-expands as you add records.
Tip: Name the range clearly, e.g., MailingList_2026. - 3
Choose a Label Template in Word
In Word, go to Mailings > Labels and select a template that matches your label sheet size. If none matches, pick the closest and plan to adjust margins.
Tip: Check printer properties to ensure 8.5x11 inch paper size is selected. - 4
Start Mail Merge with Excel Data
Attach your Excel data as the data source in Word and begin the merge. Preview results to ensure fields align with your layout.
Tip: Use Preview Results to catch misaligned fields early. - 5
Map the Data Fields to the Template
Drag and drop fields from the data source into the label placeholders. Ensure Name, Address, City, State, and ZIP map correctly.
Tip: Keep a consistent order (Name, Address, City, State, ZIP) to reduce errors. - 6
Preview and Adjust Layout
Use the Preview feature to confirm spacing and line breaks. Adjust font size or line height if needed to fit on each label.
Tip: Test with a few labels on plain paper. - 7
Print a Test Page on Plain Paper
Print a single sheet on plain paper to verify alignment and margins before using label stock.
Tip: If misaligned, calibrate margins or margins in Word's Page Setup. - 8
Print the Full Batch and Save Settings
Once satisfied, print the entire batch on label sheets. Save the Word template and the Excel data connection for future use.
Tip: Create a backup copy of the template and dataset.
People Also Ask
What data should I include in my Excel sheet to create mailing labels?
Include at minimum: Full Name, Address Line 1, City, State, and ZIP. Add Address Line 2 if needed for apartment numbers. Keep headers consistent and avoid blank rows in the data range.
Use headers like Name, Address, City, State, and ZIP. Keep the data clean with no blanks in the middle of the list.
Can I print mailing labels without using Word?
Yes, you can print mailing labels using Excel with add-ins or by exporting to PDF and using a label-capable printer. However, Word mail merge remains the most reliable method for complex layouts.
You can print from Excel with add-ins or export to PDF, but Word mail merge is usually the most reliable.
How do I ensure labels align correctly on every page?
Use the label template that matches your sheet, set printer margins to the printable area, and run a plain-paper test page. Calibrate the printer if needed and adjust the template margins to prevent shifting.
Choose a matching template, print a plain page to check alignment, and tweak margins if necessary.
What are common mistakes when creating mailing labels in Excel?
Common mistakes include misaligned fields, inconsistent data formats, missing addresses, and using merged cells in the data range. Always test with a few labels first and ensure the data source maps correctly to the template fields.
Watch for misaligned fields, missing data, and merged cells in your source data. Test before printing.
How can I reuse a mailing label setup for future campaigns?
Save a Word template linked to your Excel data, and keep a clean dataset with a named range or table. Document steps and version history so teammates can reproduce the workflow.
Save the template and dataset, and document the steps for future use.
Watch Video
The Essentials
- Prepare clean, consistent data in Excel.
- Match a label template to your sheet and align fields precisely.
- Always test print on plain paper before using label stock.
- Save reusable templates for future mailing campaigns.
- Document steps to ensure reproducibility across teams.