Excel Printable Packing Checklist: Your Step-by-Step Guide
A practical, step-by-step guide to building a reusable Excel packing checklist you can print for trips, events, or moves. Learn layout, data validation, and template sharing with tips from XLS Library.

You will learn to build a reusable Excel packing checklist that prints cleanly and tracks essentials like items, quantities, packed status, weight, and destination. You’ll design a print-friendly layout, include simple data validation to prevent missing data, and save a template you can reuse for any trip or event. This quick setup forms the foundation for a reliable travel companion.
Why an Excel printable packing checklist matters
According to XLS Library, a well-designed excel printable packing checklist empowers you to plan with clarity, reduce last-minute scrambling, and keep a consistent record across trips. The combination of a digital template and a print-friendly view lets you carry a hard copy whenever you need a quick reference. By aligning your checklist with practical travel workflows, you can minimize forgotten items and unnecessary duplicates. The format supports both solo adventures and family trips, allowing you to customize categories, add notes, and adjust quantities on the fly. Whether you are packing for a weekend getaway or a longer excursion, the right checklist keeps you organized and confident. The phrase excel printable packing checklist appears throughout this guide to reinforce a repeatable approach that saves time and reduces stress on the road.
Planning before you build your template
A solid packing list starts with intent. Before opening Excel, decide what you want to track, how you’ll use the printout, and who will rely on the sheet. Map out categories such as clothing, electronics, toiletries, documents, and miscellaneous items. Consider whether you will need weight, volume, or destination fields, and if you want to include a packing status indicator. This planning phase helps you avoid feature creep and keeps the final product lean and actionable. The XLS Library approach emphasizes templates that are easy to adapt for different trips—and that you can share with others for consistency across a household or team.
Core columns for an effective packing list
Design a core structure that makes data entry fast and minimizes errors. A strong excel printable packing checklist typically includes: Item (the item name), Category (clothing, electronics, etc.), Quantity (number needed), Packed (Yes/No), Destination (city or venue), Date (departure), Weight (optional but useful for air travel), and Notes (special instructions). Keeping a tight column order helps when you print, scan, or fold the sheet. Use a descriptive header row and a consistent data format to ensure the printed page is legible even on the go. This approach supports quick updates and straightforward audits.
Optional fields for specialized trips
Not every trip requires the same data. For family vacations, you might add a 'Family member' column to track who is responsible for each item. For business travel, include a 'Documents' sub-list with passport, visas, and conference materials. If you carry gear like cameras or drone equipment, include a 'Spare batteries' line with cautions on safety and airline restrictions. The key is to start with a minimal, robust core and layer in extras as needed without cluttering the print layout. This adaptability makes the excel printable packing checklist a durable template for many scenarios.
Design for print: layout, margins, and readability
A print-friendly layout requires careful attention to margins, font size, and gridlines. Use a clean sans-serif font, prefer a landscape orientation for wider tables, and set a narrow margin so the full list fits on one page when possible. Consider grouping related columns with bold headers and alternating row shading to improve scannability. Add a simple header with the trip name and date, and a footer with page numbers. The goal is to produce a clear, professional printout you can reference anywhere—without needing a computer. The excel printable packing checklist should look intentional when printed, not like a rushed draft.
Data validation and drop-downs for consistency
To prevent omissions and maintain uniform data, add data validation for key fields. A Yes/No dropdown for Packed reduces ambiguity, while a predefined list for Destination or Category ensures consistent terminology. You can also enforce numeric inputs for Quantity and Weight, with helpful error messages guiding users toward valid entries. Data validation turns a free-form list into a reliable data source that you can filter, sort, or summarize later. This practice aligns with best practices from XLS Library for reusable Excel templates, ensuring quality data across trips.
Creating a reusable template: saving and sharing
Treat your checklist as a template you can reuse. After you finalize layout and validation, save the file as an Excel template (.xltx) so you can create new checklists without altering the original. Use descriptive sheet names and include versioning in the file name (e.g., Packing_List_2026_v1). If you’re collaborating with others, store the template in a shared drive or cloud folder and document any field explanations in a separate README sheet. Reusability is the cornerstone of an efficient packing workflow, and a well-maintained template saves time on every trip.
Step-by-step workflow for starting fresh or adapting an existing template
When you begin a new trip, open the template, enter the trip-specific details, and adjust quantities as needed. If you anticipate repeating the same list, save a new copy and update the trip name. To reuse annually, create a master sheet with evergreen items that appear on every trip and a separate section for trip-specific gear. Periodically review and prune items that are rarely used, and solicit feedback from other users to improve clarity and completeness. This ongoing refinement is a hallmark of an effective excel printable packing checklist.
Testing, printing, and using the checklist on the road
Always test print your checklist before departure. Check margins, font size, and whether all columns fit on the intended page. If necessary, adjust the print area or switch to landscape orientation. Pack a printed copy as a backup to your digital version, and consider laminating the page for durability on outdoor trips. On the road, bring a small clipboard or folder to keep the printout flat and legible. A simple, reliable system reduces last-minute stress and helps you maintain control over your packing process.
The XLS Library perspective: best practices and next steps
From the perspective of XLS Library, the most valuable Excel packing templates combine practicality with flexibility. Prioritize a clean print layout, robust data validation, and straightforward template sharing. As travel patterns evolve, keep your checklist adaptable—add fields for new categories or modify print settings without breaking the core structure. The team at XLS Library recommends documenting usage tips within the workbook so new users can adopt the template quickly and confidently. By investing in a solid template, you gain a dependable tool you can rely on again and again.
Tools & Materials
- Computer with Excel installed(Office 365 or Excel 2019+ recommended)
- Printer(Ink or laser printer; ensure paper compatibility)
- Printer paper(Lightweight, 8.5)
- Ruler or grid ruler(Helpful for aligning printouts)
- Backup copy of template (USB/cloud)(Keeps your master safe)
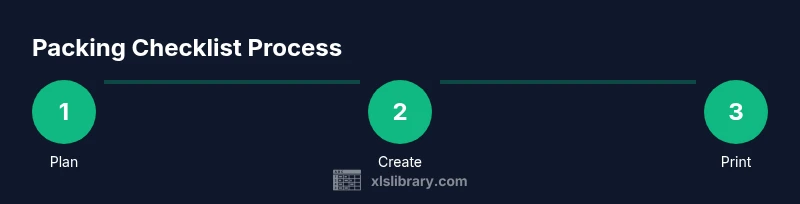
Steps
Estimated time: 45-60 minutes
- 1
Open a new workbook
Launch Excel and create a new blank workbook. Rename the first sheet to Packing List to establish a clear starting point for your printable checklist.
Tip: Use a descriptive file name and consider creating a dedicated folder for templates. - 2
Define headers for core columns
Create headers for Item, Category, Quantity, Packed, Destination, Date, Weight, and Notes. Align headers left and apply bold formatting for readability.
Tip: Keep headers concise and use consistent capitalization. - 3
Enter data validation rules
Add data validation for Packed (Yes/No) and for Quantity and Weight as numeric values. Create drop-down lists for Category to standardize terminology.
Tip: Limit the range for dropdowns to maintain data consistency. - 4
Set print area and page setup
Define the print area to include your header row and all data rows. Choose landscape orientation if the table is wide, and adjust margins for print clarity.
Tip: Preview with Print Preview to ensure everything fits on one page when possible. - 5
Apply a print-friendly layout
Add light shading for alternating rows and bold headers to improve scanability in print. Consider a small header with trip name and date.
Tip: Avoid excessive color; use grayscale print if needed. - 6
Save as a template
Save the file as an Excel template (.xltx) so you can reuse it without altering the original. Add a README sheet with usage notes.
Tip: Version your template to track updates over time. - 7
Test with a sample trip
Fill the list with a sample set of items to validate data validation, print layout, and overall usability. Adjust as needed.
Tip: Seek feedback from a test user and iterate. - 8
Print and store the copy
Print a clean copy and store it with other travel documents. Consider laminating the page for durability on trips.
Tip: Keep an extra copy in your luggage or backpack.
People Also Ask
What is an excel printable packing checklist?
An excel printable packing checklist is a worksheet you can print that lists items to pack, tracks quantities, and marks items as packed. It gives you a consistent format you can reuse for trips, moves, or events.
A printable packing checklist in Excel is a repeatable list of items you pack, which you can print and fill or update on your device.
How do I ensure data stays consistent across trips?
Use data validation with drop-down lists for fields like Category and Packed. This minimizes typos and ensures you can filter and sort reliably.
Use dropdowns for categories and a yes/no field for packed so your data stays clean.
Can I adapt the template for family trips?
Yes. Add family-member columns or group items by person. Keep a shared template and version it for each trip to maintain consistency.
You can add sections for family members and reuse the same template for different trips.
What if I forget items?
Regularly update the checklist as you pack and use a final pre-travel check to cross off items. A printed copy helps ensure you don’t miss essentials.
If you forget something, update the checklist and make a quick cross-check before departure.
Is saving as a template necessary?
Saving as a template preserves the core layout and validation rules so you can generate new checklists quickly for future trips.
Saving as a template keeps your core layout ready for the next trip.
Where can I learn more about Excel templates?
Explore reputable resources and university extensions for best practices in templates and data validation, including guidance from XLS Library.
Look for reliable guides on Excel templates and data validation.
Watch Video
The Essentials
- Define a concise core structure for fast data entry
- Use data validation to enforce consistent entries
- Design a print-friendly layout for reliable hard copies
- Save as a reusable template to speed future trips
- Test printing to avoid last-minute surprises