How to Get Rid of Print Lines in Excel
Learn practical steps to remove print lines in Excel, including gridlines, borders, and page breaks. This guide covers print settings, borders, and print area techniques for clean printouts.

In Excel, print lines typically arise from gridlines that are set to print, cell borders, page breaks defined in Page Setup, or a defined print area that includes extra rows or columns. To stop them, turn off Print Gridlines in Page Layout, disable gridlines in the View tab for screen view, clear borders on the print area, remove unnecessary page breaks, and adjust the print area. This quick approach yields clean, professional printouts.
Understanding Print Lines in Excel
According to XLS Library, print lines typically arise from four common culprits: gridlines that are set to print, cell borders that appear as lines, page breaks defined in Page Setup, and a defined print area that includes extra rows or columns. When you print, Excel will draw these elements onto the page, which can create a cluttered or inconsistent look if they are not intended. The first step is to recognize which of these elements are responsible for the lines you see. Start by opening your workbook and inspecting the area that prints. Often the lines are localized to the sheet you’re printing, but in workbooks with many tabs they can appear differently across sheets. By understanding the sources, you can apply targeted fixes instead of guesswork.
Quick Fixes: Turn Off Gridlines and Print Options
To immediately remove print lines, start with gridlines. In Excel, gridlines can be turned off for printing under Page Layout > Sheet Options > uncheck Gridlines under Print. If you want gridlines hidden on screen as well, switch to the View tab and toggle Show gridlines. Also, check the option to print headings or not in Page Setup > Sheet; uncheck Print under Row and Column Headers if not required. If borders exist on cells, use the Border toolbar to clear borders from the selected area. For some workbooks, the simplest path is to clear only the elements that print and leave the rest intact. Finally, ensure the workbook’s print area is appropriate for the sheet you are printing; misdefinitions here can create artificial lines at page boundaries.
Managing Page Breaks and Print Titles
Page breaks can create long horizontal or vertical lines that look like print lines when printed. Switch to Page Break Preview (View > Page Break Preview) to see how Excel divides the sheet across pages. Drag blue lines to adjust where a page ends, and remove any unnecessary breaks by right-clicking the break and choosing Remove Page Break. Also check the Page Setup dialog (Page Layout > Page Setup) to configure how pages print: set a suitable Scaling option (Fit to 1 page wide by 1 tall) or use the 'Adjust to' percentage to reduce unused space. If your workbook includes print titles (rows or columns repeated on every printed page), decide whether you need them; turning them off can drastically reduce lines on the printout.
Clear Borders and Adjust Borders for Printing
Borders can create visible lines around cells even when gridlines are off. To prevent this, select the range you plan to print and choose No Border from the Border drop-down menu, or remove borders from the entire area. If your data uses conditional formatting borders, review the rules to ensure they do not automatically apply borders during print. For professional prints, use borders sparingly—only where they enhance readability. After clearing borders, recheck the print preview to confirm the lines have disappeared. If you need borders elsewhere, apply borders only to header rows or key cells rather than the entire dataset.
Define a Precise Print Area
Defining a precise print area ensures Excel prints only the region you want, without stray lines at margins. Start by selecting the exact range you want to print. Then go to Page Layout > Print Area > Set Print Area. If you later adjust the data, remember to clear the print area (Page Layout > Print Area > Clear Print Area) before redefining it. When the print area is tight and aligned to the margins, the resulting printout tends to be clean with minimal extraneous lines.
Use Print Preview and Printing Options
Print Preview is your best friend for validating changes before printing. Open File > Print to see how the sheet will look on paper. Use the Scaling options (No Scaling, Fit Sheet on One Page, Fit All Columns on One Page, etc.) to control line breaks. Adjust margins for more whitespace, which can help hide residual lines. If you need a two page spread or more, consider printing in color or grayscale depending on your printer capabilities. Also, consider exporting to PDF to verify the appearance in a shareable format.
Handling Headers, Footers and Page Setup
Headings and footers can introduce additional lines if they contain borders or decorative elements. In Page Layout > Page Setup > Sheet, you can toggle Print under Row and Column Headings to avoid printing table headers on every page. In the Header/Footer section, remove any horizontal rule lines, and keep headers simple to prevent clutter. If the printer adds its own border lines, adjust the printer dialog to maintain consistent margins and disable any border options. Consistency across margins and paper size helps ensure the printed result looks clean and predictable.
Special Scenarios: Workbooks with Multiple Sheets
Workbooks with multiple worksheets require careful handling because each sheet can have different print settings. If you need consistent results across sheets, apply the same steps to each tab or group tabs (hold Ctrl and click tabs to select multiple sheets). Use the same Print Area for all selected sheets, and set Page Breaks accordingly. Create a template workbook where the print configuration is baked in, so new sheets inherit the right settings automatically. When sharing the workbook, document the printing setup for collaborators to reproduce the same output.
Best Practices and Common Mistakes
Best practice: always verify with Print Preview after every adjustment. Common mistakes include turning off gridlines on screen but leaving them set to print, misdefining the print area, or failing to adjust page breaks as data changes. Another pitfall is using aggressive scaling that truncates data or wraps text, which can ruin readability. Always save a test copy or template if you regularly produce the same type of printouts, and consider a quick PDF check before distributing printed files.
Troubleshooting Checklist
- Always use Print Preview to confirm results.
- Double-check the Print Area and Page Breaks for your active sheet.
- Verify Gridlines and Row/Column Headings print options are correct.
- Ensure borders are cleared where you do not want lines.
- Check printer settings and page margins; some printers add their own lines.
- For multi-sheet workbooks, confirm uniform settings across sheets.
Tools & Materials
- Computer with Excel (Office 365 or Excel 2019+)(Ensure you have access to Page Layout, Print Preview, and Page Setup)
- Printer or PDF printer(To verify output physically or as a PDF)
- Active workbook to test on(Use a sample workbook that includes gridlines and borders)
- Mouse and keyboard(Basic navigation and selection)
- Access to Page Layout, Print Preview, and Page Setup dialogs(Ribbon-based UI in Excel)
Steps
Estimated time: 25-45 minutes
- 1
Open the workbook and locate the print lines
Open the workbook and navigate to the sheet that prints lines. Use Print Preview (File > Print) to identify exactly where lines appear and note whether they follow gridlines, borders, or page breaks.
Tip: Use Print Preview early to anchor your fixes to the actual printout. - 2
Disable gridlines for printing
Go to Page Layout > Sheet, and uncheck Gridlines under Print. This prevents gridlines from appearing on the paper.
Tip: If you also want a cleaner screen view, toggle Show gridlines under the View tab. - 3
Turn off printing of row/column headings
Open Page Setup > Sheet and uncheck the Print option next to Row and Column Headings to eliminate heading lines on each printed page.
Tip: Only print headings if they add value for the reader. - 4
Clear borders from the print area
Select the area to print and use the Border tool to choose No Border. This removes visible lines caused by borders.
Tip: If borders exist because of conditional formatting, review rules to avoid reapplying borders on print. - 5
Define a precise Print Area
Select the exact range to print, then go to Page Layout > Print Area > Set Print Area. Clear and redefine if data changes.
Tip: A tight print area reduces margins and extraneous lines. - 6
Adjust page breaks and scaling
Switch to Page Break Preview to adjust where pages end and drag breaks as needed. In Page Setup, choose Fit to 1 page wide by 1 tall if appropriate.
Tip: Avoid aggressive scaling that cuts off data; test with Print Preview after each change. - 7
Review with Print Preview again
Open File > Print to inspect the final look. Tweak margins, orientation, and scaling as needed for a clean result.
Tip: Check on both portrait and landscape if your data layout varies by orientation. - 8
Save and test for future use
Save the configuration as a template or workbook so future sheets inherit the same print settings and avoid regressions.
Tip: Keep a copy of the template for sharing with teammates.
People Also Ask
What causes print lines to appear in Excel?
Print lines typically come from gridlines set to print, cell borders, page breaks, or an overly broad print area. Each cause has a targeted fix, so you can apply specific actions rather than broad changes.
Print lines usually come from gridlines, borders, or page breaks. Fix them by turning off prints for gridlines, clearing borders, or adjusting the print area.
How can I print without gridlines in Excel?
To print without gridlines, go to Page Layout > Sheet and uncheck Gridlines under Print. You can also disable on-screen gridlines via the View tab if you don’t want to see them while editing.
Open Page Layout, turn off Gridlines under Print, and optionally hide gridlines on screen in the View tab.
Can I apply the same print settings to multiple worksheets?
Yes. Group the sheets by holding Ctrl and clicking the tabs, then apply the print settings you want. Changes will apply to all selected sheets, but verify each sheet in Print Preview.
You can select multiple sheets and apply the same print settings to all of them at once.
Will these changes affect existing workbooks?
Adjusting print settings affects only the workbook you are editing. If you want consistency across future workbooks, save the configuration as a template.
The changes stay with the current workbook unless you save them as a template for future use.
Is it possible to automate this with a macro?
Yes. A macro can disable gridlines for printing, clear print areas, and set standard margins or scaling. Use a small macro to repeat these steps across sheets, then save for future use.
You can automate consistent print settings with a simple macro across sheets.
How do I reset printing settings to default?
To reset, clear any custom print areas, set gridlines to print again if needed, and set page breaks back to default in Page Setup. Save the workbook or template after resetting.
Reset by clearing custom print areas and page breaks, then re-enable default gridline and heading options as needed.
Watch Video
The Essentials
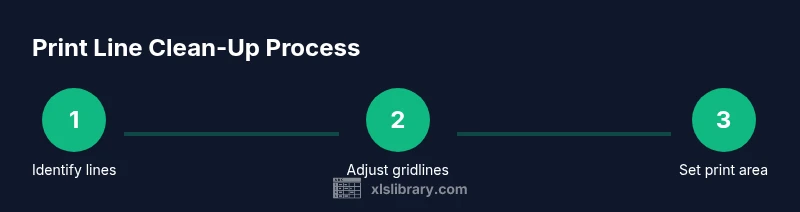
- Identify the source of print lines and target fixes.
- Turn off gridlines for printing and define a precise print area.
- Use Print Preview to verify results before printing.
- Apply consistent settings across sheets when needed.
- Save a template to maintain print readiness in future workbooks.