How to Make a Label in Excel: A Practical Guide
Learn to create and print labels from Excel data using a reliable mail-merge workflow. Prepare clean data, design label templates, and print accurately with best practices for Excel labeling.

With Excel, you can create and print labels by preparing your data, then using Word Mail Merge to lay out each label. Start by cleaning your data in Excel, choose a standard label stock, and create a merge template in Word. Finally, preview, test, and print. This two-step approach balances data integrity with precise label formatting.
Why labels in Excel require a two-step approach
Excel is fantastic for storing and organizing data, but it doesn’t print neatly on label stock by itself. To get professional, aligned labels, most workflows split the task: prepare data in Excel, then use a label-design tool or word processor to lay out each label and print. According to XLS Library, the most reliable method is to combine Excel’s data integrity with a dedicated label template to ensure margins, fonts, and line breaks render consistently on every sheet. This separation helps you reuse data for future labels without reformatting, and it minimizes waste when test printing. By treating the process as a two-part job—data preparation and label rendering—you gain flexibility to print different label types (name tags, address labels, product labels) from the same dataset. The XLS Library team emphasizes careful data governance as the foundation of accurate labeling.
Choosing the right method: Word Mail Merge vs Excel-only labeling
Label printing typically happens through Word Mail Merge or by using a dedicated labeling tool. An Excel-only approach often requires exporting a CSV and using a print-ready template elsewhere; however, it lacks precise alignment that Word templates provide. In most office environments, Word Mail Merge is the preferred method because it lets you place data fields exactly where you want on a label and apply consistent formatting across many records. For bulk labeling (addresses, product codes, event badges), Word’s mail merge templates support standard label stock (e.g., Avery). The key decision is whether you need dynamic content (generated in Excel) or static text that changes per record. The XLS Library guidance is to choose the workflow that minimizes rework while preserving data integrity.
Preparing your data: clean, structure, and format
Before you even think about labels, clean and structure your data in Excel. Remove duplicates, standardize addresses (use consistent abbreviations), and ensure each field is in its own column (FirstName, LastName, Address, City, State, Zip). Convert the data range into a table so the Word mail merge can easily pull new rows. If you plan to include multi-line addresses, consider using a single field that includes line breaks, or create a calculated field that concatenates lines with CHAR(10). The XLS Library analysis shows that well-structured data reduces errors in the merge stage and minimizes wasted label stock.
Designing labels: layout, fonts, and margins
Create a label template that matches your stock size (for example, Avery 5160, 1" x 3.5" labels). In Word, draw a single label to mirror the exact dimension, then insert merge fields where data should appear. Keep your font legible (classic sans-serif like Arial or Calibri) and set a single line height to avoid wrapping that breaks alignment. Margin settings are critical; use the label’s built-in margin guides and print a few test pages on plain paper to verify alignment before using actual label stock. The goal is a clean, scannable label with consistent line breaks and spacing across all records.
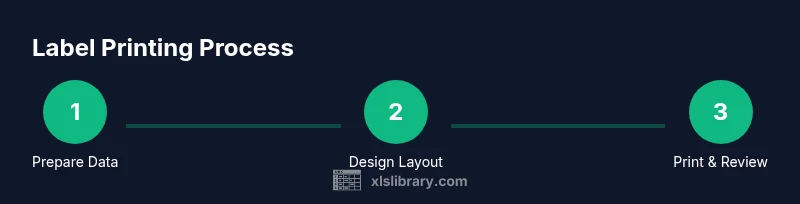
The end-to-end workflow (high-level)
- Prepare and clean data in Excel; 2) Convert to a table and save; 3) Open Word and start a Mail Merge for labels; 4) Link to the Excel data source and insert the fields into the label layout; 5) Preview results and adjust formatting; 6) Print a test page, fix any alignment issues, then print the final labels; 7) Save the Word template and the data connection for future runs.
Troubleshooting: alignment, margins, printer settings
Common issues include misaligned text, truncated lines, or margins that cut off labels. Start by verifying the label stock dimension in Word and adjusting the Layout or Margins to match the label; check the printer settings (page size, borderless option if available). Use a test page to verify alignment before printing on label stock. If printing on different printers yields inconsistent results, adjust the printer properties (print quality, scaling) and re-test with plain paper.
Authority sources
- OSU Extension: Label Printing and Mail Merge Guidance (edu) https://extension.oregonstate.edu
- Microsoft Support: Mail Merge for Labels https://support.microsoft.com
- Avery: Label stock specifications and templates https://www.avery.com
Advanced techniques: using formulas to create dynamic label content
You can build dynamic label text directly in Excel by using formulas to concatenate fields, such as =A2 & " " & B2 & line break & C2. When you merge, insert the resulting field as a single label line or multiple lines using CHAR(10) for line breaks. For addresses, you can create a single field that combines street, city, state, and ZIP with appropriate punctuation, then format via Word to wrap lines neatly. Saving a named range keeps the data source stable and makes future label runs faster.
Tools & Materials
- Computer with Excel installed(Any modern Windows or macOS setup with Office 365 or Office 2021+)
- Printer(Laser preferred for sharp text; inkjets can work with proper settings)
- Label stock (e.g., Avery-compatible sheets)(Confirm sheet size (e.g., 5160, 5163) and alignment with your printer)
- Microsoft Word (Mail Merge)(Word 2016 or later; ensure you can access merge templates)
- Excel data source (workbook)(Columns: FirstName, LastName, Address, City, State, Zip; convert to table)
- Test paper (optional)(Plain paper for margin checks before using label stock)
- Clear desk space(Helps avoid misfeeds and mix-ups during printing)
Steps
Estimated time: 60-90 minutes
- 1
Define label objective and stock
Decide what the label will convey (name, address, product code) and select a label stock size that matches your printer. This upfront choice impacts layout and font size, reducing later rework.
Tip: Have the label stock SKU or size written down before starting to prevent mismatches. - 2
Prepare and clean data in Excel
Organize your data into clearly named columns and remove duplicates. Convert the data range to a table so Word can reference it reliably during the merge.
Tip: Use data validation to keep ZIP codes and state abbreviations consistent. - 3
Create a stable Excel data source
Save the table to a workbook and ensure there is a header row. Consider adding a calculated field that formats multi-line addresses using CHAR(10).
Tip: Name the table (e.g., tblLabels) to simplify referencing in Word. - 4
Start Word Mail Merge for labels
Open Word, start Mail Merge, and choose Labels. Select the label vendor and product number to match your stock. Connect to the Excel data source you prepared.
Tip: Use the 'Step by Step Wizard' in Word for guided setup. - 5
Insert merge fields and design layout
Place the appropriate fields (FirstName, LastName, Address, etc.) on the label. Keep the layout simple with readable fonts and consistent line breaks.
Tip: Use a single label template page that you can copy for multiple records. - 6
Preview results and adjust margins
Preview each label to ensure data alignment, then compare with the label grid. Adjust margins, font size, and line breaks to fit precisely.
Tip: Print a test page on plain paper before using actual stock. - 7
Print test and finalize
Print a small run on plain paper, correct any misalignments, then print the final batch on label stock. Save the Word template and the data connection for future use.
Tip: Keep a spare sheet of each label stock in case you need to reprint. - 8
Save and reuse the workflow
Store the Word template and the linked Excel file for future label projects. You can reuse the same template with updated data sources without reformatting.
Tip: Document the steps so a teammate can reproduce the process.
People Also Ask
Can I create labels directly in Excel without Word?
Excel stores data well, but printing labels usually requires Word Mail Merge or specialized software to align text on label stock. Use Excel to prepare the data, then merge in Word for precise layout.
You generally need Word Mail Merge to print labels; Excel alone can’t reliably format and print labels on stock.
What label sizes work best with Excel Mail Merge?
Standard sizes like Avery 5160 or 5163 are commonly used and supported by Word templates. Always verify your printer’s compatibility with the stock size and margins.
Stick with common sizes like Avery 5160 and test if your printer handles them correctly.
How can I format label text using Excel formulas?
Create a calculated field that concatenates name and address lines, e.g., =A2 & " " & B2 & CHAR(10) & C2. Use TEXT functions to format ZIP codes or dates if needed.
Use CONCAT or the ampersand to combine fields, and CHAR(10) for line breaks.
Do I need to print test labels?
Yes. Always print a test page on plain paper to verify alignment before using label stock. This saves resources and avoids waste.
Always run a test print on plain paper first.
Can I reuse a label template for different datasets?
Yes. Save the Word template and simply switch the Excel data source. You can update data and reprint without redesigning the layout.
Yes—reusing templates is a smart, efficient workflow.
What if my printer can't handle label stock margins?
Adjust printer properties: set the printable area correctly, enable borderless if available, or modify the label size to match the stock. Re-test after changes.
Tweak printer settings to match the label margins and re-test.
Is there a risk of misalignment across large print runs?
Yes, especially with incorrect margins or nonstandard stock. Always do a spot check on multiple labels and adjust as needed.
Yes—check a few samples first to avoid waste.
Watch Video
The Essentials
- Prepare data in Excel first, in a clean, structured table.
- Use Word Mail Merge for precise label layout and printing.
- Always test print and adjust margins before final runs.
- Save templates and data connections for reuse.
- Leverage formulas to generate dynamic label content in Excel.