Lock Rows in Excel: Practical Protection Techniques
Learn how to lock a row in Excel, protect sheet editing, and manage visibility. This XLS Library guide covers locking cells, using protections, and practical tips for secure spreadsheets.

Locking a row in Excel involves selecting the target row, unlocking all cells, locking only that row, and then applying sheet protection (with an optional password). This quick method prevents edits to the row while allowing other data to remain editable.
Understanding the concept of locking rows in Excel
In Excel, there are two distinct ways people talk about 'locking a row': locking the ability to edit the row’s cells, and locking the row in the viewport so it stays visible as you scroll. Both ideas can be useful in data-entry templates and shared workbooks. According to XLS Library, the most reliable way to actually prevent edits is to combine cell locking with sheet protection. This means you prepare the cells you want to guard, then enable protection to enforce those rules across the worksheet. If you want to ensure readers know which row is critical, you can highlight that row with formatting, and provide a clear note in the header about why it is locked. This approach gives you control without locking down the entire workbook.
When to use locking versus freezing
Locking is about editing rights, while freezing affects what you see. If your goal is to prevent accidental edits, you’ll lock cells and protect the sheet. If your only goal is to keep a row visible while you scroll, use Freeze Panes (View > Freeze Panes) instead of protection. XLS Library’s guidance emphasizes choosing the right tool for the goal: protect data integrity with locking, or improve navigation with freezing. In shared files, clear policy and password protection ensure collaborators understand what’s protected and why.
Prerequisites and safety considerations
Before you lock a row, ensure you understand the implications: locked cells only take effect after you protect the sheet. Decide whether you want a password and how you’ll share it. Always start with a backup copy of your workbook in case you need to revert changes. If multiple users need to unlock rows temporarily, plan a simple process for admins to re-enable editing without compromising data integrity. This planning reduces friction during collaboration and minimizes the risk of accidental data loss.
Tools & Materials
- Microsoft Excel (Windows or macOS)(Any recent version; ideally 365/Office 2021 or later)
- Password for sheet protection (optional)(Strong, unique password; store securely)
- A sample workbook or a copy of your data(Practice with non-critical data)
- Backup copy of the original workbook(Recommended before applying protection in production files)
- Clear labeling and documentation(Notes on which row is locked and why)
Steps
Estimated time: 15-25 minutes
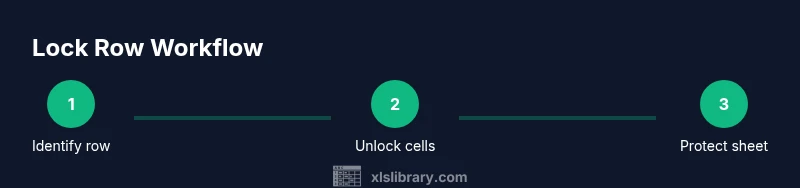
- 1
Identify target row
Open your workbook and locate the row you want to lock. Mark it clearly using a color or a note so you don’t accidentally lock the wrong row.
Tip: Double-check the row number against your data entry form - 2
Unlock all cells on the sheet
Select the entire sheet (Ctrl+A), then open Format Cells > Protection and uncheck 'Locked'. This makes every cell editable so you can selectively lock only the chosen row.
Tip: If there are already unlocked cells, you can skip this step for fewer changes - 3
Lock the target row's cells
Select the entire target row (row header), reopen Format Cells > Protection and check 'Locked'. This ensures only that row’s cells require protection.
Tip: Be mindful that merged cells can complicate locking - 4
Protect the sheet
Go to Review > Protect Sheet, set a password if desired, and choose permissions. Ensure 'Protect worksheet and contents of locked cells' is checked.
Tip: Do not forget to save the password securely - 5
Test the protection
Try editing a cell in the locked row and a cell outside it to confirm protections work as intended.
Tip: If editing fails for the locked row but works elsewhere, you’re successful - 6
Document and save
Save a versioned copy with a clear name indicating protection status. Document which row is locked and why for future reference.
Tip: Consider adding a small legend to the header - 7
Plan for unlocking
If admins need to unlock later, ensure a quick method is in place (provide password or temporary unlock).
Tip: Define a rollback plan before sharing the file
People Also Ask
What does locking a row do in Excel?
Locking a row marks its cells as locked, but protection must be enabled on the sheet to enforce editing restrictions. Without Protect Sheet, users can still edit the row.
Locking marks the cells as locked, but you still need to protect the sheet to enforce it.
Can I lock multiple rows at once?
Yes. Unlock all cells, then select each row you want to lock and set those cells to Locked before protecting the sheet.
Yes, you can lock multiple rows by locking those rows before protecting the sheet.
What if I forget the protection password?
If you set a password, Excel will require it to unprotect. Without it, you’ll need to recover or reset the password using supported methods. Maintain a secure record of passwords.
If you forget the password, you’ll need to recover it using proper methods; keep a record next time.
Does locking a row affect formulas?
Locking only affects editing permissions; it does not change how formulas calculate. Shielded cells prevent edits while formulas can remain intact if locked cells are protected.
Locking prevents edits but doesn’t change formula logic.
Is locking rows possible in Excel Online?
Yes, Excel Online supports sheet protection, but some features may differ from desktop. You can still lock specific cells after unlocking others and then protect the sheet.
You can lock cells in Excel Online after unlocking others and enabling protection.
How can I unlock a previously locked row?
To unlock, unprotect the sheet (enter the password if used), set the target row’s cells back to Unlocked, then re-protect if needed.
Unprotect the sheet, unlock the row’s cells, and re-protect if required.
Watch Video
The Essentials
- Locking requires sheet protection to be effective.
- Target only the intended row to minimize disruption.
- Test thoroughly before sharing with others.
- Document the protection rules for admins and users.