How to Convert JPG to Excel Online
Learn how to convert JPG images to Excel data online using reliable tools. This step-by-step guide from XLS Library covers best practices, accuracy tips, and common pitfalls for clean spreadsheets.

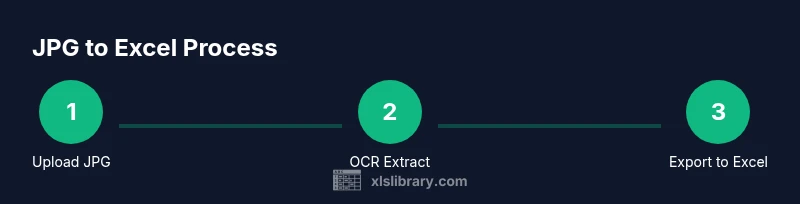
To convert a JPG to Excel online, start by selecting a reliable JPG-to-Excel converter, upload your image, and choose OCR or table extraction options. Review the extracted data for accuracy, correct any misread values, and export to an Excel friendly format such as XLSX or CSV. Save your workbook and verify alignment with your original data.
Understanding JPG to Excel converters
According to XLS Library, the basic idea is simple yet powerful: extract the tabular data embedded in a photo and place it into a real Excel sheet. A good jpg to excel converter online will recognize rows and columns, keep the header structure, and preserve numeric values as numbers rather than text. The quality of the result depends on image clarity, the presence of borders, and the tool's OCR engine. In practice, you will benefit from starting with a clean scan or photo, reducing glare, and ensuring there are distinct table boundaries. Expect that some formatting such as merged cells or multi line headers may require post processing in Excel. The goal is to obtain an editable data grid that mirrors the source.
How OCR translates images to tabular data
OCR reads each character one by one and assembles words, then tries to map this text into a grid. Printed, high contrast text with well defined borders translates most reliably into rows and columns. In our experience at XLS Library, structured tables with consistent fonts and minimal shading yield the best results. The converter may deliver a preview where you can adjust column widths, align headers, and separate merged data. Remember that OCR is probabilistic; you will often need to correct misreads like swapped digits or mis inserted spaces. A clean table layout dramatically reduces manual correction later.
Factors that affect accuracy and how to mitigate
Accuracy depends on image quality, font size, and the layout complexity. Skewed photos, curved borders, and handwriting reduce OCR performance. To mitigate, pre process the image by cropping to the table, straightening it, increasing contrast, and saving in a lossless format if possible. If you must work with color scans, convert to grayscale before uploading. Choose an online converter that supports multiple languages and shows a live OCR preview so you can catch errors early. In cases with heavy column sprawl, consider exporting to CSV and then importing into Excel to control column boundaries more precisely.
Preparing your JPG to maximize hits
Before uploading, inspect the image for glare, shadows, and text clarity. Crop away extraneous margins so the table fills the frame. If your image is a photograph, rotate it so the table reads left to right. Save in a stable format and test a small crop first to verify the converter handles the data properly. Keep a backup of the original image in case you need to re upload after re scanning. After importing into Excel, use features such as text to columns to separate data into proper fields.
Choosing a reputable online converter: features to look for
Key features include reliable OCR with language options, export formats such as XLSX and CSV, data preview before export, and privacy options like local processing and data deletion policies. A good tool will offer column alignment controls, the ability to handle multi line headers, and straightforward post export editing in Excel. Look for tools with batch processing if you have many images, and check whether the service supports structured table detection rather than free form text blocks. Clear usage tips and a clean UI help you stay efficient.
A practical workflow example with screenshots
Start by loading a clean JPG of a table into the converter. Enable OCR for the language used in the document, review the extracted grid in the preview, and adjust as needed. Export to XLSX, open in Excel, and perform quick formatting such as adjusting column widths and applying data types to columns. If the export includes merged cells, use the Text to Columns feature to split packed data. Save an edited version with a new file name to preserve the original scan.
Common errors and how to fix them
Common issues include mis read digits, misplaced decimals, extra spaces, and missing header rows. Fix by re running OCR with higher resolution, cropping more tightly around the table, or choosing a tool with stronger table recognition. In Excel, use find replace for quick cleanup, and apply data validation rules to enforce correct types. If needed, perform manual correction on a sample row first before applying changes to the full sheet.
Tools & Materials
- Original JPG image file(Ensure the image is clear and high-contrast)
- Modern web browser(Chrome, Edge, Firefox recommended)
- Online JPG to Excel converter(Choose reputable tools with OCR)
- Excel or CSV export option(To import data into Excel)
- Stable internet connection(Broadband recommended for uploads)
- Optional: pre processed image editor(Enhance contrast or crop before upload)
Steps
Estimated time: 45-60 minutes
- 1
Prepare your image and tool choice
Identify a clear JPG showing a table and pick a trusted online converter with OCR. Confirm you can export to XLSX or CSV so you can work in Excel after extraction.
Tip: Choose high contrast images with visible grid lines to improve OCR accuracy - 2
Upload the JPG to the converter
Open the tool, upload your image, and select the table area if the option exists. Use the live preview to check that the full table is captured.
Tip: If batch uploads are supported, start with one image to validate results - 3
Configure language and output format
Set the OCR language to match the document and choose XLSX or CSV as the export format. Enable table detection if available.
Tip: Verify that the preview shows column headers and aligned rows - 4
Review the extracted data
Scan the preview for misreads, merged cells, or missing headers. Mark any rows or columns that look off for correction.
Tip: Use zoom to inspect digits and decimal points - 5
Correct data in the preview
Edit misread values directly in the converter preview if possible, or plan to fix in Excel after export.
Tip: Keep a backup of the original image - 6
Export to Excel compatible format
Export as XLSX or CSV and download the file to your computer.
Tip: Save with a descriptive name for easy retrieval - 7
Open in Excel and format
Open the file in Excel, apply basic formatting, and adjust column widths. Convert texts to numbers where needed and set data types.
Tip: Use Text to Columns if data is packed in a single cell - 8
Validate and save your workbook
Cross check totals and key fields against the source image. Save a version with revisions and keep the original scan as a backup.
Tip: Create a simple data validation rule to prevent future entry errors
People Also Ask
What is a JPG to Excel converter online?
An online tool that uses OCR to extract tabular data from a JPG image and place it into a spreadsheet. The quality depends on image clarity and the tool's OCR engine.
An online tool that uses OCR to pull data from a JPG into a spreadsheet.
Can handwritten tables be read by OCR?
OCR works best on printed text. Handwritten tables often require manual corrections after export.
OCR handles print better; expect more edits with handwriting.
What formats can I export to?
Most tools export to XLSX or CSV. Some also offer copy to clipboard or Google Sheets integration.
Export as XLSX or CSV, then open in Excel.
Is it safe to upload data to online converters?
Check the privacy policy and choose reputable tools. Avoid uploading highly sensitive information.
Be cautious with sensitive data online.
Why might OCR miss data?
Low contrast, curved text, or unusual fonts can cause errors. Preprocess the image to improve readability.
OCR can miss things if the image isn't clear.
Do free tools suffice for simple tasks?
For simple tables, free tools can work, but check export limits and accuracy before relying on results.
Free tools can help, but verify results.
Watch Video
The Essentials
- Start with a clean JPG image for best OCR.
- Preview results before exporting to Excel.
- Export to XLSX or CSV and clean in Excel.
- Verify data alignment and formats after import.