Excel Budget Form: Build a Practical Budget Template in Excel
Learn to build a reusable Excel budget form that tracks income, expenses, and savings. This step-by-step guide covers layout, formulas, validation, and optional charts to fuel smarter financial decisions in 2026.

You will create an Excel budget form from scratch that tracks income, expenses, and savings with a clean layout, built-in totals, and data validation. The process covers planning the structure, setting up categories, entering formulas, and adding optional charts for quick insights. By the end you’ll have a reusable template ready for 2026 budgets.
What is an Excel budget form and why use it?
According to XLS Library, an Excel budget form is a dedicated workbook designed to track income, expenses, savings, and cash flow across defined periods (monthly or quarterly). It provides a centralized view that updates automatically as you enter transactions, helping you see where money goes and where you can cut costs. A well-constructed budget form acts as a compass for financial decisions, whether you're planning a personal budget, a team project, or a small business sprint. Using a structured template reduces manual transcription, minimizes errors, and makes it easier to compare actuals against targets over time. The form typically includes sections for income sources, fixed and variable expenses, and a separate area for savings goals. In 2026, many Excel budgets combine data validation for consistent categories, clear labeling, and optional charts to visualize trends. The XLS Library team has found that templates with consistent categories and a clear flow help users start quickly, even if they’ve never built a budget in Excel before. The goal is a clean, adaptable form you can copy, reuse, and customize without starting from scratch each month.
Core design principles for a practical budget form
A practical budget form starts with clarity and consistency. Use a clean layout with clearly labeled sections so anyone can enter data without guessing. Favor modular design: separate data entry, summary, and settings so you can adjust one area without breaking others. Include data validation to enforce consistent categories and valid numbers, and rely on formulas rather than manual totals to minimize drift. Make the template scalable: plan for additional months or new categories without rewriting formulas. Finally, document assumptions and provide a simple explanation of how to read the dashboard so stakeholders can interpret results at a glance.
Laying out the worksheet: headers, categories, and time periods
Create a dedicated input area with a header row for months (or quarters) and a leftmost column for categories. Use a separate row group for Income, Expenses, and Savings. Keep a border or shaded header for readability and freeze the header row so you can scroll without losing context. Build a data validation list for categories on the input area and reference that list from a second sheet to keep your design tidy. If you’re planning dashboards, reserve a small section at the top of the sheet to host quick KPIs like year-to-date totals and net cash flow.
Key formulas to automate totals and validation
Automation saves time and reduces errors. Use SUM to total rows across months: =SUM(B2:M2) for a row spanning months. Use SUM for monthly totals and a separate SUMIF to aggregate by category across the year: =SUMIF($A$2:$A$50, "Housing", B$2:B$50). Calculate net cash flow with =TotalIncomeMonth - TotalExpensesMonth. Validate data by restricting inputs to numbers with decimal control and using a drop-down list for Category, Month, and Source. Finally, consider a running total with =SUM($B$2:B2) to track cumulative progress.
How to handle income, expenses, and savings goals
Organize inputs into three logical zones: Income (wages, freelance, investments), Expenses (fixed and variable), and Savings (emergency fund, retirement, goals). For each month, show a sub-total for income and a separate sub-total for expenses so you can see the net result quickly. Add a dedicated Savings row or column that feeds into a year-end goal. Use color-coding to differentiate cash inflows from outflows and highlight variances from targets with conditional formatting.
Extending the template with charts and dashboards
Visuals help stakeholders grasp the story fast. Create a couple of charts like a monthly cash flow bar chart and a pie chart showing spending by category. Use a compact dashboard section that references the monthly totals and year-to-date sums. Keep the dashboard slim and legible, with consistent fonts and colors that match your brand. If you plan to share the file, consider a one-page executive view that executives can glance at in under a minute.
Data integrity: validations, protections, and versioning
To prevent accidental changes, lock formulas and protect the sheet, while leaving an input area editable for collaborators. Use password protection if appropriate and avoid sharing sensitive financial data over insecure channels. Keep a version history by saving new files with date stamps (e.g., Budget_Form_2026_03.xlsx). Maintain a separate backup copy in case you need to revert to a previous state. Document any changes in a change log so you can track the evolution of your template.
Common pitfalls and how to avoid them
Common pitfalls include hard-coding numbers, failing to update category lists, and ignoring date alignment between months. Don’t skip data validation or rely on manual totals that can drift over time. Avoid overloading a single sheet with too many formulas; fragmentation into a Data sheet and a Summary sheet helps. Lastly, avoid inconsistent currency formatting; set a single currency across the workbook to avoid confusion.
What to customize for your scenario
Every budget form is unique. Customize your categories to reflect actual spending and sources of income in your life or business. Add additional months or quarters if you need a longer planning horizon. If you plan to share the template with others, include a short instructions sheet and an example entry. Consider expanding with a simple debt tracker or a small dashboard if the audience expects a higher level of detail.
Tools & Materials
- Excel-compatible spreadsheet software(Excel 2019+ or Google Sheets; save as .xlsx/.ods)
- Blank workbook or budget template(Create a dedicated file for the budget form)
- Predefined category list(Common categories for income/expenses; stored on a separate sheet)
- Named ranges (optional)(For simplifying references in formulas)
- Data validation lists(Drop-downs for Category, Month, and Source)
- Reference data sheet(Stores lists used in validation)
- Backup storage(Regular backups or cloud-sync)
- Guidance document or cheatsheet(One-page guide for users)
Steps
Estimated time: 60-90 minutes
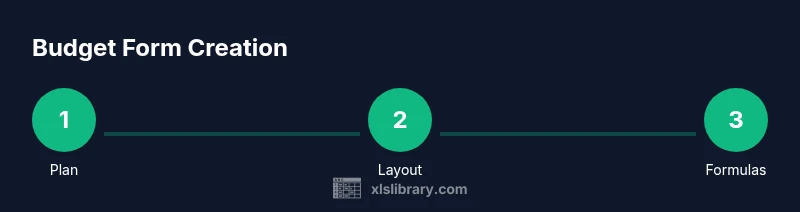
- 1
Plan your budget structure
Outline the time period (monthly or yearly), define main categories (Income, Housing, Utilities, Food, Transportation, Savings), and decide which totals you want to track (monthly total, category totals, and net cash flow). This planning saves rework later.
Tip: Draft a rough sketch on paper or a whiteboard before touching Excel to align expectations. - 2
Create the workbook and sheets
Open a new workbook and create separate sheets for Data Entry, Summary, and Settings. Name ranges for categories and months to support consistent formulas. Keep a dedicated template file for future budgets.
Tip: Use a neutral file name (Budget_Form_Template) and enable 'Save as template' if your software supports it. - 3
Define your categories with data validation
Set a list of categories and assign to a data validation drop-down to ensure consistency. This reduces mis-spellings and improves analysis. Include at least 8-12 core categories and allow a 'Other' option.
Tip: Store the list in a separate sheet and reference it with Data Validation. - 4
Set up the income and expense input areas
Create rows for each income source and expense category. Include a separate Savings row. Format cells for currency and align headings. Use borders to separate sections and make the sheet easy to scan.
Tip: Include a Total row at the bottom of every section. - 5
Add monthly totals with SUM formulas
In each month column, use =SUM(startCell:endCell) to total income and expenses. Place separate totals for income, expenses, and savings, and compute net cash flow. Copy formulas across all months.
Tip: Use absolute references for fixed rows while copying across columns. - 6
Create a dynamic summary dashboard
Build a compact summary that shows year-to-date totals, variances vs targets, and a quick-pulse chart. Link the dashboard to the monthly totals so it updates automatically when data changes.
Tip: Leverage conditional formatting to highlight red flags. - 7
Apply data protections and versioning
Lock critical formula cells, enable sheet protection, and set a strong password if possible. Create incremental versions of the file with date stamps so you can revert if needed.
Tip: Always keep an unlocked 'input' sheet for collaborators, if necessary. - 8
Test with a realistic scenario
Enter sample numbers representing a typical month, then verify that all sums match expectations and that the dashboard reflects the inputs correctly. Adjust your layout if things don’t line up.
Tip: Test edge cases like negative balances to ensure formulas handle them gracefully. - 9
Save and reuse as a template
Save the workbook as a template so you can reuse it for future months or different budgets. Document any assumptions and provide a readme sheet for new users.
Tip: Create a short one-page guide inside the template to help new users.
People Also Ask
What is the purpose of an Excel budget form?
An Excel budget form provides a structured workspace to capture income, expenses, and savings in one place. It uses formulas to calculate totals and trends, helping you monitor cash flow and make informed decisions. It supports personal, project, or small-business budgets, and scales with your needs.
The budget form helps you track money in real time and make smarter spending choices.
Can I customize the budget form for multiple months?
Yes. You can structure the sheet to include monthly columns, or create a single-year layout with a monthly summary. Use named ranges and dynamic formulas to keep it manageable as you extend to more months.
Yes—it's easy to extend month by month.
How do I protect budget data from accidental changes?
Use sheet protection, lock cells with formulas, and restrict editing to specific ranges. Always keep a backup copy and consider versioning to recover from mistakes.
Lock down formulas and save backup copies.
Which Excel features are essential for a budget form?
At minimum, use sums and conditional totals, data validation for categories, and clear labeling. Optional features include charts for dashboards and dynamic named ranges.
Key features include sums, data validation, and clean labeling.
Is Google Sheets suitable for budget forms, or should I use Excel?
Google Sheets works for basic budgets but may lack some advanced features and offline access. Excel provides richer formulas and better offline reliability. For many users, starting in Sheets and migrating to Excel later is a practical path.
Sheets can do the job for basics, but Excel is stronger for complex budgets.
Watch Video
The Essentials
- Plan your budget structure before building.
- Use data validation for consistent categories.
- Link months to a dynamic summary for quick insights.
- Protect formulas and back up frequently.
- Save as a reusable budget template.