How to Convert Excel to PDF: A Practical Step-by-Step Guide
Learn how to convert Excel to PDF with confidence. This guide covers export options, print setup, and tips to preserve layout, fonts, and charts for reliable shareable PDFs.

You can convert an Excel workbook to PDF in a few straightforward steps. This guide covers exporting the file, choosing the right print area, adjusting scaling, selecting which worksheets to include, and preserving layout for sharing. By the end, you’ll be able to produce clean, print-ready PDFs from Excel with confidence.
Why converting Excel to PDF matters for professionals
According to XLS Library, exporting an Excel workbook to PDF is a reliable way to share data without risking layout shifts or missing fonts. PDFs preserve the visual structure of your spreadsheets, so colleagues, clients, and printers see the same information you designed in Excel. This section explains practical reasons to convert and the scenarios where PDF output truly shines, from quarterly reports to client-ready proposals. You’ll also learn how quality PDFs support archiving and compliance by providing a stable, non-editable snapshot of your data. Throughout this guide we’ll use clear language and concrete examples so you can apply the steps immediately, whether you’re on Windows, macOS, or in a mixed office environment.
For XLS Library readers, the ability to export efficiently reduces back-and-forth and ensures consistency across devices and departments. The content here reflects common workflows observed in professional settings and is designed to be practical for both beginners and power users.
Print fundamentals: layout, scaling, and margins
PDFs rely on how you set up your Excel sheet before export. Start with page orientation (portrait vs. landscape), margins, and gridlines, then decide if you want to fit content to a single page or allow multi-page output. Adjusting the print area ensures you show only the data that matters, while print titles keep header rows visible on every page. Scaling options—such as Fit to 1 page wide by 1 page tall—help maintain readability without excessive shrinking. Keep font sizes consistent and verify that charts and images stay legible after export. These fundamentals are essential regardless of whether you’re sharing a budget, forecast, or dashboard. By planning layout ahead of time, you avoid surprises when the PDF is opened on another device.
Methods to convert: Save As, Export, and Print to PDF
Excel provides multiple pathways to PDF output. The simplest route is Save As, then choose PDF from the file type list. Another option is Export, which is common across Office applications and often includes more precise control over what gets saved. Finally, you can use the Print dialog and select 'Microsoft Print to PDF' (or a macOS PDF option) to create the document directly from the print pipeline. Each method offers similar results but may differ in how you access page setup options or which sheets are included. In practice, pick the method that aligns with your workflow and permission level in your organization. Remember to review the filename and destination path to avoid overwriting existing files.
For busy teams, creating a consistent export template helps standardize PDFs across projects and preserves formatting.
Working with multiple sheets and workbooks
Deciding whether to export a single worksheet, a printer-friendly selection, or an entire workbook depends on the context. If your workbook contains sensitive data on hidden sheets, verify that those sheets are excluded from the PDF unless required. To include multiple sheets in a single PDF, you can arrange the order of printing and define which sheets are printed by selecting them in the workbook and using the Print Area feature. If you need a multi-file PDF, you may export each sheet to a separate PDF and then combine them using a PDF editor. In all cases, ensure that headers, footers, and page breaks align with the data so readers won’t miss critical information on any page.
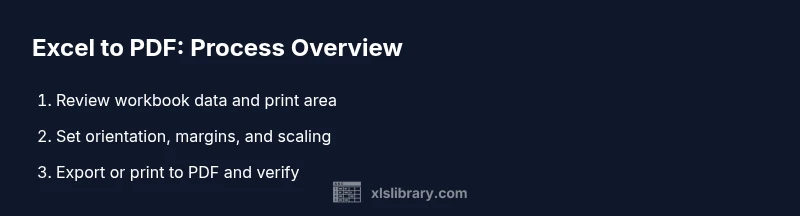
Step-by-step overview and best practices
This section provides a concise overview of the most common path to a high-quality PDF from Excel. First, review the data and remove any extraneous columns or rows that don’t belong in the final document. Next, set a consistent print area and confirm that page orientation matches the intended layout. Then, adjust scaling to preserve readability without compromising fit. Finally, export or print to PDF and perform a quick review against a print preview. Keeping a kitchen-sink workbook separate from a client-ready version helps avoid accidental disclosure of sensitive data.
Preserving fonts, images, and charts in PDF
Fonts are a frequent source of inconsistencies when exporting to PDF. Use standard system fonts where possible, or embed fonts if your Excel version and printer support it. Images and charts should be sized and positioned to avoid clipping at the margins. Avoid overly complex charts that rely on tiny details; instead, consider simplifying labels or increasing font sizes for legibility in the PDF. If color accuracy matters, verify that printer color settings align with the source. A quick test export of a small sample sheet helps you catch any layout quirks before the full conversion.
Troubleshooting common issues
If the PDF looks off after export, check the following: print area and page breaks, hidden cells, and conditional formatting that may render differently. Ensure the correct printer is selected and the scale setting is appropriate (e.g., 100% vs. Fit to Page). When dealing with large workbooks, export in batches to identify pages that need adjustment. For Windows users, updating the printer driver or trying a different PDF printer can resolve stubborn formatting problems. On macOS, ensure the default settings in Print Dialog align with your intended output. Document these fixes in a reusable template to speed up future exports.
Automating conversions and templates
Automation reduces repetitive work and improves consistency. You can record a macro that opens a specific workbook, selects a predefined print area, and exports to PDF with chosen options. If you frequently export from multiple workbooks, building a small Power Query or VBA macro can streamline the process. For non-programmers, consider using Office templates that predefine page setup, margins, and print areas, then apply them to new workbooks. Automation also makes it easier to enforce organizational standards for PDF exports across teams.
Accessibility, archiving, and security considerations
PDFs should be accessible to readers with varying needs. Use descriptive file names, include alt text for charts and images, and ensure sufficient color contrast. For archival purposes, store PDFs in a well-organized folder structure with clear versioning. If security is a concern, password-protect PDFs or apply restrictions via your PDF editor, rather than relying on Excel alone. Finally, keep a master Excel file with raw data separate from the client-ready PDF to maintain data integrity.
Tools & Materials
- Microsoft Excel (2016 or newer)(Any edition capable of exporting to PDF)
- PDF viewer or printer(To verify and share the output)
- Computer (Windows or macOS)(Excel runs on both platforms)
- Print driver or built-in PDF printer(Available via OS or Excel export options)
- Sample workbook for practice(Useful for testing scenarios)
- Optional PDF editor(Helps with final tweaks and security settings)
Steps
Estimated time: 15-25 minutes
- 1
Open the workbook and review data
Begin by inspecting the workbook to identify which sheets, sections, and visuals should appear in the final PDF. Remove any unnecessary data and ensure fonts, colors, and charts are legible. Confirm the print area reflects only the content you want to share.
Tip: Use the Page Break Preview to visualize how data will paginate in the PDF. - 2
Set the print area and page setup
Select the cells you want to print and define the print area. Choose orientation (portrait/landscape), set margins, and decide whether to include row/column headers on every page. Enable any desired options like gridlines or headings to improve readability.
Tip: Preview the print layout to catch wrap or cut-off items before exporting. - 3
Choose export method and configure options
Decide between Save As, Export, or Print to PDF. In the chosen method, adjust scaling (Fit to 1 page wide, 1 page tall, or 100%), and specify which sheets to include if needed. Double-check the file name and destination.
Tip: If you’re sharing with others, enable embedding fonts when possible to preserve appearance. - 4
Export or print to PDF
Execute the export or print action. If prompted, select the PDF printer or destination folder. Wait for the process to complete and then open the PDF to perform a quick check of layout, colors, and legibility.
Tip: Keep a test PDF for reference and adjust as needed for future exports. - 5
Verify and adjust if necessary
Review the PDF for any truncation, broken charts, or misaligned headers. If issues exist, go back to Excel, tweak the print area or scaling, and re-export. Repeat until the final PDF matches your expectations.
Tip: Create a reusable export template for recurring reports. - 6
Archive and share securely
Store the PDF in an organized archive with a clear naming convention. If needed, password-protect the file or apply restrictions using a PDF editor before sharing.
Tip: Document the export settings in a quick-reference guide for teammates.
People Also Ask
Can I export only specific sheets to PDF?
Yes. Select the sheets you want to include, set the print area accordingly, and export or print to PDF. If you export the entire workbook by mistake, you can simply repeat the process with the intended sheets.
Yes, you can export only selected sheets by choosing them before exporting and adjusting the print area.
How do I preserve the print area and page breaks?
Define a precise print area in Excel and insert manual page breaks where needed. Use Page Layout > Breaks to manage page boundaries, then export to PDF and review the results.
Set a clear print area and page breaks, then export and check the document.
Will formulas be clickable in the PDF?
PDFs are static representations; formulas do not work in PDFs. You’ll share data as values and charts, with clickable hyperlinks if you add them in the source.
No, formulas don’t work in PDFs; the PDF shows values and charts only.
Can I password-protect a PDF exported from Excel?
Excel itself doesn’t password-protect PDFs directly. Use a PDF editor or printer with password options after export to secure the file.
You’d password-protect the PDF after exporting using a PDF tool.
What if the PDF looks different on another device?
Differences can occur due to fonts, printer drivers, or scaling. Use embedded fonts, standard fonts, and verify on multiple devices during testing.
Differences happen if fonts or scaling vary; test on other devices.
Watch Video
The Essentials
- Export options matter: Save As, Export, or Print to PDF yield similar results with small differences.
- Plan print areas and page setup before exporting to avoid truncation.
- Always preview your PDF and create a reusable export template.
- When sharing, consider accessibility, archiving, and security implications.
- Automation can save time for recurring exports.