How to Convert Excel Files to PDF
Learn how to convert Excel files to PDF quickly and reliably. This guide covers built-in Excel options, print settings, and best practices to preserve layout.

In this guide, you will learn how to convert an Excel file to PDF using built-in features like Save As and Export, plus practical tips for ensuring formatting stays intact. You’ll discover when to use a PDF printer, how to adjust page setup, and how to automate common conversions for multiple files. According to XLS Library, mastering these steps can save time and improve document sharing.
Why PDF is a reliable shareable format for Excel workbooks
When you share an Excel file, you risk misalignment, font substitutions, and lost formulas if the recipient doesn’t have the same software or fonts installed. Saving as PDF fixes the layout, ensuring that pages, charts, and tables appear exactly as you designed them. For professionals and students alike, PDF exports are a dependable way to preserve visuals and data integrity across platforms. The XLS Library team emphasizes that PDFs are widely viewable and harder to modify unintentionally, making them ideal for reporting and presentations. This section lays the groundwork for understanding when a PDF export is the best choice and how to approach it with confidence.
Methods to convert: Save As, Export, or Print-to-PDF
Excel provides multiple pathways to generate a PDF from your workbook. The most straightforward is Save As, which writes a PDF version of the active workbook or selected sheets. Export offers a similar outcome with a clean, user-friendly dialog. If you’re on a device without a built-in PDF writer, you can use a PDF printer driver, which appears as a printer option and produces a PDF file instead of a physical printout. Each method has nuances related to which sheets are included, how pages are broken, and how the output aligns with page breaks. Understanding these differences helps you choose the method that best fits your workflow. As a rule of thumb, start with Save As for simple tasks, and reserve Print-to-PDF when you need broader compatibility across systems.
Step-by-step prerequisites for a smooth PDF export
Before exporting, verify print areas, margins, orientation, and scaling. Hidden rows or columns can shift content in the PDF; setting explicit Print Areas prevents surprises. Use Page Layout view to preview how content will fit on pages and adjust the page breaks accordingly. If your workbook contains charts or images, ensure they are anchored and sized to avoid clipping. These preparatory checks reduce the need for post-export edits and help you deliver a professional document.
Page setup tips to optimize your PDF output
Margins, orientation (portrait vs. landscape), and the scaling option (Fit All Columns on One Page, Fit All Rows on One Page, or Custom Scaling) determine how your content flows across PDF pages. For wide worksheets, landscape orientation with Fit All Columns on One Page often yields a cleaner result. If you have a long dataset, consider printing to multiple pages with appropriate breakpoints so the PDF remains legible. The goal is to minimize awkward page breaks while preserving readability.
Handling multi-sheet workbooks and large data sets
If your workbook contains many sheets, you must decide whether to export all sheets or select specific ones. In many cases, exporting a single worksheet or a subset of sheets yields a more focused PDF. For large reports, you can create a dedicated print area for the essential sheets and leave other data out of the export. If you consistently require a fixed set of sheets, consider saving a template workbook with preconfigured page setup so you can reproduce the same PDF every time.
Batch conversion and automation options
For teams or frequent tasks, batch converting Excel files to PDFs can save substantial time. Options include using a macro that loops through a folder of workbooks, or using Power Automate or a third-party add-in to automate the export process. When automating, include clear naming conventions (for example, [Year]-[Department]-Report.pdf) and an error-handling mechanism to catch files that fail export. Automation reduces manual steps while preserving consistency across exports. The XLS Library analysis shows that automation is a key efficiency driver for frequent exports.
How to verify the PDF after export
Always open the resulting PDF to confirm that text, tables, and visuals appear as intended. Check fonts, embedded charts, and the alignment of headers and footers. If something seems off, revisit Page Layout settings and the chosen export method. In some cases, you may need to adjust print area or scaling and re-export. Quick verification saves time by catching issues before sending the file to colleagues or clients.
Troubleshooting common export issues and fixes
If your PDF looks odd, first verify that you’re exporting the correct worksheets and that hidden data isn’t included unintentionally. Check that fonts are embedded or available on the target system to avoid substitutions. If charts disappear, verify that the charts are not set to be printed on a separate page and that linked data remains intact. For very large workbooks, export may take longer; ensure you have sufficient disk space and that the workbook isn’t exceeding your system’s memory limits.
Advanced options: automating exports with macros and add-ins
For power users, macros provide a repeatable, single-click export process. A simple macro can loop through a folder of workbooks, export selected sheets to PDFs, and save them with a consistent naming convention. Add-ins from Microsoft and third-party vendors can extend export capabilities, including batch processing, metadata embedding, and securing PDFs. When implementing automation, implement error handling and logging to track which files export successfully and which require manual intervention.
Tools & Materials
- Microsoft Excel (latest version)(Windows or macOS with a supported Office license)
- PDF printer driver or built-in PDF export(Windows: Microsoft Print to PDF or Adobe PDF; macOS: native Save as PDF)
- Stable workbook with clearly defined print areas(Helpful for predictable exports, especially in larger reports)
Steps
Estimated time: 15-25 minutes
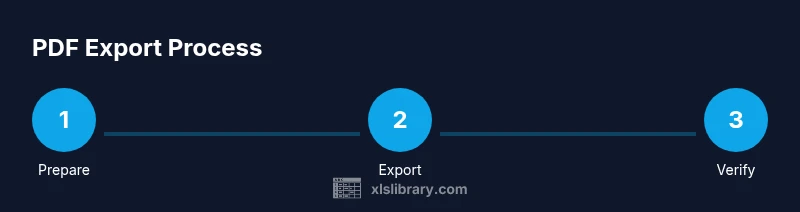
- 1
Prepare the workbook
Review content for accuracy, remove sensitive data, and decide which sheets or sections to export. Set a clear print area to ensure only relevant data appears in the PDF.
Tip: Create a backup before exporting in case you need to revert. - 2
Choose the export method
Decide whether to use Save As > PDF, Export > PDF, or Print-to-PDF. Each method has slight differences in dialog options and the scope of content.
Tip: Start with Save As for simple exports; switch to Print-to-PDF for broader compatibility. - 3
Open Page Layout settings
Go to Page Layout to adjust margins, orientation, and scaling. Preview how content will break across pages to anticipate issues.
Tip: Use the Page Break Preview view to visualize where pages will end. - 4
Set margins and orientation
Choose portrait or landscape based on your widest content. Apply narrow or moderate margins to maximize usable space without clipping.
Tip: For wide sheets, landscape with Fit All Columns on One Page often yields the best results. - 5
Configure scaling and fit
Select appropriate scaling options to keep content legible. Options include Fit All Columns on One Page and Fit All Rows on One Page.
Tip: Test a quick print preview to confirm the chosen scaling meets expectations. - 6
Preview before exporting
Use the print preview to check headers, footers, and page breaks. Confirm that charts render correctly and fonts are embedded where possible.
Tip: If fonts appear differently in the PDF, ensure the font is embedded or substituted properly. - 7
Save as PDF
Choose a destination path, name your file consistently, and select the PDF format. Confirm the export completes without errors.
Tip: Use meaningful file names like Project_Quarter_Report.pdf. - 8
Verify the PDF
Open the PDF in a reader and check for layout fidelity, embedded images, and any truncated data. Re-export if necessary.
Tip: Double-check multi-sheet outputs to ensure all intended sheets are present. - 9
Consider batch or automation
If you export frequently, create a macro or use automation tools to perform batch exports with consistent naming.
Tip: Document the macro steps so teammates can reuse or customize them.
People Also Ask
Can I convert multiple Excel workbooks to PDFs in one batch?
Yes. You can batch convert by using a macro or automation tool that loops through a folder and exports each workbook to PDF. This ensures consistency across files and saves manual effort.
Yes. You can batch convert using a simple macro or an automation tool to export each workbook to PDF.
What should I check before exporting to PDF?
Check print areas, margins, orientation, and scaling. Verify that only intended data is included and that fonts render correctly in the PDF.
Review print areas and page setup before exporting to ensure everything looks right.
Does exporting to PDF preserve formulas?
PDF exports capture the current view of the workbook, including values and charts, but they do not preserve formulas. Only the rendered results are saved.
No, formulas aren’t preserved; the PDF shows the results as they appear in Excel.
Is exporting to PDF available in all Excel versions?
Most modern versions of Excel include Save As PDF or Export to PDF. Some older editions may require add-ins or workarounds.
Most recent Excel versions have PDF export built in; older ones might need an add-in.
Can I password-protect a PDF after exporting from Excel?
PDF password protection is typically handled by PDF software after export. Excel does not add password protection to PDFs by default.
You usually password-protect with a PDF tool after exporting from Excel.
Watch Video
The Essentials
- Save as PDF for fixed-layout output
- Preview Page Layout before exporting
- Use Print Area to control what exports
- Batch exports can save time for multiple files