How to Fit an Excel Sheet to Full Page
Learn to fit an Excel sheet to a full page with print setup, orientation, margins, and scaling. This step-by-step guide covers Windows and macOS, avoids common pitfalls, and includes quick checks to ensure your data prints cleanly on a single page.

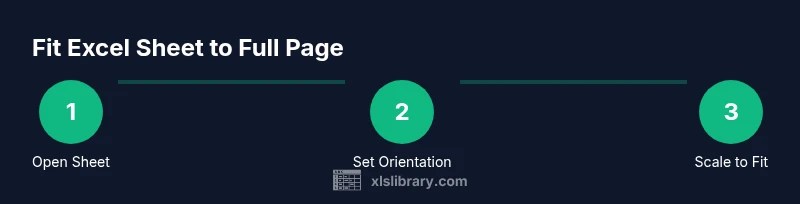
To fit an Excel sheet to a full page, set the page orientation, enable Scale to Fit, and choose 1 page wide by 1 page tall in the Print settings. Then preview and adjust margins, print area, and printer options. This approach works across Windows and macOS, reducing wasted paper and avoiding cutoffs. Follow the detailed steps below for a reliable result.
Why fitting to full page matters
According to XLS Library, printing a well-fitted worksheet saves time, reduces paper waste, and presents data clearly to readers. When data prints across multiple pages or trims essential columns, it creates confusion and extra reprints. A consistent full-page print improves professional presentation, especially for quarterly reports, client deliverables, or shared workbooks. In practice, the goal is to keep essential data legible while avoiding oversized margins or truncated headings. By understanding the core print setup—orientation, margins, and scaling—you can consistently achieve a single-page print wherever feasible. The XLS Library team found that most print problems stem from inconsistent page setup across worksheets, not from the data itself. Small adjustments now prevent bigger issues later.
Understanding the print workflow in Excel
Excel’s print workflow begins with selecting the data you want to print and choosing a print destination. From there, you’ll navigate through Page Layout and the Print dialog to control how the sheet is scaled, how many pages appear across width and height, and where page breaks occur. Familiarizing yourself with the terms—Print Area, Page Setup, Scaling, and Margins—helps you predict how a worksheet will look when printed. Keep in mind that regional printer drivers and paper sizes (A4 vs Letter) can affect results, so always verify the final preview before printing.
Page layout basics: orientation, margins, and scaling
The orientation (Portrait vs Landscape) changes how the data fits width-wise. Margins influence the space around the content; smallest safe margins reduce white space but can clip data if your content touches the edge. Scaling options, such as Fit to page or Scale, control how many pages the sheet will occupy in width and height. A common, reliable approach is to set Width to 1 page and Height to 1 page to force the entire sheet onto a single page. However, this can squeeze tiny fonts; be prepared to adjust font size or remove nonessential columns if needed.
Using the Print dialog: Windows vs macOS
Windows and macOS share the core Print dialog, but the location of Scale to Fit and Page Setup may differ. In Windows, you’ll typically access it via File > Print or Page Layout; in macOS, use File > Print and then click Show Details for scaling options. In both cases, select 1 page wide by 1 page tall under Scale to Fit, and check the Preview pane to confirm the result. If you’re printing to a PDF, ensure the page size matches your paper dimension to avoid unexpected truncation.
Quick workflow: scaling to 1 page width by 1 page height
This streamlined workflow focuses on the essential steps: select the worksheet, open the Print/Page Setup dialog, set Orientation, enable Scale to Fit, and choose Width=1 page and Height=1 page. Keep an eye on font sizes and column widths; you may need to adjust column widths so that the total data remains readable. For large datasets, consider printing only the key sections or using a dedicated print area to control what prints.
Common issues and how to check results
If the preview shows data spilling onto a second page, you can try widening the page or reducing font size slightly. Another frequent issue is hidden columns or row heights that push content off the page; ensure all needed data is visible in the Print Area and that you haven’t unintentionally set a restrictive print area. Always perform a final Print Preview to confirm margins, pagination, and readability before printing.
Real-world examples and templates
Two common scenarios illustrate this process. Scenario A prints a single worksheet where all data should fit in portrait orientation with 1 page width and 1 page height. Scenario B involves wider tables that will only fit on one page by switching to Landscape and adjusting the font size modestly. In both cases, using a defined Print Area and checking the Preview pane reduces guesswork and errors.
Final checks and saving defaults
Before closing, save your settings as a template if you often print the same worksheets. This ensures consistency across team members and avoids reconfiguring every time. Verifying Print Area, margins, and orientation on a test print makes it easier to catch issues early. The approach described here is designed to standardize page fitting across multiple workbooks.
Tools & Materials
- Printer(A standard printer compatible with A4/Letter sizes)
- Computer with Excel installed(Excel 2016+ or Microsoft 365)
- Workbook ready for print(Ensure the data you intend to print is visible in the worksheet)
- Printer paper (A4 or Letter)(Choose matching paper size to your default page size)
- Printed test page(Optional for verifying real-world output after adjustments)
Steps
Estimated time: 15-25 minutes
- 1
Open the workbook and select the sheet
Open the Excel workbook containing the data you want to print and select the worksheet. Confirm that all necessary columns and rows are visible on the screen and adjust the view if needed (e.g., zoom to 100%).
Tip: If data extends beyond the screen, consider hiding nonessential columns temporarily for the preview. - 2
Open Print or Page Setup dialog
Navigate to the Print dialog (File > Print) or open Page Setup from the Page Layout tab. This is where you control how the sheet will be scaled and paginated.
Tip: In some Excel versions, use the Page Setup button in the Ribbon to access all options from a single place. - 3
Choose orientation and paper size
Select Portrait or Landscape based on where your data fits best. Ensure the paper size matches your printer settings (A4 or Letter).
Tip: Landscape often works better for wide grids; Portrait minimizes horizontal scrolling. - 4
Enable Scale to Fit and set Width/Height
In the scaling options, set Width to 1 page and Height to 1 page. This forces the entire sheet onto a single page when possible.
Tip: If text becomes too small, consider increasing margins slightly or removing nonessential columns. - 5
Adjust margins and print area
Tweak margins to reduce wasted white space while ensuring content isn’t clipped. Define a precise Print Area if only a portion of the sheet should print.
Tip: Use Narrow margins as a starting point, then fine-tune for readability. - 6
Preview and verify in Print Preview
Use Print Preview to confirm that everything fits on one page and that headings or key data aren’t cut off. Make final adjustments as needed.
Tip: Check both page layout and page breaks; adjust Print Area if necessary. - 7
Apply and save your settings
Apply the settings and optionally save them as a template for future worksheets. This ensures consistency across similar prints.
Tip: Label the template clearly (e.g., 'OnePagePrint') to avoid confusion later.
People Also Ask
What does Scale to Fit do in Excel and when should I use it?
Scale to Fit adjusts how Excel prints a worksheet by resizing content to fit the selected page width and height. Use it when you want a single-page print or to control how data distributes across pages.
Scale to Fit resizes your worksheet for printing, helping you fit content onto a specified number of pages. It's handy when you want a single page or tightly controlled pagination.
How can I fit all columns on one page?
Set Width to 1 page and Height to 1 page in the Print Setup, then adjust margins and font size to maintain readability. If needed, temporarily hide nonessential columns for the print.
To fit all columns on one page, use the 1-page width option and reduce font size slightly if needed.
Do margins affect the fit to page?
Yes. Margins determine how much white space appears around your data. Larger margins can push content onto additional pages; smaller margins save space but risk clipping. Find a balance that preserves readability.
Margins control how much space surrounds your data. Too large margins can cause extra pages; too small margins can clip content.
Can I apply these settings to multiple worksheets at once?
You can replicate the same Page Setup settings across sheets by using a template or applying the same Print Setup configuration to each sheet. Consider creating a workbook template with your preferred print settings.
You can copy the print settings to other sheets or save them as a template for reuse.
What should I do if content still prints on two pages?
Reassess orientation, adjust margins, or reduce font size slightly. If needed, remove nonessential columns or use a smaller scale factor while preserving readability.
If it still prints on two pages, tweak orientation, margins, or font size, or prune nonessential data.
Watch Video
The Essentials
- Use Scale to Fit with 1 page width and 1 page height for single-page prints
- Check orientation, margins, and Print Area to avoid clipping
- Preview before printing and save settings as templates
- Consistency across workbooks reduces confusion and waste
- Always verify paper size matches printer settings