How to Enlarge Excel When Printing: A Practical Guide
Learn practical, step-by-step methods to enlarge Excel prints. Master scaling, margins, orientation, and print area to ensure data prints clearly every time.

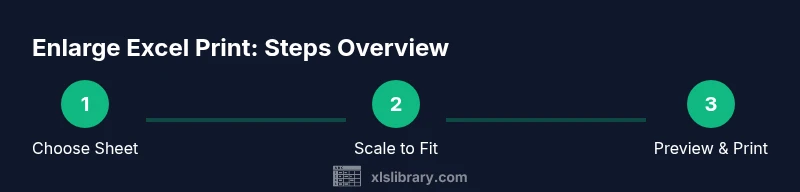
By the end of this guide you’ll know how to enlarge Excel prints using scaling, orientation, and page breaks. You’ll adjust margins, fit to page, and print area to ensure data fits clearly on paper. This approach covers both single-sheet and multi-sheet workbooks and applies to Excel on Windows and Mac.
Why You Might Need to Enlarge Excel Printouts
Printed spreadsheets often look cramped when data columns are wide or font sizes are small. Enlarging prints improves readability for meetings, audits, or handouts. With the right settings, you can make sure headers stay visible, borders align, and key figures remain legible. According to XLS Library, understanding print scaling can prevent wasted paper and improve readability. In this section we explore why enlargement matters and set the stage for practical adjustments. Expect practical examples: a budget worksheet with long category names, a project plan with many columns, and a dashboard that must fit on a single page for a meeting. The goal is to give you a clear sense of when and why enlarging prints matters, and to prepare you for the exact steps you’ll take in the later sections.
Understanding Excel's Print Settings: Scaling, Orientation, and Margins
Excel provides several levers to control how your data appears on paper. The most common controls are under the Page Layout tab or in the Print Preview dialog. Key options include "Scale to Fit" (Width and Height), the dropdowns for page orientation (Portrait or Landscape), and margin presets (Normal, Narrow, Wide). The primary goal is to preserve readability while fitting as much relevant data as possible onto each sheet. Use "Scale to Fit" with Width set to 1 page and Height set to Automatic to ensure wide sheets don’t wrap undesirably, or opt for Width: Automatic and Height: 1 page for tall lists. Print areas and titles can further refine output by freezing headers and restricting print scope. XLS Library analysis shows that consistent scaling reduces wasted paper and improves legibility across devices. After configuring scaling, always preview the printout to confirm line breaks and column widths; small misalignments can become obvious after printing. This section will also explain when to choose Fit to Page, Fit All Columns on One Page, or Fit All Rows on One Page depending on the workbook’s structure.
Step-by-Step Approach in Practice
A practical approach to enlarging prints starts with identifying the exact pages you’ll need for your audience. Start by selecting the sheet or range you plan to print, then switch to Page Layout view. Apply a scale that balances readability and data density: typically Width: 1 page, Height: Automatic, and Orientation: Portrait or Landscape based on the data shape. Use Margins: Normal or Narrow to maximize usable space, and set a Print Area to avoid printing extraneous cells. If headers repeat on every page, use Rows to repeat at top to keep context. Always verify with Print Preview before printing the final copy. For multi-sheet workbooks, set the same scale across sheets or save a template so new files inherit your preferred settings. The XLS Library team emphasizes testing with a sample page to ensure the final result matches expectations rather than guessing from the screen.
Common Pitfalls and How to Avoid Them
Things that trip people up when enlarging Excel prints include over-scaling that leaves text too small to read, under-scaling that forces readers to squint, and forgetting to adjust margins or headers. A common mistake is applying different scales to each sheet in a workbook, which creates inconsistent outputs. Another pitfall is printing without a defined Print Area, which can pull in stray cells or hidden data. To avoid these issues, always run a Print Preview after setting scaling, ensure font sizes remain legible at the chosen scale, and standardize margins. If your columns are too wide, consider increasing the page width (Fit to Page) before resorting to font scaling. Finally, save your preferred page setup as a template for future workbooks to reduce repetitive setup.
Quick Reference: When to Use Different Scaling Options
- Fit to Page (Width: 1 page, Height: Automatic): Best for wide datasets with a limited number of rows. This option expands or contracts content to fit the page width.
- Fit All Columns on One Page: Use when you must see every column on a single sheet, but be mindful of font size.
- Fit All Rows on One Page: Ideal for long lists with a fixed column count but many rows; can compress row height.
- No Scaling: Preserve actual workbook dimensions when exact print size is critical for audits or verification. Always compare against the Print Preview.
- Custom Scaling (e.g., 90%): Useful if you want finer control, but test readability carefully. XLS Library analysis shows that consistent scaling across related sheets improves comprehension in printed reports.
Authority sources
- Authority sources section is a curated list of credible references to support best practices in print scaling and page setup. See the links below for official guidance on print layouts and Excel page setup across Windows and Mac platforms.
Cross-Platform Tips: Windows vs Mac printing
Printing from Windows and macOS shares the same core concepts (scaling, margins, orientation) but the UI and defaults differ slightly. On Windows, you typically access Page Layout and Print Preview from the ribbon; on Mac, you may find similar options under File > Page Setup or the Print dialog with scaling controls. When enlarging Excel prints, verify that your chosen settings transfer correctly when moving workbooks between platforms. The key is to establish a consistent approach that you apply regardless of the OS, so your printouts remain reliable across devices. The XLS Library team recommends validating on both systems if your audience uses mixed devices.
Key Takeaways: Quick Reference for Print Enlargement
- Use Scale to Fit with Width 1 page for wide sheets that fit on a single page.
- Preview before printing to catch issues with margins or legibility.
- Apply consistent scaling across related sheets for uniform results.
- Define a Print Area to avoid printing extraneous cells.
- Save your settings as a template for future workbooks to speed up workflow.
Authority sources
- https://support.microsoft.com 2) https://www.nist.gov 3) https://www.osha.gov
Get the Most from Excel Printing on Windows vs Mac
Windows and Mac users should aim for a consistent workflow. Start with a high-contrast font, standard margins, and a width-based scaling approach for wide data sets. On Windows, use the Page Layout tab and the Scale to Fit group; on Mac, you may need to access Page Setup or the Print dialog differently. If your organization relies on printed handouts, ensure your layout looks good in both portrait and landscape orientations. The goal is clear, readable prints that accurately reflect your on-screen data while avoiding unnecessary page breaks or cramped text. The XLS Library team recommends establishing and following a reproducible print workflow so your team can produce reliable, legible handouts every time.
Tools & Materials
- Computer with Microsoft Excel (Windows or Mac)(Ensure you have the latest update for reliable print previews.)
- Printer connected and operational(Check ink/toner levels and paper settings before printing.)
- Standard letter or A4 paper(Match paper size to your print settings.)
- Print area definition (range selection)(Optional but helpful for large workbooks.)
- Test print page or PDF printer(Useful for verifying layout before wasting paper.)
Steps
Estimated time: 20-30 minutes
- 1
Open the workbook and select the sheet
Open the workbook containing the data to print and select the specific worksheet or range. This ensures you’re adjusting the correct content and avoids unintended prints from other sheets.
Tip: If printing multiple sheets, decide whether to print each separately or combine into a single print job for consistency. - 2
Access Scale to Fit options
Go to the Page Layout tab (Windows) or Page Setup (Mac) and locate the Scale to Fit group. This is where you control how the data scales to page width and height.
Tip: If you don’t see Scale to Fit, switch to Print Preview first or enable the advanced options in your Excel version. - 3
Set Width to 1 page and Height to Automatic
Choose Width: 1 page and Height: Automatic to make the sheet fit the page width without forcing every column into one page height. This balances readability and space usage.
Tip: If your font becomes too small, increase the page margin slightly or switch to Landscape orientation. - 4
Choose orientation and margins
Decide between Portrait and Landscape based on data shape. Narrow margins can help fit more content, but ensure there’s enough white space for readability.
Tip: Test both orientations if the data spans wide columns or tall rows. - 5
Define or adjust the Print Area
Select the cells you want to print, then set the Print Area. This prevents hidden columns or stray data from appearing on printed pages.
Tip: Use Clear Print Area to reset if you make wide changes to the sheet. - 6
Preview and refine with Print Preview
Open Print Preview to inspect how each page prints. Look for broken lines, truncated headers, or awkward breaks and adjust accordingly.
Tip: Use Page Break Preview to see where page breaks occur and adjust manually if needed. - 7
Repeat headers and set titles if needed
If printing multi-page reports, configure Rows to Repeat at Top so header information stays visible on each page.
Tip: Ensure header rows are excluded from the print area to prevent duplication. - 8
Print or export to PDF
When satisfied with the preview, print the sheet or export to PDF for digital distribution. Save or reuse your preferred print settings for future workbooks.
Tip: For recurring reports, save the layout as a template to speed up future prints.
People Also Ask
What is the best way to enlarge an Excel print without losing readability?
Use the Scale to Fit options with Width set to 1 page and Height to Automatic, then preview and adjust margins and orientation for readability.
Use Scale to Fit with width set to one page, then preview to ensure readability.
Will scaling affect formulas or data integrity?
No. Scaling only changes how the data is displayed on the page. Formulas and underlying data remain unchanged.
Scaling changes the print size, not the data or formulas.
Can I apply the same scaling to multiple worksheets?
Yes. Set the same scale on each sheet or create a template so future workbooks reuse your chosen settings.
You can apply the same scaling to related sheets or save a template.
How do I save print settings for future workbooks?
You can save a Page Setup template or copy the page setup from one workbook to another to maintain consistency.
Save your page setup as a template to reuse later.
Is there a difference between 'Fit to Page' and 'No Scaling'?
Yes. 'Fit to Page' scales content to fit the page, while 'No Scaling' prints exactly as it appears with the current zoom settings.
Fit to Page scales the content; No Scaling prints at the current size.
Can I print to PDF with enlargement?
Absolutely. The same scaling and margins apply when printing to PDF, which is useful for digital handouts.
You can apply the same scaling when exporting to PDF.
Watch Video
The Essentials
- Choose a scaling option that fits your data to one page when possible.
- Always preview prior to printing to catch layout issues.
- Standardize margins and orientation across related sheets.
- Print Areas help avoid wasted pages and extraneous content.
- Save printing settings as templates for future workbooks.