Project Timeline Example in Excel: A Practical Guide
Discover a practical project timeline example in Excel, with templates, milestones, dependencies, and visuals. Learn to plan, track, and update projects efficiently.

By the end of this guide, you will be able to build a practical project timeline in Excel, incorporating milestones, dependencies, and baselines; choose between a milestone-based or Gantt-style layout; and create a shareable, stakeholder-ready visualization that stays up to date. Includes templates, quick formulas, and tips to keep the plan aligned with real progress.
Why a Project Timeline Matters
According to XLS Library, a well-structured project timeline in Excel helps teams align, set realistic milestones, and track progress with clarity. In practice, a timeline turns a vague plan into a shared, readable map that shows what needs to happen, when, and in what order. When you can see start dates, durations, and dependencies all in one view, stakeholders understand priorities and risks more quickly. This reduces meetings that wander without decisions and makes accountability explicit.
A typical project timeline answers basic questions: What tasks exist? When do they start and finish? Which tasks depend on others? What milestones mark key progress? The result is a living document that guides execution, supports resource planning, and provides a single source of truth for both the project team and sponsors. Excel's flexible structure makes it possible to build a timeline that fits a wide range of project types, from software sprints to marketing campaigns. This approach also scales as your project grows, enabling easier forecasting and what-if analysis as assumptions change.
Choosing the Right Excel Approach
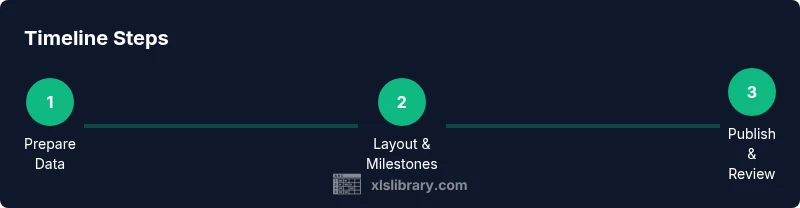
There are two common ways to structure a visual project timeline in Excel: a milestone-based timeline and a Gantt-style timeline. A milestone timeline emphasizes key checkpoints (e.g., design review, beta release) and is often sufficient for smaller projects with straightforward dependencies. A Gantt-style timeline shows task duration as horizontal bars, which can help you see overlaps, critical path, and resource load. Neither method is inherently superior; the best choice depends on project size, team workflow, and reporting needs.
Other considerations include how you want to share the timeline. If you need interactive filtering, you might build a data table with categories and responsible owners and then create charts that reference that data. If you prefer a static document for executives, a summarized view with clear milestones and color-coding may be best. Excel supports both approaches through templates, formulas, and formatting options, so you can start simple and grow as your project evolves.
Prepare the Timeline Skeleton in Excel
Begin with a clean workbook and a dedicated timeline sheet. Create columns for Task, Start Date, End Date, Duration, Dependency, Milestone, Status, and Owner. Enter your tasks and milestones in logical order, then use built-in date functions to auto-calculate durations. Add a Dependency column to show which tasks must precede others, using simple references like Task 2 or Task ID. This skeleton provides the data backbone for your visualization and reporting. Consistency at this stage saves hours of rework later and makes it easier to apply formatting and charts later on.
Add Milestones, Dependencies, and Baselines
Milestones mark important progress points rather than a full task, so label them clearly and stand them apart with distinct formatting. Use a separate Milestone column or a boolean flag to highlight these items. Dependencies help you identify the sequence of work; you can reference preceding tasks or use a dependency matrix. Baselines capture the original plan; compare current dates to baselines to detect drift. In Excel, you can implement these with simple formulas, for example, a planned start equals the minimum of all dependent tasks, and a baseline column holds the initial dates. Keeping these elements explicit makes status reporting much easier and reduces last-minute surprises.
Visualizing the Timeline in Excel
The visual heart of a project timeline is a horizontal bar chart or a stacked bar that represents task duration. A simple approach is to create a helper column that shifts a date into a bar offset and then apply conditional formatting to color the bars. Alternatively, you can build a Gantt chart using a stacked bar chart where the first series is the offset (start date) and the second series is the duration. Color-code by owner or category for quick scanning. Remember to freeze panes and add a legend for readability, and test across screen sizes so the chart remains legible on shared displays.
Best Practices and Common Mistakes
Keep the data model simple: avoid dozens of interdependent formulas that become hard to audit. Use named ranges for critical columns so formulas remain readable. Regularly validate dates and durations to prevent drift. Don’t forget to document assumptions and dependencies so new team members can understand the plan quickly. Common mistakes include missing dependencies, inconsistent date formats, and overcomplicated visuals that obscure the timeline rather than clarify it. A well-designed timeline should feel like a map, not a maze. XLS Library analysis shows that clear color-coding and concise labels significantly improve readability and alignment across teams.
Maintaining and Sharing Your Timeline
A project timeline is only valuable if it stays up-to-date. Schedule regular reviews, ideally aligned with sprint cadences or reporting cycles. When you update, consider saving a versioned copy and sharing a read-only view with stakeholders. Use Excel’s built-in sharing options or export to PDF for distribution. For long-running initiatives, publish a high-level dashboard that highlights milestones, progress, and risks, while keeping detailed task data in a separate sheet for drill-downs. Finally, set expectations with your team about who updates the sheet and when, to maintain consistency and trust across the project lifecycle.
Tools & Materials
- Microsoft Excel (365 or equivalent)(Latest version preferred for export options and templates)
- Prepared task/milestone list (Excel or CSV)(Columns: Task, Start Date, End Date, Dependency, Milestone)
- Timeline template or starter workbook(Use a clear sheet named Timeline)
- Color palette and styling guidelines(3-5 colors max for readability)
- Documentation of assumptions/dependencies(Helps onboarding)
- Optional: Power Query or Power Pivot (for automation)(If you want self-updating data connections)
Steps
Estimated time: 60-90 minutes
- 1
Open a clean workbook
Launch Excel, create a new blank workbook, and rename Sheet1 to Timeline. Set a consistent date format (YYYY-MM-DD) and add headers in Row 1 for Task, Start, End, Duration, Dependency, Milestone, Owner, Status. This ensures a stable data backbone.
Tip: Use a dedicated folder and versioning to track changes. - 2
List tasks and milestones
Enter each task and milestone in its own row, using clear, scorable names. Group related tasks into phases in a separate column if helpful. Keep milestones as distinct rows or as a boolean flag in the Milestone column.
Tip: Keep names concise and unique. - 3
Set start, end, and duration
Fill in Start and End dates for each item and compute Duration with a simple formula: =End-Start+1. Validate dates, and set End to be not earlier than Start. This step lays the foundation for accurate visualization.
Tip: Use Data Validation to prevent incorrect dates. - 4
Define dependencies
Add a Dependency column that references preceding tasks. Use simple labels (Task 3) or identifiers. Building this early helps you model sequencing and identify the critical path later.
Tip: A small, consistent syntax pays off in formulas. - 5
Create a basic timeline view
Add a helper column for a bar offset and create a simple bar for each task using conditional formatting. This gives you a rough Gantt-style view without complex charts at first.
Tip: Start with a pilot subset to test visuals. - 6
Apply final formatting
Convert the timeline into colored bars by applying conditional formatting or a stacked bar chart. Use 3-4 colors for task status or ownership. Add a legend and freeze panes for easy navigation.
Tip: Label axes clearly and keep the scale meaningful. - 7
Highlight milestones and baselines
Format milestone rows with a distinct color or shape to stand out. Add a Baseline column to capture the original schedule and compare against current dates to detect drift.
Tip: Review baselines with stakeholders before finalizing. - 8
Review, export, and maintain
Review the timeline with the team, export to PDF if needed, and save a versioned copy. Set a cadence for updates (e.g., weekly) and share ownership for ongoing maintenance.
Tip: Create a quick one-page summary for leadership.
People Also Ask
What is a project timeline in Excel?
A project timeline is a plan that shows tasks, dates, and milestones along a calendar axis. It helps teams visualize schedule and dependencies.
A project timeline in Excel is a visual plan showing tasks and milestones along a calendar.
Do I need a Gantt chart to make a project timeline?
No—Excel supports milestone timelines and Gantt bars, so choose based on project complexity.
You don't have to use a Gantt chart; milestones can work well.
Can I automate updates to the timeline?
Yes, by using tables, formulas, and possibly Power Query to pull in progress data. You can set recalculation to refresh dependencies.
Yes, you can automate with formulas and data connections.
Are there ready-made templates for Excel timelines?
Yes, you can start with built-in templates or create a custom template based on your data model.
There are templates you can customize.
How often should I refresh the timeline?
Refresh after milestone updates or on a regular cadence that matches reporting cycles.
Refresh it after milestones or weekly.
Is Excel enough for large, complex projects?
For many small to mid-size projects, Excel is sufficient; for very large programs, consider add-ins or dedicated tools.
Excel works for many projects, but big programs might need more.
Watch Video
The Essentials
- Define tasks and milestones clearly.
- Choose an Excel timeline approach that fits your project.
- Use visuals to communicate progress.
- Keep the timeline current and shareable.