Print from Excel: A Practical How-To Guide
Learn how to print from Excel with precise page setup, margins, and print areas. This XLS Library guide covers steps, previews, and PDF export to produce professional, consistent prints.

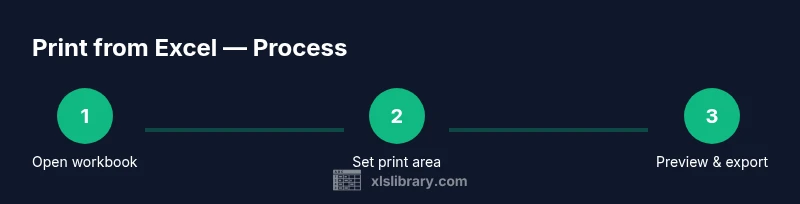
Printing from Excel boils down to four essentials: define the print area, set page layout, preview before printing, and choose the output (printer or PDF). This ultra-compact version highlights these steps; see the full guide for detailed steps and screenshots.
Why printing from Excel matters
Printing from Excel is about turning dynamic spreadsheet data into reliable, readable paper outputs. It goes beyond merely pressing Print; it defines how data is presented to stakeholders, ensuring that key figures, trends, and summaries are legible and properly aligned on the page. When you print, you create a static snapshot that may be shared in meetings, audited, or reviewed by colleagues who don’t work with the file daily. The ability to control print settings directly in Excel—print areas, page orientation, margins, and headers—helps maintain consistency across reports. According to XLS Library, mastering print from Excel reduces wasted paper, prevents misunderstandings, and speeds up decision-making by presenting a clean, professional document. This is especially important for budgets, inventory lists, dashboards, and monthly summaries that teams rely on in print form. As you’ll see, planning the print layout before you hit Print saves time and avoids last-minute scrambles, especially when multiple people contribute to the same workbook.
Core concepts: print areas, scaling, and page layout
Before you print, you need to understand several core concepts that control how a worksheet becomes a printed page. The Print Area defines the exact cells that will appear on the sheet, while Page Setup governs margins, orientation, and the overall scale of the output. Scaling to fit can condense or expand data to fit a single page width or height, which is crucial when turning wide dashboards into an accessible print. Print Titles (rows or columns to repeat) help maintain context across multi-page prints. Headers and footers can display workbook metadata like file name, date, and page numbers, which is essential for formal reports. In practice, you’ll often combine these tools: set a print area for the data you need, choose a layout that matches your audience, and preview the result to confirm readability. The XLS Library approach stresses a deliberate setup: think about how many pages your sheet will occupy and how the reader will navigate the printed pages.
Step-by-step: prepare your workbook for printing
Preparation is the backbone of a clean printout. Start by selecting the print area that contains the data you want to publish, and hide or remove extraneous columns or rows to avoid clutter. Check that all data labels are visible and not truncated by formatting. If you’re using multiple sheets, decide whether to print one sheet at a time or combine worksheets using a print setup that respects consistent margins and fonts. Clear any accidental page breaks you don’t intend to keep, and verify that your data sorts and formulas will render correctly on paper. This preparation saves time in the final preview and helps prevent misalignment when the document is handed to others. For visual guidance, you can follow a diagram like “Print Area Setup” (see Diagram 1) to ensure you’re selecting the right cells before printing. The XLS Library method recommends performing a quick dry run with a test print to catch issues early.
How to set a print area and page breaks
To set a print area, select the cells you want to print, then go to the Page Layout tab and choose Print Area > Set Print Area. If you need different sections on separate pages, insert manual page breaks: click a cell where you want a break, then choose Page Layout > Breaks > Insert Page Break. This technique is invaluable when printing reports that combine data tables with charts. Always re-check the preview to confirm the breaks align with logical sections. When working with large worksheets, consider using separate print areas for each section and printing them sequentially so you can better manage pagination. Diagram references in the guide illustrate typical print area selections and where breaks commonly occur.
Headers, footers, and page numbers
Headers and footers add context and professionalism to printed workbooks. Use them to display the workbook name, date, page numbers, and author. In Excel, access the header/footer editor from Insert > Header & Footer or Page Layout > Page Setup > Header/Footer. You can also insert dynamic fields (like page numbers) that update automatically on each page. Keep suffixes consistent across pages to avoid confusion, especially in budget or inventory reports. If you’re printing a multi-page document, consider including a brief section title or date in the header to help readers orient themselves across sheets. When using headers and footers, ensure your margins provide adequate space so that nothing gets clipped during printing.
Preview, print, and export options
Always use Print Preview before printing to catch layout issues. Use the Scale to Fit options to control how many pages wide or tall the output should be. If you’re sharing with others who don’t have Excel, exporting to PDF is a reliable choice; PDFs preserve layout more consistently across devices. When printing, confirm that gridlines and headings appear as needed—gridlines can improve readability, especially for data-dense tables. For dashboards, consider printing to PDF with landscape orientation and a slightly smaller font to fit content legibly. If the workbook includes charts, verify they scale properly with the rest of the data. Finally, report any anomalies to the owner so the next iteration can be refined for print clarity.
Troubleshooting and best practices for different outputs
Prints rarely go perfectly on the first try. If the final print looks cropped or misaligned, revisit your print area, page breaks, and margins. Ensure fonts are readable and that colors print with appropriate contrast if you’re using color. For consistent reports across teams, standardize a template with preconfigured Print Areas, Page Setup options, and headers/footers. When distributing to external audiences, prefer exporting to PDF or printing to a high-quality printer with test pages to calibrate paper size and margins. Finally, document the steps you used for this print so others can reproduce the same result with minimal friction.
Tools & Materials
- Computer with Microsoft Excel installed (Windows or macOS)(Ensure you’re running a recent release for accurate Print settings)
- Printer or PDF export option(Test printing to a real printer and a PDF printer to verify output)
- Sample workbook for testing print settings(Include multiple sheets and representative data)
- Printer paper (A4/letter) and basic supplies(For physical prints, keep standard paper size handy)
- Optional: color ink or grayscale printer profile(Use grayscale to save ink if color isn’t needed)
Steps
Estimated time: 15-25 minutes
- 1
Open and review the workbook
Open the workbook and identify the data you intend to print. Confirm which sheets, ranges, and charts should appear, and note any sensitive data that should be omitted. This step ensures you don’t waste paper on unneeded content and sets the stage for a clean print layout.
Tip: Use a separate print preview to verify only the required data will print. - 2
Show gridlines and headings for readability
Enable gridlines and row/column headings if you want them visible in print. This helps readers track values across columns and rows, especially in dense tables and dashboards.
Tip: Gridlines can be hidden or shown in Print Preview if you need to compare styles. - 3
Set the print area
Select the cells you want to print, then go to Page Layout > Print Area > Set Print Area. This confines printing to the chosen region and prevents accidental data from spilling onto extra pages.
Tip: If your data changes, redefine the Print Area before your next print. - 4
Adjust margins, orientation, and scaling
Visit Page Layout to adjust Margins, Orientation (Portrait or Landscape), and Scale to Fit. Use Fit to 1 page wide by tall if you need a compact single-page print, or adjust scale percent to balance readability.
Tip: Start with Fit to Page and fine-tune using Scale to Fit percent. - 5
Repeat header rows
If your print spans multiple pages, set Rows to repeat at top under Page Setup > Sheet > Rows to Repeat. This keeps key labels visible on every page.
Tip: Repetition improves comprehension for long reports. - 6
Add headers and footers
Insert headers and footers to show titles, dates, page numbers, or file names. This helps recipients orient themselves and track progression across pages.
Tip: Limit header/footer content to essential information to avoid clutter. - 7
Preview and adjust
Use Print Preview to inspect the final layout. Check margins, page breaks, and whether all intended content fits nicely. Make adjustments as needed.
Tip: Toggle between portrait and landscape to compare readability. - 8
Print or export to PDF
Choose the correct destination: a physical printer or a PDF. For sharing, PDF preserves layout consistency across devices. Save a copy of your settings as a template for future prints.
Tip: Always save a test copy before distributing to others.
People Also Ask
What is the difference between Print Area and printing an entire worksheet?
Print Area confines output to the selected cells, while printing the whole sheet includes all data. Using a defined Print Area helps avoid wasted paper and ensures focus on relevant content. You can redefine the area as data changes.
Print Area limits what prints to the chosen cells, avoiding unnecessary content on paper.
How do I print multiple worksheets in a workbook?
You can print multiple sheets by selecting the sheets and printing, or by configuring the print settings to include multiple sheets in one job. Ensure each sheet has consistent margins and headers for a cohesive report.
Select the sheets you want and print; ensure consistent formatting.
How can I export a workbook as PDF while preserving layout?
Use the File > Save As or File > Export option to save as PDF, or set the printer to 'PDF' in the Print dialog. Check the PDF output in Print Preview to confirm margins and page breaks.
Save or export as PDF from the print dialog and verify in preview.
Why is my printout missing headers or gridlines?
Headers and gridlines can be toggled in Page Layout or the Print settings. Make sure they are enabled for the selected Print Area and that the preview shows them correctly.
Enable headers and gridlines in the print settings and recheck Preview.
What is Scale to Fit and when should I use it?
Scale to Fit adjusts the content to fit a specified number of pages. Use it for wide dashboards or small paper sizes to ensure readability without manual resizing.
Scale to Fit helps fit content onto a set number of pages.
Watch Video
The Essentials
- Define the exact print area before printing
- Preview and adjust scaling to fit page(s)
- Use headers/footers for context and professionalism
- Export to PDF when sharing externally
- Test with a dry run to catch layout issues