Set Print Area in Excel: Step-by-Step Guide
Master setting the print area in Excel with practical steps, screenshots, and tips for consistent, printer-friendly worksheets across workbooks across files.

According to XLS Library, you will learn how to set the print area in Excel, ensuring your worksheets print exactly what you need. This step-by-step guide covers selecting the included cells, saving the area as a named print area, and verifying the print preview across pages. By the end, you’ll be able to apply consistent print areas to multiple sheets and workbooks.
What is the Print Area in Excel?
The print area is the specific block of cells Excel will send to the printer when you choose Print. Setting a print area helps you control what prints on each page, ensuring you avoid blank pages and extraneous data. In practice, you select the cells you want to print, then tell Excel to treat that selection as the print area. Once set, even if you scroll, adjust margins, or add data outside the area, the print area remains anchored to the chosen cells until you modify it again. This is essential when preparing budgets, inventories, or reports that require a defined, repeatable printout. A well-managed print area also makes it easier to print multiple sheets with consistent layout. The ability to fix the print area is particularly valuable when you work with monthly reports, where only the latest data needs to appear on each page. In Excel, print area settings persist across sessions within the same workbook, but they do not automatically carry over to other workbooks unless you save the area as a named range. Understanding this concept lays the groundwork for reliable printing workflows.
Why Set a Print Area?
There are several practical reasons to define a print area: efficiency, accuracy, and professionalism. When you set the print area, you ensure only the relevant portion of your worksheet prints, avoiding wasted ink and misaligned pages. It also makes it easier to share reports with stakeholders who expect neatly formatted outputs. If you work with large datasets, a defined print area helps maintain consistent margins and header visibility across pages. For students and managers, repeatable printouts become a reliable reference, reducing the time spent adjusting print settings for each run. Finally, named print areas—if you create them—let you reuse the same layout across multiple sheets and workbook versions, speeding up the process when you must deliver updated reports monthly or quarterly.
Defining a Print Area: Set Area vs Named Range
Excel offers two common approaches to control printing: you can set the print area directly on the worksheet, or you can save a named range that represents your print area for reuse. Setting the print area is quick: select the cells and use the Print Area command in the Page Layout tab. Named print areas are a longer-term solution; they behave like a custom reference you can apply to any sheet or workbook, making it easier to maintain the same print layout as your data changes. This distinction matters when you’re working across multiple tabs that share a consistent structure, as named ranges reduce the risk of accidentally printing the wrong region. If you frequently print the same section, a named area can save time and ensure consistency across versions of your workbook.
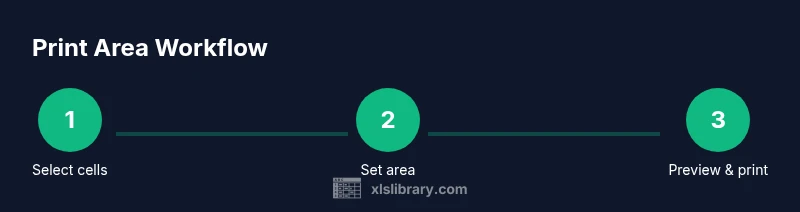
Quick Reference: How to Set the Print Area
Here is a concise, repeatable sequence you can follow in any modern Excel version:
- Select the range of cells you want to print.
- Go to the Page Layout tab and click Print Area > Set Print Area.
- To remove the print area, choose Clear Print Area.
- Save the workbook to retain the setting; in most cases the print area remains until you change it again.
- For cross-sheet consistency, apply the same steps to each worksheet and consider creating a named print area to reuse later. This quick reference keeps you focused on the essential actions without getting lost in dialog boxes.
Verify with Print Preview and Page Setup Options
Before printing, verify how your output will look using Print Preview (Ctrl+P). In Print Preview you can confirm that headers, footers, margins, and orientation align with your expectations. If necessary, open the Page Setup dialog to adjust options such as scaling, paper size, and print titles. Remember: the print area defines the data, while Page Setup governs the surrounding layout. By toggling between normal view and Page Layout, you can fine-tune the result for a clean, readable printout.
Managing Print Areas Across Workbooks
To reuse print area across sheets and workbooks, save the area as a named range. This makes it easy to apply the same print area to new but similarly structured worksheets. Go to Formulas > Name Manager, create a new name, and set the Refers to range equal to the previously printed area. Then, on another worksheet, you can use Page Layout > Print Area > Set Print Area and select the named range. This approach reduces drift in your print layouts when updating datasets.
Common Pitfalls and How to Avoid Them
Several mistakes can derail printing efficiency. A common issue is modifying data outside the print area without updating the area, which can lead to unintended content being printed. Another pitfall is relying on default print settings; always verify orientation, margins, and scaling in Page Setup. If you delete or hide rows within the print area, Excel may adjust the area automatically or produce blank pages. Finally, remember that print areas are workbook-specific; if you share a file, others must set or reuse the same named area to get the same results.
Best Practices for Consistent Printing
- Define a print area at the worksheet level first, then apply to all relevant sheets.
- Use Print Titles (row or column headers) to keep context across pages.
- Save print areas as named ranges for easy reuse in future sessions.
- Check Print Preview on every major data change; small edits can change the printed region.
- Keep a simple, repeatable template for reports that you print regularly.
Quick Start Cheatsheet
- Select the exact cells to print. 2) Page Layout > Print Area > Set Print Area. 3) Preview with Ctrl+P; adjust as needed. 4) Save the workbook; consider creating a named print area for reuse. 5) If printing across multiple sheets, repeat per sheet.
Tools & Materials
- Microsoft Excel (Windows or macOS)(Office 365 or standalone Excel is fine)
- Active workbook to print(Open the target spreadsheet)
- Printer or Print Preview access(Optional to verify output before printing)
- Notebook or digital checklist(For recording print area references or named ranges)
- Name Manager access (optional)(Needed if you plan to create named print areas)
Steps
Estimated time: Estimated total time: 12-18 minutes
- 1
Open the workbook and locate data
Open the Excel workbook containing the data you intend to print. Navigate to the worksheet and verify that the data is organized with headers and the desired layout. This step sets the context so you don’t miss important rows or columns when printing.
Tip: Use Freeze Panes to keep headers visible while you select the print area. - 2
Select the exact print area
Click and drag to select the cells you want included in the printout. Include any header rows if needed. Avoid selecting extra empty rows that would waste space on the printed pages.
Tip: Double-check the last row and column to ensure nothing important is left out. - 3
Set the print area
Go to the Page Layout tab, choose Print Area, and select Set Print Area. This anchors the current selection as the printable region. If you later adjust the sheet, the area remains defined until you reset it.
Tip: To quickly verify, press Ctrl+P to open Print Preview after setting the area. - 4
Preview and adjust
Review the Print Preview to confirm margins, orientation, and scale. If the data spans multiple pages, adjust settings in Page Setup (Margins, Orientation, Scaling) to improve readability.
Tip: Use ‘Fit to one page wide by X pages tall’ sparingly to avoid squished text. - 5
Consider saving as a named print area
If you will reuse this area, save it as a named range via Formulas > Name Manager. Named print areas simplify reuse across sheets and workbooks.
Tip: Choose a descriptive name like PrintArea_Q2_Sales to avoid confusion later. - 6
Apply to additional sheets
Repeat the same steps for other worksheets with a similar structure, or reference a named print area on those sheets. Consistency reduces printing errors.
Tip: Document which sheets share the same print area to speed up future updates. - 7
Test print or export
Do a test print or export to PDF to ensure accurate results. Confirm headers, footers, and page breaks match expectations before distributing.
Tip: Print a small sample page first to catch layout issues early.
People Also Ask
What is the print area in Excel and why should I use it?
The print area defines exactly which cells Excel will print. Setting it helps avoid unwanted data and ensures consistent, page-ready output across worksheets.
The print area is the part of the worksheet you print. It helps keep your printed pages clean and predictable.
How do I set the print area quickly?
Select the cells you want to print, then go to Page Layout > Print Area > Set Print Area. Use Print Preview to confirm.
Select the area, then set it as the print area and preview to confirm.
Can I reuse a print area on other sheets?
Yes. Save the area as a named range via Name Manager. Then apply the named area to other sheets using the Print Area command.
You can reuse it by saving a named print area and applying it elsewhere.
What happens if the data changes inside the print area?
If you modify data inside the print area, the printed result changes accordingly. Recheck the area and Preview after edits.
Any data changes inside the print area will show up in printouts; re-check in Preview.
Is the print area saved with the workbook or the worksheet?
Print areas are workbook-specific and stored per worksheet. If you share the file, recipients may need to set the area on their end.
The print area is saved with the workbook and worksheet, so others may need to set it too.
How can I ensure headers repeat on every printed page?
Use Print Titles in Page Setup to repeat header rows on every page, enhancing readability across pages.
Use Print Titles to repeat header rows on each page.
Watch Video
The Essentials
- Define a clear print area to control printed content.
- Use named print areas to simplify reuse across workbooks.
- Always verify with Print Preview before printing.
- Document and standardize your print setup for consistency.