How to Print the Lines in Excel
Master printing gridlines and borders in Excel with a practical, step-by-step approach. Learn to set print areas, repeat headers, and adjust scaling for clean, readable printouts across Windows and Mac.

Here's how to print the lines in Excel: You’ll learn to enable gridlines, print areas, and page setup options so your data prints with visible row and column lines. The guide covers Windows and Mac, how to repeat header rows, print titles, and adjust scaling, margins, and orientation for clean, professional printouts.
Why printing lines matters
According to XLS Library, printing lines and gridlines is more than a cosmetic feature—it's about preserving data structure when a document moves from screen to paper. When you print a worksheet, lines help readers distinguish rows and columns, track values across wide tables, and spot patterns quickly. If you’re learning how to print the lines in excel, the goal is to reproduce the worksheet's layout faithfully while keeping margins, headers, and footers legible. In practice, gridlines should be visible but not overpowering; borders can be added selectively to emphasize key groups or totals. This block explores why clear lines matter, what to enable, and common mistakes to avoid. You’ll discover how print settings interact with page size, orientation, and scaling, and why small choices—like whether to print gridlines or not—can affect readability and overall impression. By following best practices, you’ll produce printed worksheets that are easy to scan, annotate, and share in meetings or client reviews. The XLS Library team emphasizes practical, approachable steps that work across recent Excel versions and both major platforms.
Understanding Excel's printing options
Printing in Excel offers a mix of universal controls and version-specific nuances. The core ideas are simple: you control what prints (print area), how it prints (orientation and margins), and what appears on every page (headers, footers, and repeating rows). When you ask how to print the lines in excel, gridlines are one of the first toggles to consider, followed by whether borders should be drawn around cells. Page Layout and Print Preview are your two constant companions: they show you a live representation of the final sheet and let you adjust settings before you waste paper. A second layer of control comes from Scale, Width, and Height options, which determine how many pages your content will span. Mastery comes from practicing these choices on real worksheets—start with a simple table, then scale up to multi-sheet reports. Over time you’ll learn which combinations deliver crisp, readable prints with minimal adjustments.
Step-by-step: Windows users (how to print the lines in excel)
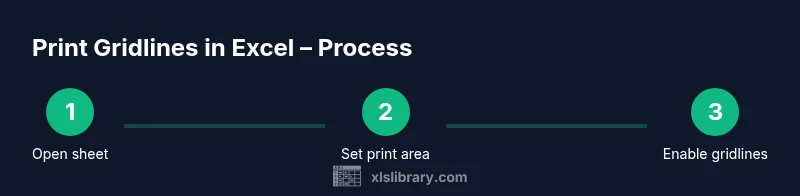
- Open the workbook and navigate to the worksheet you intend to print. Review the data layout to decide which elements (titles, headers, gridlines) must appear on the printed page.
- Set the print area by selecting the desired cells, then go to Page Layout > Print Area > Set Print Area. This confines printing to a defined region, preventing blank pages or extraneous data from appearing.
- Enable gridlines by going to Page Layout > Sheet Options > check Gridlines (Print). This ensures the worksheet’s background lines appear on the printout.
- Open File > Print or press Ctrl+P to preview. Confirm that the gridlines, headers, and any borders align with page boundaries and margins.
- If you print headers on every page, use Page Layout > Print Titles to specify Rows to repeat at top. This keeps column labels visible on pages with long tables.
- Adjust margins and orientation (Portrait vs Landscape) in Page Setup as needed to balance content density and readability.
- Use Scale to Fit (Under Page Setup) to set options like Width: 1 Page and Height: Automatic, ensuring content fits within the printed pages without squashing data.
- Click Print and verify the output. If results aren’t ideal, return to the preview, tweak Print Area or scaling, and retry. Pro tip: run a quick test print on a single page first to save resources.
tip2 and tip3? missing in this field—keep in mind each step has its own tip in the STEP-BY-STEP block
Step-by-step: Mac users (how to print the lines in excel)
- Open the workbook and select the worksheet to print. Confirm that the data structure mirrors what you expect in print.
- Navigate to Page Layout > Print Area > Set Print Area to fix the region you want to print. This is essential for avoiding accidental printing of unrelated cells.
- Check the option to print gridlines and, if needed, borders by using Page Layout > Sheet Options > Gridlines and Borders. Gridlines help retain the worksheet’s structure on paper.
- Open File > Print or use Command+P to access the print dialog. Review the preview to ensure gridlines and headers appear as intended.
- Decide on Headers: use Rows to Repeat at Top under Print Titles to keep column names visible on every page.
- Adjust orientation and margins in the Page Setup panel. Portrait is common for dense tables; landscapes suit wide tables.
- Use the Fit to Page or Scale to Fit options to manage page breaks. This helps maintain legibility when data spans multiple pages.
- Print a test run, then refine axes and scaling based on the result. Pro tip: PDF export first can help verify layout across devices.
Managing print areas and repeating headers
A precise print area is the foundation of clean output. By defining exactly which cells print, you prevent wasted pages and ensure the lines you want appear in the final document. Repeating header rows is equally important for multi-page tables; without this, readers lose context when data extends beyond a single page. Start by selecting the range you need, then apply Set Print Area. If your table crosses pages, add Rows to Repeat at Top under Print Titles. Remember that headers and gridlines are not the same: gridlines are the worksheet’s background lines, while borders are formatting you apply to cells. When deciding how to print the lines in excel, plan for the longest page and test with Print Preview to confirm that headers align with the data beneath.
In practice, the combination of a defined print area and repeating headers creates printed sheets that are easy to navigate, even for readers who join mid-presentation. This approach also minimizes the need for added notes or manual reformatting after printing.
Previewing and adjusting print settings
Print Preview is your most powerful ally before printing. It reveals how your selected settings will appear on paper and lets you catch mismatches in margins, header placement, and line density. When you run a preview, start with gridlines visible and borders turned off unless you require emphasis. If the page breaks occur in awkward places, adjust the orientation, margins, or scaling until the preview shows a clean flow from page to page. Use the zoom feature in the preview to inspect small type and ensure headers stay legible. The ultimate goal is a print that mirrors the worksheet’s structure while remaining readable in a standard paper size. Always verify that critical numbers or labels don’t get truncated by narrow margins or aggressive scaling. The small adjustments you make in preview save time and ink later.
Troubleshooting common printing issues
Many printing hiccups stem from misaligned page settings or ambiguous print areas. If gridlines aren’t printing, double-check that Gridlines (Print) is enabled under Page Layout > Sheet Options. Also verify that you’ve defined a Print Area and that you’re viewing the correct page in Preview. If headers disappear on some pages, recheck the Rows to Repeat at Top under Print Titles. When text looks squished, try reducing the scale or increasing the paper size from Letter to Legal or A4 to maintain readability. On some devices, differences in printer drivers can affect margins; in such cases, test printing from another printer or adjust printer defaults. Consistency is key, so create a standard method you apply to similar worksheets. This consistency reduces errors and ensures reproducible results.
Best practices for legible printed worksheets
Clear printed lines come from a deliberate balance of gridlines, borders, margins, and scaling. Use gridlines for baseline readability, and apply borders selectively to highlight totals, groupings, or subtotals. Always set a defined Print Area to avoid wasted pages, and repeat header rows for multi-page reports to help readers stay oriented. When possible, print in a high-contrast mode or use a dark header row to increase legibility in black-and-white prints. Finally, adopt a standard print template that includes your preferred margins, font size, and scaling. This creates a predictable, professional result across all Excel projects. The end result is printing lines in Excel that look intentional rather than accidental, making your data easier to review in meetings and handouts.
Advanced tips: borders, gridlines, and print titles together
To elevate print quality, combine borders with gridlines only where needed. Borders add emphasis on key rows or columns without overpowering the page. Use Print Titles for top rows and, if necessary, columns to repeat on subpages. When working with large datasets, consider using Landscape orientation and narrower margins to maximize usable space. If you frequently print reports, create a quick-access template with your preferred settings and print area already defined. This saves time and ensures consistent outputs, especially when sharing worksheets with colleagues who expect a uniform look. With these practices, you’ll confidently manage complex tables and maintain readability across multiple pages.
Tools & Materials
- Computer with MS Excel installed(Ensure Excel version supports Print Gridlines (Excel 2010+))
- Printer(Any standard printer; color is optional for charts/borders)
- Printer paper(Standard Letter or A4; consider heavier stock for formal handouts)
- Network or USB connection(Stable connection to printer to avoid print drops)
Steps
Estimated time: 20-30 minutes
- 1
Open workbook and select worksheet
Open the workbook containing the data you need to print. Navigate to the specific worksheet and confirm that the data layout matches your intended print view. This initial step sets the stage for precise printing and prevents wasted pages.
Tip: Check that the active sheet is the one you want to publish; a quick peek at the bottom tab saves time. - 2
Define the print area
Select the cells you want printed, then go to Page Layout > Print Area > Set Print Area. This confines printing to a defined region and prevents blank pages from appearing in the final output.
Tip: If the data extends unpredictably, consider using dynamic ranges or named ranges for easier updates. - 3
Enable gridlines or borders
In Page Layout > Sheet Options, tick Gridlines (Print) to print the worksheet’s underlying lines. If emphasis is needed, apply borders to key cells to guide readers without cluttering the page.
Tip: Borders should be used sparingly—too many borders reduce readability. - 4
Preview the print
Open File > Print to preview the final layout. Ensure gridlines, borders, and header rows align with margins and page breaks.
Tip: Use the print preview zoom to inspect small text at 100% and confirm legibility. - 5
Set header rows to repeat
If your data spans multiple pages, use Page Layout > Print Titles to specify Rows to repeat at the top. This keeps column headers visible on every page.
Tip: Choose a row with clear column labels for maximum readability. - 6
Adjust margins and orientation
Choose margins (Normal, Narrow, or Custom) and orientation (Portrait or Landscape) based on data density and page width.
Tip: Landscape often works well for wide tables and wide data columns. - 7
Apply scaling to fit pages
Under Scale to Fit, set Width to 1 Page or adjust Height accordingly. This helps prevent data from cramming onto too many pages.
Tip: Avoid excessive scaling that makes text too small to read. - 8
Print and verify
Click Print and review the physical copy. If needed, return to the preview to tweak the print area, margins, or scaling before a second attempt.
Tip: A quick test print saves paper and ink in the long run.
People Also Ask
What is the difference between gridlines and borders in Excel printing?
Gridlines are the worksheet’s default background lines that help orient data. Borders are formatting applied to cells to emphasize specific edges or totals. To print borders, apply the border formatting to the desired cells, then print with borders enabled.
Gridlines are the default lines you see on screen; borders are added cell-by-cell for emphasis. Enable borders in the home or borders menu, then print as usual.
How can I print header rows on every page?
Use Print Titles to specify Rows to repeat at the top. This keeps column labels visible on all pages when your data spans multiple pages.
Set which rows to repeat at the top, so the headers stay visible on every printed page.
Can I print multiple sheets in one go?
Yes. In the Print dialog, you can choose to print the entire workbook or specific sheets. Arrange the print order as needed before printing.
You can print all sheets or pick individual ones from the Print dialog.
Why aren’t gridlines printing even though I enabled them?
Check that Gridlines (Print) is enabled under Page Layout > Sheet Options, and verify that you’ve selected the correct area for printing. Preview helps catch this early.
Make sure gridlines are turned on in the print options and you’re viewing the right area in Preview.
How do I change orientation to fit wide tables?
Change orientation to Landscape in Page Setup to give your data more horizontal space and improve readability on printed pages.
Switch to Landscape so your columns aren’t cramped.
Can I export my print as PDF from Excel?
Yes. In Windows or Mac, use the Print dialog and choose Save as PDF (or equivalent). This preserves layout and gridlines when sharing.
Print to PDF to preserve the layout exactly as printed.
Watch Video
The Essentials
- Enable gridlines for readability
- Use Print Area to limit printed content
- Repeat header rows on multi-page prints
- Preview before printing to avoid waste
- Match margins and orientation to data density