Print Lines in Excel: A Practical Step-by-Step Guide
Master how to print exact lines in Excel with headers, print areas, and page breaks. This comprehensive guide covers setup, preview, troubleshooting, and tips for exporting to PDF across Windows and macOS.

Printing lines in Excel means configuring the print area, headers, and page breaks so your worksheet prints exactly as intended. This guide shows you how to print specific lines or ranges, repeat header rows on every page, and use Print Preview before printing. According to XLS Library, mastering this task reduces wasted paper and prevents data from being cut off.
What printing lines in Excel means
Printing lines in Excel is about choosing the exact rows and columns you want to appear on paper, ensuring headers repeat on each page, and controlling page breaks, margins, and scaling. When done well, your printed workbook communicates data clearly to colleagues and clients. According to XLS Library, this capability helps users avoid wasted paper and misaligned reports, especially for multi-page sheets. The keyword print lines in excel should guide your decisions around print areas, headers, and pagination. This section introduces the core concepts so you can print with confidence across Windows and macOS, noting small interface differences but a consistent underlying approach.
By understanding the print area, you prevent Excel from printing irrelevant cells, while keeping headers visible on every page. You’ll also learn how to preview your printout to catch mistakes before you print or export to PDF. With these basics in place, you can tackle more complex sheets—multisheet workbooks, large data ranges, and dashboards—without guesswork.
tipTagsFlow】:null
descriptionNoteForInternalUseOnly":""
Tools & Materials
- Computer with Excel installed(Excel 2016+ or Office 365; Windows or macOS works similarly)
- Printer (optional)(If you plan to print physically; otherwise export to PDF)
- Printer paper (optional)(Use standard A4 or Letter for testing print areas)
- Access to a workbook you can print(Start with a sample sheet to practice print settings)
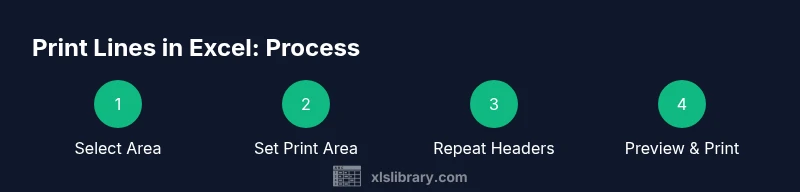
Steps
Estimated time: 15-25 minutes
- 1
Open the workbook and select the print range
Open the workbook and identify the exact rows and columns you want printed. You can select a single area or extend the selection to multiple regions. This foundation ensures subsequent steps apply to the correct data set.
Tip: If you’re unsure, start with a small sample to confirm the print area before expanding. - 2
Set the print area
Go to Page Layout > Print Area > Set Print Area (or right-click the selection and choose Define Print Area). This defines what Excel will send to the printer or PDF. If you later adjust the data, reselect and reset the area.
Tip: Use the Name Box to quickly verify the defined print area name, restoring it if you undo selections. - 3
Choose orientation and scaling
In Page Layout, select Orientation (Portrait or Landscape) and Scale to Fit options. Scaling helps ensure your data fits on one or more pages. Adjust by Width, Height, or a custom scale percentage to keep readability intact.
Tip: Avoid extreme scaling; aim for legible fonts and consistent margins across pages. - 4
Repeat header rows on every page
To keep column headers visible on each page, set Rows to repeat at top via Page Setup > Sheet > Rows to repeat at top. This is crucial for multi-page prints of large tables.
Tip: Lock in the header range (e.g., $A$1:$D$1) so it stays consistent when you add rows. - 5
Insert and manage page breaks
Manual page breaks can control where one page ends and the next begins. Use Breaks > Insert Page Break (or drag blue lines in Page Break Preview) to tailor page length.
Tip: Prefer put breaks after logical groups (e.g., after a section) to preserve readability. - 6
Preview before printing
Use File > Print or Print Preview to inspect how your data will appear. Check margins, header visibility, and whether ranges spill onto unintended pages. Make final tweaks as needed.
Tip: Toggle the Settings to show gridlines or print area borders for better accuracy. - 7
Save your print setup as a template
If you print the same sheet regularly, save the settings within the workbook or define a named print area so you can quickly apply it later. This saves time and reduces errors in future prints.
Tip: Create a template workbook with standard print area and headers for repeated use. - 8
Print or export to PDF
When satisfied, print the document or export to PDF for sharing. PDFs preserve layout across devices and avoid font or printer differences.
Tip: If printing multiple sheets, decide whether to print the entire workbook or selected sheets with consistent print settings.
People Also Ask
What is the print area and why is it important?
The print area is the specific range of cells designated for printing. Defining it prevents Excel from sending unwanted cells to the printer and ensures your output is clean and focused on the data you need.
The print area is the exact range you want printed, so you don’t waste paper printing extra cells.
How do I repeat header rows on every printed page?
Use Rows to repeat at top in Page Setup to ensure column headers appear on every page. This keeps sheets readable when they span multiple pages.
Set the header rows to repeat so they show up on each page.
Can I print to PDF instead of a physical printer?
Yes. Use the Print dialog and choose 'Print to PDF' or select a PDF printer. This preserves layout for sharing.
Printing to PDF is a reliable way to share formatted data.
What should I do if only part of my data prints?
Check the print area, page breaks, and scaling. Resetting the print area or adjusting margins usually fixes it.
Reset the print area and confirm scaling so all your data fits properly.
How can I print multiple worksheets with the same layout?
Set the print options to print the selected sheets or the entire workbook, and ensure each sheet uses the same print area and headers.
Choose which sheets to print and keep consistent print settings across them.
Is it possible to save print settings for future use?
Yes. Save as a template or bookmark the print area so you can reuse the setup in future workbooks.
You can save your print settings for quick reuse in later workbooks.
Watch Video
The Essentials
- Define the exact print area to avoid wasted pages
- Repeat header rows on every page for clarity
- Use Print Preview to catch layout issues before printing
- Master page breaks to control how data flows across pages
- Export to PDF when sharing to preserve formatting